You Don’t Have to Know Everything. You Just Have to Know Where to Find It.
Albert Einstein
Building Components
Air Conditioning
About Air Conditioning
Three-quarters of all homes in the United States have air conditioners. Air conditioners use about 6% of all the electricity produced in the United States, at an annual cost of about $29 billion to homeowners. As a result, roughly 117 million metric tons of carbon dioxide are released into the air each year.
Air conditioners employ the same operating principles and basic components as your home refrigerator. Refrigerators use energy (usually electricity) to transfer heat from the cool interior of the refrigerator to the relatively warm surroundings of your home; likewise, an air conditioner uses energy to transfer heat from the interior of your home to the relatively warm outside environment.
An air conditioner cools your home with a cold indoor coil called the evaporator. The condenser, a hot outdoor coil, releases the collected heat outside. The evaporator and condenser coils are serpentine tubing surrounded by aluminum fins. This tubing is usually made of copper.
A pump, called the compressor, moves a heat transfer fluid (or refrigerant) between the evaporator and the condenser. The pump forces the refrigerant through the circuit of tubing and fins in the coils.
The liquid refrigerant evaporates in the indoor evaporator coil, pulling heat out of indoor air and cooling your home. The hot refrigerant gas is pumped outdoors into the condenser where it reverts back to a liquid, giving up its heat to the outside air flowing over the condenser’s metal tubing and fins.
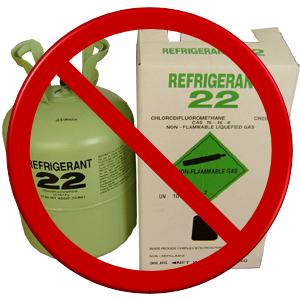
Throughout the second half of the 20th century, nearly all air conditioners used chlorofluorocarbons (CFCs) as their refrigerant, but because these chemicals are damaging to Earth’s ozone layer, CFC production stopped in the United States in 1995. Nearly all air conditioning systems now use halogenated chlorofluorocarbons (HCFCs) as a refrigerant. The latest HCFC, HCFC-22 (also called R-22), began to be phased out in 2010 and stopped entirely in 2020. However, HCFC-22 is expected to be available for many years as it is removed and reused from old systems that are taken out of service. As these refrigerants are phased out, ozone-safe hydrofluorocarbons (HFCs) are expected to dominate the market, as well as alternative refrigerants such as ammonia.
Heat pumps offer an energy-efficient alternative to furnaces and air conditioners for all climates. Like your refrigerator, heat pumps use electricity to transfer heat from a cool space to a warm space, making the cool space cooler and the warm space warmer. During the heating season, heat pumps move heat from the cool outdoors into your warm house. During the cooling season, heat pumps move heat from your house into the outdoors. Because they transfer heat rather than generate heat, heat pumps can efficiently provide comfortable temperatures for your home.
Central A/C
Ducted Air-Source Heat Pumps

There are three main types of heat pumps connected by ducts: air-to-air, water source, and geothermal. They collect heat from the air, water, or ground outside your home and concentrate it for use inside.
The most common type of heat pump is the air-source heat pump, which transfers heat between your house and the outside air. Today’s heat pump can reduce your electricity use for heating by approximately 50% compared to electric resistance heating such as furnaces and baseboard heaters. High-efficiency heat pumps also dehumidify better than standard central air conditioners, resulting in less energy usage and more cooling comfort in summer months. Air-source heat pumps have been used for many years in nearly all parts of the United States, but until recently they have not been used in areas that experienced extended periods of subfreezing temperatures. However, in recent years, air-source heat pump technology has advanced so that it now offers a legitimate space heating alternative in colder regions.
Split A/C
Ductless Air-Source Heat Pumps

For homes without ducts, air-source heat pumps are also available in a ductless version called a mini-split heat pump. In addition, a special type of air-source heat pump called a “reverse cycle chiller” generates hot and cold water rather than air, allowing it to be used with radiant floor heating systems in heating mode.
Other Types
Geothermal Heat Pumps

Geothermal (ground-source or water-source) heat pumps achieve higher efficiencies by transferring heat between your house and the ground or a nearby water source. Although they cost more to install, geothermal heat pumps have low operating costs because they take advantage of relatively constant ground or water temperatures. Geothermal (or ground source) heat pumps have some major advantages. They can reduce energy use by 30%-60%, control humidity, are sturdy and reliable, and fit in a wide variety of homes. Whether a geothermal heat pump is appropriate for you will depend on the size of your lot, the subsoil, and the landscape. Ground-source or water-source heat pumps can be used in more extreme climates than air-source heat pumps, and customer satisfaction with the systems is very high.
Absorption Heat Pumps
A relatively new type of heat pump for residential systems is the absorption heat pump, also called a gas-fired heat pump. Absorption heat pumps use heat as their energy source, and can be driven with a wide variety of heat sources.
Advanced Features to Look for in a Heat Pump
A number of innovations are improving the performance of heat pumps.
Unlike standard compressors that can only operate at full capacity, two-speed compressors allow heat pumps to operate close to the heating or cooling capacity needed at any particular outdoor temperature, saving energy by reducing on/off operation and compressor wear. Two-speed heat pumps also work well with zone control systems. Zone control systems, often found in larger homes, use automatic dampers to allow the heat pump to keep different rooms at different temperatures.
Some models of heat pumps are equipped with variable-speed or dual-speed motors on their indoor fans (blowers), outdoor fans, or both. The variable-speed controls for these fans attempt to keep the air moving at a comfortable velocity, minimizing cool drafts and maximizing electrical savings. It also minimizes the noise from the blower running at full speed.
Some high-efficiency heat pumps are equipped with a desuperheater, which recovers waste heat from the heat pump’s cooling mode and uses it to heat water. A desuperheater-equipped heat pump can heat water 2 to 3 times more efficiently than an ordinary electric water heater.
Another advance in heat pump technology is the scroll compressor, which consists of two spiral-shaped scrolls. One remains stationary, while the other orbits around it, compressing the refrigerant by forcing it into increasingly smaller areas. Compared to the typical piston compressors, scroll compressors have a longer operating life and are quieter. According to some reports, heat pumps with scroll compressors provide 10° to 15°F (5.6° to 8.3°C) warmer air when in the heating mode, compared to existing heat pumps with piston compressors.
Although most heat pumps use electric resistance heaters as a backup for cold weather, heat pumps can also be equipped in combination with a gas furnace, sometimes referred to as a dual-fuel or hybrid system, to supplement the heat pump. This helps solve the problem of the heat pump operating less efficiently at low temperatures and reduces its use of electricity. There are few heat pump manufacturers that incorporate both types of heat in one box, so these configurations are often two smaller, side-by-side, standard systems sharing the same ductwork.
In comparison with a combustion fuel-fired furnace or standard heat pump alone, this type of system can also be more economical. Actual energy savings depend on the relative costs of the combustion fuel relative to electricity.
Solar Powered Air Conditioners: A Comprehensive Guide
April 22, 2021 by Cielo in Blog
The Sun has been a source of energy in our cosmic system for billions of years. The history of humans using the Sun as an energy source is as old as mankind itself. It helps to grow food, for warmth, for fire, and for other uses across different continents. With the passage of time and advancement in technology though, we have been able to harness the immense potential of the sun in the form of photovoltaic cells and use it for much greater purposes.
The Sun’s rays can now be converted into electricity, and be used to power our homes and appliances at a fraction of the environmental impact as compared to conventional sources. In this era of sustainability, this serves as a major driver for the growth of solar power. What started as a niche application of this concept, has now turned into mass scale implementation of solar power.
One such application of this renewable energy source is in air conditioning, through solar air conditioners. These heating and cooling appliances can work by using the sun as an energy source. Reduced energy bills and minimal environmental impact are just some of the benefits which this energy source provides. Let’s read on and find out all there is to know about solar air conditioning.
Why We Need Solar Powered Air Conditioners?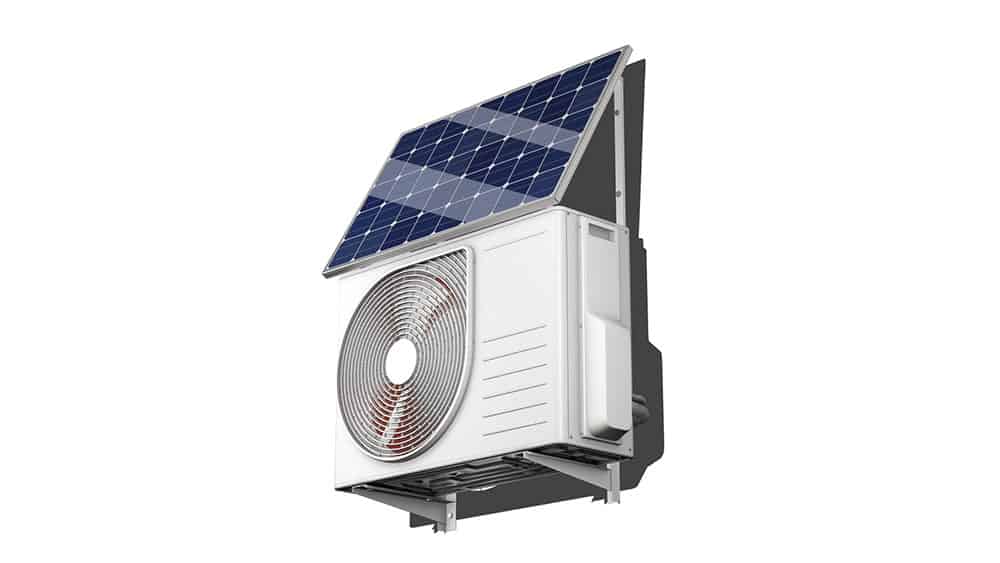
The need for solar-powered air conditioners is vital considering how according to energy.gov, three-quarters of homes in the US use air conditioning which consumes about 6% of total electricity usage costing $29 billion annually and releasing 117 million metric tons of CO2! Switching to solar powered energy-efficient air conditioning can help decrease the load from the environment and save considerable amounts of money.
Currently, as of 2020, solar energy only accounts for 2.4% of total electricity use.
Benefits of Solar Air Conditioning
Additionally, while solar powered air conditioners are quite an investment, they come with multiple advantages:
- Increases the value of your property
- Saves on bills to make up for the initial costs
- With peak load shifting it reduces the overall energy demand
- Reduced greenhouse gas emissions
Solar Powered Air Conditioning Options
Even with solar-powered air conditioners, there are a few different options available. These differ based on the mode of power that the air conditioner is getting. Let’s see them below.
- DC-Powered Solar Air Conditioners
- AC-Powered Solar Air Conditioners
- Hybrid Powered Solar Air Conditioners
1. DC Powered Solar Air Conditioners
Also known as conventional solar-powered air conditioners, DC solar air conditioners run on direct current (DC) electricity, meaning that the solar panels are directly wired to it. They can run through the batteries, which are charged through solar power; therefore can run entirely off-grid. They use solar panels, photovoltaic panels to collect sunlight and turn it into electric energy. This type of air conditioner provides a few major advantages, which are:
- As a solar panel produces DC electricity, running such an air conditioner directly off the solar panel will not be a problem.
- DC-powered solar air conditioners are the go-to option for complete off-the-grid living and you can run them with minimal extra equipment cost, as in AC-powered air conditioners.
- They are easy to install and maintain.
The disadvantage of such a system is that you would need a hefty battery bank to supply power for night time operation. The other option is to use a rectifier device to convert the AC electricity from the power mains to DC and then run the air conditioner. Still, it defeats the whole purpose of a solar-powered air conditioner!
2. AC Powered Solar Air Conditioners
Alternating Current is the more well-known solar air conditioner. For AC air conditioners to run with solar power, you need a device known as an inverter, converting the DC from the solar panels into AC.
The inverter is an integral part of such a setup. Moreover, the solar powered air conditioner then uses up the energy stored in a battery after passing through the inverter. Due to this reason, AC powered solar air conditioners provide the following advantages:
- These air conditioners can also be tied up to the grid power and run as a standard air conditioner. You don’t require an extra equipment since this air conditioner can run on AC power.
- The primary advantage of such a system is that you can run it with grid power and solar panels.
- If these ACs are tied to the grid, you can give excess electricity produced back to the grid and get credits for it by a process called net metering.
3. Hybrid Powered Solar Air Conditioners
Hybrid solar-powered air conditioners can run on both DC and AC at the same time, seamlessly. Such units can be connected to both the solar panels/batteries directly and to the grid at the same time. The unit can then use the appropriate power source according to the time of day and power load.
- There is no additional equipment, such as an inverter, which means the total costs are also less.
- They can switch between solar power and grid power smoothly.
- They are very flexible to operate during all times of the day and seasons.
The disadvantage of this system is that if your batteries are not charged and installed off-grid, it won’t work at night.
How Does a Solar AC Work?
A solar air conditioner combines solar electricity and air conditioning. In simple words, it takes energy from the Sun and uses it to power your AC to cool your space!
A solar panel is a device that captures the power of the Sun. It converts the Sun rays into electrical energy. This energy can then be used directly or stored in a battery. This is known as DC power. A solar-powered air conditioner then uses this DC power, either directly as DC or after conversion into AC (using an inverter), and heats or cools your home.
Furthermore, instead of using grid energy, a solar-powered air conditioner uses the energy of the Sun. It can use the grid energy, though, if needed.
Asbestos Ceilings
Spray-on textured ceiling was popular from the 1950s to the 1980s because it was an easy way for builders to hide imperfections.
Unfortunately, this was during a period when asbestos was a high-demand building material in the U.S.
Known as “popcorn ceiling,” “cottage-cheese ceiling” or “stucco ceiling,” it was typically 1 to 10 percent asbestos. To find out if your old popcorn ceiling contains asbestos, you can purchase a test kit or hire an asbestos abatement professional. If you buy a test kit, you will have to collect a sample of the ceiling and mail it to a lab. Hiring a professional to do it is safer but more expensive. Many inspectors recommend testing your ceiling for lead paint while you are at it.
So what do you do if you find out your popcorn ceiling contains asbestos?
Any percentage of asbestos makes the popcorn ceiling dangerous. Make sure nothing disturbs it, and decide whether you want to have it encapsulated or removed. Removing asbestos popcorn ceilings requires many precautions. It’s a job best left to qualified professionals.
Popcorn ceiling is a friable material — meaning it is very easy to damage. Friable asbestos materials release toxic dust at the slightest disturbance. Inhaling asbestos dust is what can lead to serious diseases such as asbestosis, lung cancer and mesothelioma.
It’s Not the Percentage — It’s the Crumbliness
Whether your popcorn ceiling is 1 percent asbestos or 10 percent asbestos, the advice is the same.
The ceiling will not endanger your health as long as it remains completely undisturbed or properly encapsulated. In the long run, having it professionally removed is the safest choice.
A higher percentage of asbestos is worse, but popcorn ceilings are dangerous even if it is just a few percent asbestos.
The Clean Air Act of 1978 banned spray-on asbestos products, which were a major health risk for the workers who applied them. However, the law allowed businesses to use up their existing inventory of products, so the asbestos popcorn ceiling was applied well into the 1980s. The crumbliness of the popcorn ceiling puts it in a different class than other common asbestos materials leftover in old homes. For example, you can walk on vinyl asbestos floor tiles without much risk. Just don’t smash, scrape or sand them. But merely brushing the asbestos popcorn ceiling with your hand releases toxic dust. This makes it as dangerous as old asbestos pipe insulation.
Tips for Living with Asbestos Popcorn Ceiling
- Do not disturb the ceiling with nails, screws or tape.
- Don’t put shelves so high that items might scrape the ceiling by accident.
- Be careful not to scrape the ceiling when moving furniture or long objects.
- Make sure children do not throw toys or pillows at the ceiling.
- If a child’s bunk bed allows them to touch the ceiling, don’t put the bunk bed in a room with asbestos popcorn ceiling.
- If the ceiling starts to peel down because of dampness or age, it must be encapsulated or removed.
How to Encapsulate Asbestos Popcorn Ceiling
Encapsulation means covering an asbestos material so it cannot release asbestos dust. Asbestos popcorn ceilings can be covered with new ceiling panels or vinyl paint. One way to cover the popcorn ceiling is with gypsum board ceiling panels. This material is like drywall but lighter. You screw it into the framing of the ceiling. It’s best to hire a professional to cover the asbestos popcorn ceiling. They will know how to mud and tape the new ceiling seamlessly.
Another method is to spray the ceiling with a special vinyl paint. Ordinary house paint will not work. In fact, putting normal paint on the ceiling will actually cause the exposure you are trying to prevent. Spray-on vinyl paint can work, but keep in mind the old popcorn ceiling texture will still be visible.
Encapsulating asbestos is a safe solution, but if you do renovation or demolition work in the future, the asbestos will become a danger again. If you decide to sell your home, you will have to inform potential buyers of the asbestos you found.
How to Remove Asbestos Popcorn Ceiling
It is always better to have asbestos abatement done properly from the beginning. Cleaning up contamination after the fact becomes much more expensive. For many homeowners, hiring a professional is mandatory. For others, it is highly recommended. In most places, the law requires qualified asbestos abatement professionals to perform asbestos removal in commercial buildings and multi family homes. Owners of single-family homes are usually allowed to perform their own asbestos removal. Every state and city has its own regulations, though, and it is still safest to leave it to professionals.
Precautions for Safely Removing Asbestos Popcorn Ceiling
- Remove furniture from the room, and cover whatever is left in the room with plastic.
- Turn off the home’s heating, ventilation and air conditioning unit to avoid spreading contamination beyond the room.
- Seal the doors and windows with plastic flaps.
- Keep pets and all people without protective gear away from the area.
- Wear a respirator with a high efficiency particulate air filter. Set up an air purifier as well.
- Wear disposable coveralls. Cover your skin and hair to keep ceiling debris off you.
- Keep the popcorn ceiling material wet. This helps prevent dust from getting into the air.
- Place asbestos-containing waste in sealed and labeled plastic bags.
- Find a landfill or trash-pickup service that can accept asbestos, and call them in advance.
Ignoring these guidelines can be costly. Insurance policies often do not cover asbestos contamination caused by careless renovations. This could leave homeowners with a huge bill for asbestos abatement, on top of the health risks.
Asbestos Flooring
Asbestos Floor Tiles: Is It Safe to Remove on Your Own?
Written By:
Daniel King
Unlike many asbestos-containing materials, vinyl asbestos flooring is generally safe to be around. But that changes as soon as you decide to remove it.
Vinyl is a type of plastic that has long been a popular material for floor tiles and sheets. Old vinyl products that contain asbestos remain in many buildings across the U.S., creating a hazard for contractors and do-it-yourself renovators.
Working with asbestos flooring can release toxic dust. Lack of awareness in the past has led to many workers suffering from terrible diseases today such as mesothelioma and asbestosis.
Workers must take many precautions to remove asbestos floor tiles safely, and it is always safest to leave asbestos removal to qualified professionals.
What Makes Asbestos Floor Tiles Dangerous?
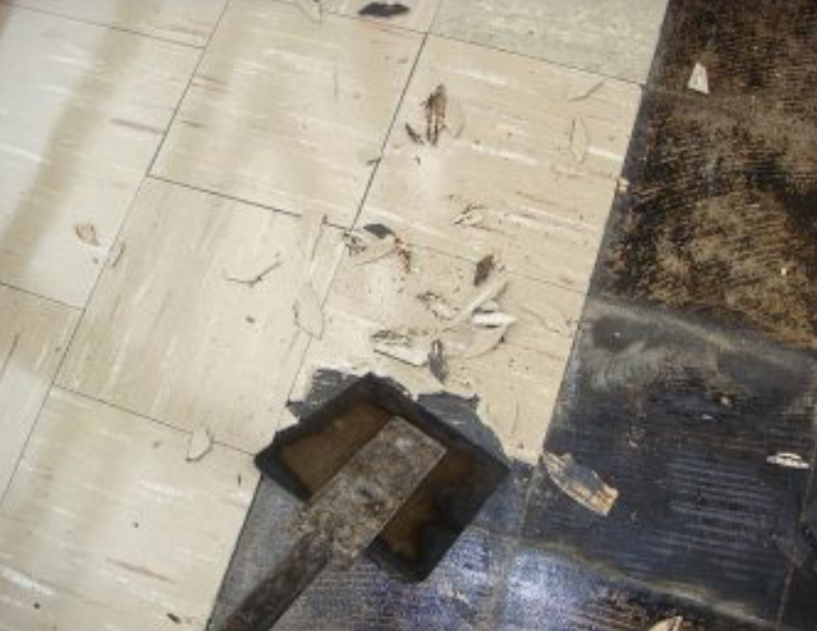
Asbestos is a toxic mineral American manufacturers once mixed into many building materials. When these old materials are disturbed, they release dust that can make people sick later in life.
Asbestos is fibrous, meaning it can be pulled apart into a soft, wooly consistency. Mixing asbestos fibers into building materials makes them stronger and more heat resistant.
This is why asbestos was a popular additive in vinyl flooring products for much of the 20th century. Unfortunately, inhaling asbestos dust can lead to several serious diseases.
When you breathe in microscopic asbestos fibers, they can get stuck in your body forever. The human body cannot dissolve asbestos. Instead, the asbestos fibers may eventually cause the buildup of scar tissue or genetic changes that lead to cancer.
The asbestos industry covered up the dangers of asbestos for decades. By the 1970s, however, the medical evidence had piled up.
Thousands of tradesmen who spent their careers working with asbestos materials have died of related diseases. Even though the use of asbestos is now limited in the U.S., thousands still die every year because of past uses of this toxic mineral.
It is safest to assume that any flooring material put down before 1980 contains asbestos. Without a manufacturer’s label, you can’t tell whether a product has asbestos in it just by looking at it.
You can find out for sure by having an asbestos-abatement professional inspect the material. You can also mail a sample of the flooring to a lab for testing.
Friable Versus Non friable Asbestos Materials
Asbestos materials are sorted into two categories depending on how dangerous they are.
- Friable materials are easy to break or crumble by hand. Friable asbestos materials are very dangerous because they can easily release toxic dust into the air. An example would be old asbestos pipe insulation.
- Non Friable materials are durable. These products keep asbestos fibers safely contained as long as the materials are not damaged. An example would be a floor slab made from asbestos cement.
When vinyl asbestos flooring is crumbling or damaged, it is considered friable. In this case, it needs to be removed very carefully to avoid asbestos exposure.
But when vinyl asbestos flooring is in good condition, it is considered non friable. That means it is safe to walk on but not safe to scrape, sand or use power tools on.
In many cases, the best thing to do about vinyl asbestos flooring is put a new layer of flooring on top of it. You could also seal it with a coat of epoxy floor paint.
Both these options will keep the asbestos trapped in the floor. Just keep in mind the asbestos will still be there if someone does demolition or renovation work in the future.
If you decide to remove nonfriable vinyl asbestos flooring, you have to be cautious for two reasons:
- If you break the flooring into pieces while removing it, you have effectively turned it into a friable material.
- Even if the vinyl flooring is pulled up intact, the old adhesive underneath may also contain asbestos.
How to Remove Asbestos Floor Tiles Safely
It is always safest to leave asbestos flooring removal to asbestos-abatement professionals.
Workers need protective gear to prevent asbestos exposure, and they must follow special procedures to avoid contaminating the whole building.
Generally, the law requires licensed professionals to perform asbestos removal in commercial buildings.
Some jurisdictions allow private homeowners to remove asbestos materials on their own, but DIY asbestos abatement is never recommended.
Before you remove asbestos flooring yourself, you must check the state and city regulations for asbestos removal and disposal.
To do the job without putting yourself or your household at risk, you need to take the same precautions as the professionals.
Equipment for safe asbestos flooring removal includes:
- Plastic sheets to seal off the work area. To keep asbestos contamination from spreading, workers must cover air vents, doors and windows with plastic flaps and turn off the heating, ventilation and air conditioning unit. Any items that cannot be removed from the work area should be covered in plastic as well.
- Respirator with a high efficiency particulate air (HEPA) filter. Ordinary dust masks do not protect from microscopic asbestos fibers. Each worker needs a half- or full-face mask with a HEPA filter.
- Air purifier with a HEPA filter. Setting up an air purifier in the work area reduces the risk of contamination.
- Disposable coveralls and gloves. Asbestos is hard to wash out of clothes. Workers should wear disposable coveralls or clothing that they plan to throw away when the work is finished.
- Pump sprayer filled with water. Keeping asbestos materials wet helps prevent dust from getting into the air. Workers should spray the flooring and any old adhesive underneath to keep it damp at all times. A solvent may be useful for dissolving old adhesive.
- Wet wipes or a HEPA vacuum. Workers should clean the work area and all tools with disposable wet wipes to avoid stirring up asbestos dust. Another option is to use a vacuum cleaner with a HEPA filter to trap dry dust.
- Sealable plastic bags for disposal. Many jurisdictions require asbestos materials to be collected and disposed of in specially designed and labeled bags.
It is illegal to dump asbestos materials with regular trash.
Qualified abatement professionals know how to dispose of asbestos properly. If you need to dispose of asbestos materials yourself, you must find a landfill or trash-pickup service that can accept asbestos. You may have to call to make an appointment in advance.
Attic Ventilation
Ventilation is a system of exhaust and intake mechanisms that create a steady flow of air around a property. In hot climates, ventilation expels hot air from the attic space – meaning it takes less work to keep the area cool. Proper attic ventilation is the solution for year-round benefits in all kinds of roofing systems – cooling attics in hotter weather, protecting against damage to structures and materials, and aiding in the reduction of energy consumption.
Many climate experts and handymen recommend that homeowners seek out proper ventilation to combat high levels of humidity and extreme heat. Without good ventilation, hot and humid climates can lead to a massive buildup of moisture and heat in the attic space, leading to various problems – including damage to roofing shingles and roof decking. Too much heat over time can actually warm or deteriorate the roofing materials prematurely, damaging your home.
The Benefits of Ventilation
The importance of proper attic ventilation can be summed up in two simple words: heat rises. If you live in a warm climate and go into your attic on even a mild day, you’ll likely find that it’s incredibly hot inside – more like a sauna than a room. That’s why roofing industry experts agree that maintaining a consistently cool temperature in your attic not only saves on energy costs, but can also extend the life of major components in your home.
A well-ventilated attic:
Reduces your energy costs – Air circulation removes hot air, preventing it from seeping into other rooms, and saving your AC units, refrigerators and other appliances from having to work harder. The reduced temperature in the attic will also assist the air conditioner by keeping internal air and ductwork cooler.
Extends the life of your roof and other components –

When your attic heats up, the underlayment beneath the roof shingles warm up as well, and over time this will cause them to become brittle and ineffective. Lowering attic temperatures can save on the expense of premature replacement and repairs.
Removes harmful moisture –
A hot climate with any level of humidity can result in a buildup of moisture within your attic space; and if the temperature begins to drop, that moisture will condense, which can cause a number of issues. Ventilation removes moisture, preventing dangerous mold and mildew in your home.
Proper attic ventilation facilitates the continual flow of air at a manageable temperature within a home, making a huge difference to the comfort level of the property and the people who live there.
Clothes Dryer Lint In Crawlspace or Attic
A clothes dryer works by forcing hot air through a turning drum. Wet clothes placed in the drum are then dried by moving hot air. It is possible for a full load of wet clothes to contain as much as one and a half gallons of water. Lint, consisting mostly of small fibers from the clothes and debris in or on the clothes, is created from the clothes as the clothes tumble in the drum. While much of the lint is trapped by the dryer’s filter, lint is also carried through the vent system along with moist air. Lint is a highly combustible material that can accumulate both in the dryer and in the dryer vent. Accumulated lint leads to reduced airflow and can pose a potential fire hazard.
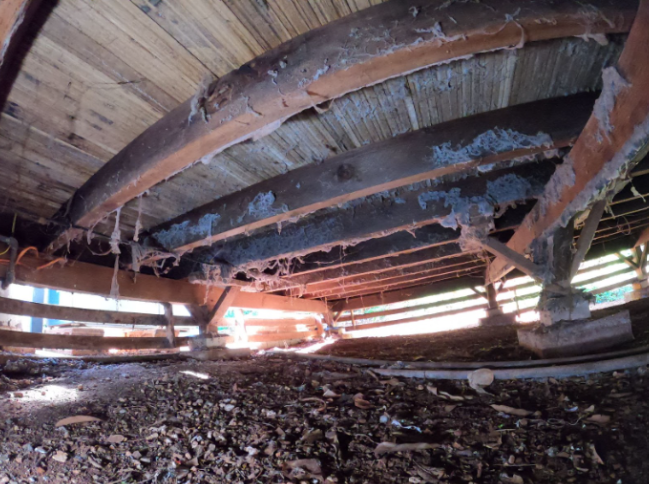
According to FEMA 77.1% of all fires occurring in residential one or two family dwellings can be attributed to clothes dryers and the lint they produce.* The dust, fiber and lint produced by most dyers is highly combustible and is usually the first thing to ignite in a fire situation. Because of this extreme hazard, building codes specify that all clothes dryers be exhausted directly outdoors. Venting a dryer into attics, soffits, ridge vents or crawl spaces is expressly prohibited. Serious hazards can occur when dryer vents do not exhaust directly to the outside.
EIFS – What is an EIFS system?
This is an article from Copyright 2023 Allana Buick & Bers, Inc. | Powered by ABB Marketing
What is an EIFS system? Are there geographic limitations to its use?

Exterior Insulation and Finish Systems (EIFS) are a type of building cladding commonly used on both commercial and residential structures. Originally developed in Europe after World War II as a means of repairing bomb damaged masonry buildings, today’s EIFS is substantially different. It is recognized more as a North American development, where it was first applied to framed and sheathed walls, instead of masonry or concrete.
EIFS provides both weather resistance and architectural appeal. Basic EIFS is a thin “lamina” of cementitious material applied directly over a fiberglass “screed”. This is applied over rigid foam insulation which is attached to sheathing such as exterior rated gypsum board. Preferably, a waterproofing barrier is applied to the exterior sheathing prior to application of the EIFS. Occasionally you will hear EIFS referred to as synthetic stucco; however, EIFS and traditional stucco are very different so it is important the two are not confused.
There are no significant limitations to where EIFS can be used. It works in most climate types and conditions, provided the appropriate type is selected and is properly installed.
What is the advantage of using an EIFS system?

Economics play a major role in selecting an EIFS system over another type of exterior cladding. In addition to being typically less expensive, it is also readily available. The cementitious lamina is mixed on site and field applied, so there are less transportation costs involved. In comparison, other types of cladding systems need to be ordered with a significant amount of advance notice and cannot be built on-site. Most of the foam insulation used in EIFS assembly can be locally sourced, again providing economic benefit. EIFS also gives designers and installers increased flexibility and creativity without breaking the bank; it is architecturally easy to work with. Lastly, EIFS improves energy efficiency as compared to some other systems. The increase in energy efficiency continues to be one of the driving forces behind EIFS popularity.
How do you determine which type of EIFS system will work best for a particular project?
The answer here truly is “it depends”. Decision-making factors are the owner’s goals and budget, there is no single solution for all situations. Specific systems vary from manufacturer to manufacturer but EIFS can generally be condensed into four basic categories:
- Direct Applied EIFS (DEFS) – Direct applied EIFS systems are not really EIFS at all using the North American stan-dard. The foam insulation is removed from the assembly and the 1/8” cementitious lamina is applied directly to the sheathing. In a sense, this is exactly how EIFS was envisioned to be used in Europe after World War II; however, it was never applied over framed walls like we use it today in the U.S. This is a very fragile and simplistic system. Today, DEFS is used only in regions with small thermal swings like Hawaii – it is almost never used on the U.S. mainland. Although owners like it because it is the least expensive of all EIFS assemblies, we would not recom-mend it as a primary cladding system.
- Barrier EIFS (‘Classic’ EIFS) – Barrier EIFS systems are the most basic of EIFS assemblies and do not incorporate any back-up systems or redundancy. Essentially, the 1/8” of cementitious lamina is the only means of keeping water out of the building; it is a barrier without a back-up. This system has evolved and improved over the years, but it is still essentially the same system that has been used in the U.S. since the 1970’s and 1980’s.
- Water-Managed EIFS (‘Drainable’ EIFS) – Water managed EIFS systems combine a barrier EIFS assembly with a back-up waterproofing system and are far superior to barrier EIFS. The design of these systems concedes that no building is perfect, and that eventually, a crack or a leak will almost always develop. Therefore, a weather resistive barrier (WRB) is incorporated into the assembly as a back-up, which directs any water which does make it past the primary barrier, out of the assembly instead of into the walls. In a sense, this is the closest EIFS gets to emulating traditional stucco.
- Rainscreen EIFS (EIFS with Cavity Wall) – Rainscreen EIFS or “cavity wall” systems are rarely installed due to their high installation cost, but they are unquestionably the most robust EIFS assemblies. This system incorporates a water managed EIFS assembly with an open cavity wall behind it. An entire secondary waterproofing system is then applied to the cavity wall. It is almost like having two exterior walls. Very effective, but very expensive.
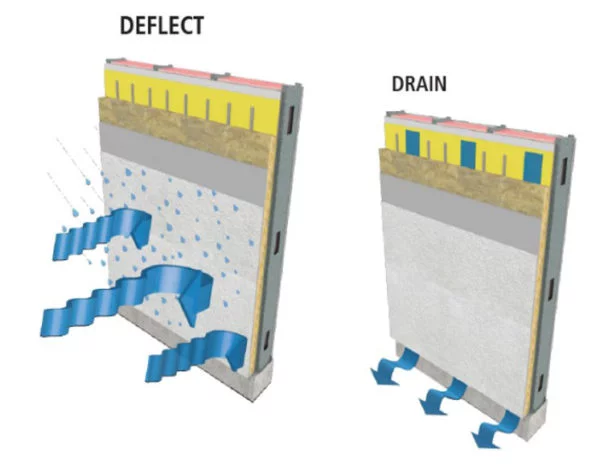
What are the cons or caveats to using an EIFS system? What types of projects are best suited for EIFS? Under what circumstances would an EIFS system not necessarily be the most effective choice for a building?
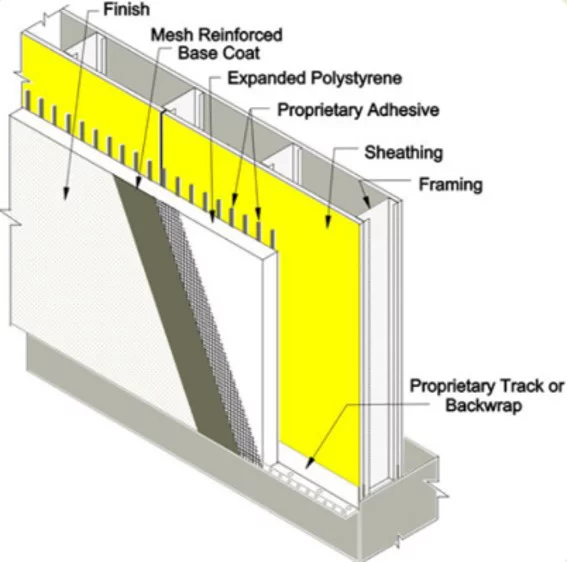
EIFS can be a very effective system for almost any low or mid rise building and is cost effective. However, anytime you rely on 1/8” of cement over foam to keep water out of a building things can go wrong. Barrier EIFS and DEFS systems have no backup, so if there are any problems, water is going directly into the wall cavity. This causes corrosion, premature failure of components, and worse yet, mold.
EIFS systems are theoretically trying to emulate traditional stucco at less expense. But if you think about it, stucco systems always have a weather resistive barrier as a back-up.
In fact, it is a building code requirement for stucco systems. With this in mind, our firm never recommends using DEFS or a standard barrier EIFS because they have no WRB backup. Instead, we always recommend owners use a water-managed EIFS assembly thereby making it an effective choice to protect their investme
Many reports describe problems with moisture buildup in an EIFS system. What causes these problems in an EIFS system and how can they be prevented?
To be fair, water intrusion into buildings is a problem with many types of cladding systems, not just EIFS. Moisture buildup in wall systems is especially prevalent in regions with hot and humid climates regardless of the type of cladding. Moisture problems can be associated with material defects and design errors; however, the overwhelming majority of these problems are caused by construction defects and poor craftsmanship.
This is particularly true of DEFS and classic EIFS since there is no WRB as a back-up. Even the smallest of construction errors can allow water directly into the wall cavity. The good news is prevention can easily be obtained. If expired material arrives at the job site, reject it. Consult with knowledgeable designers and building envelope specialists. Insist on quality and be sure to include a quality assurance program in your project.
From a contractor’s standpoint, what must be done to ensure that an EIFS system performs successfully?
Construction is a tough business and translating design intent from “mouse clicks” to “bricks” is often a dilemma for contractors. It is not an enviable position and we respect the challenges they face. Nonetheless, installing EIFS (or anything else) correctly and in compliance with the construction documents is ultimately the contractor’s responsibility. If we could offer one piece of advice to contractors, it would be to invest in better training for your crews, and then as a follow up, hold your craftsmen accountable to installing a quality product. It has been our observation over the years that this is single-handedly the biggest thing contractors could do to improve the performance and reduce risk.
Any reassuring words for owners/developers who are considering an EIFS system?
First, don’t be afraid of EIFS. It is a perfectly acceptable cladding system. That said, do your homework. As you can see from our comments above it is more complicated than it may appear. Always use a water-managed EIFS system that incorporates a weather resistive barrier as a back-up. Second, get your designer or a third party to provide observations in the field to verify the installation is in compliance with the construction documents and manufacturer requirements.
Since most construction defect litigation is attributable to poor craftsmanship, this is the single best thing owners can do to protect their investments.
Last, plan for and resolve your warranty and insurance concerns at the front end of the project. Comprehensive labor and material warranties are available from the EIFS manufacturers, but you have to ask for them in advance!
Estimated Life Expectancy of Home Components
Estimated Life Expectancy Chart for Hawai‘i Homes
The following chart details the predicted life expectancy of appliances, products, materials, systems and components for homes in the state of Hawai‘i. (It may also be applicable to states in the nearby coastal region with similar climate and weather conditions on a typical basis.)
While many components and systems in homes located in Hawai‘i and the surrounding area have service life expectancies that are comparable to those anywhere else in the U.S., those items that are regularly exposed to saltwater, wind, sun and heat are particularly vulnerable to premature failure compared to items installed in homes located elsewhere. These guidelines attempt to address those differences. Consumers, inspectors, and professionals advising their clients should note that these life expectancies have been determined through research and testing based on regular recommended maintenance and conditions of normal wear and tear, and not extreme weather (or other) conditions, neglect, over-use or abuse. Therefore, they should be used as guidelines only, and not relied upon as guarantees or warranties
Table of Contents
Paints, Caulks, Adhesives and or Sealants
Surface preparation and paint quality are the most important determinants of a paint’s life expectancy. Ultraviolet (UV) rays can shorten life expectancy, especially in coastal regions that experience a lot of sunshine and heat, as well as wind-driven rain. Additionally, conditions of high humidity indoors or outdoors can affect the lifespan of these components, which is why they should be maintained seasonally.
| ADHESIVES, CAULK & PAINTS | YEARS |
| Caulking (interior) | 5 to 8 |
| Caulking (exterior) | 1 to 3 |
| Construction Glue | 10+ |
| Paint (exterior) | 5 |
| Paint (interior) | 8 to 12 |
| Roofing Adhesives/Cements | 8+ |
| Sealants | 5 |
| Stains | 2 to 6 |
Appliances
Appliance life expectancy depends to a great extent on the use it receives. Furthermore, consumers often replace appliances long before they become worn out due to changes in styling, technology and consumer preferences.
| APPLIANCES | YEARS |
| Air Conditioner (portable/window) | 5 to 7 |
| Compactors (trash) | 6 |
| Dehumidifier | 8 |
| Dishwasher | 9 |
| Disposal (food waste) | 12 |
| Dryer Vent (plastic) | 5 |
| Dryer Vent (steel) | 20 |
| Dryer (clothes) | 13 |
| Exhaust Fans | 10 |
| Freezer | 10 to 20 |
| Gas Oven | 10 to 18 |
| Hand Dryer | 10 to 12 |
| Microwave Oven | 9 |
| Range/Oven Hood | 14 |
| Electric Range | 13 to 15 |
| Gas Range | 15 to 17 |
| Refrigerator | 9 to 13 |
| Swamp Cooler | 5 to 15 |
| Washing Machine | 5 to 15 |
| Whole-House Vacuum System | 20 |
Kitchen Components
Modern kitchens are larger and more elaborate, and together with the family room, modern kitchens now form the “great room.”
| CABINETRY & STORAGE | YEARS |
| Bathroom Cabinets | 50+ |
| Closet Shelves | 100+ |
| Entertainment Center/Home Office | 10 |
| Garage/Laundry Cabinets | 70+ |
| Kitchen Cabinets | 50 |
| Medicine Cabinet | 25+ |
| Modular (stock manufacturing-type) | 50 |
Interior Walls & Ceilings
Walls and ceilings typically last the full lifespan of the home.
| CEILINGS & WALLS | YEARS |
| Acoustical Tile Ceiling | 40+ (older than 25 years may contain asbestos) |
| Ceramic Tile | 70+ |
| Concrete | 75+ |
| Gypsum | 75 |
| Wood Paneling | 20 to 50 |
| Suspended Ceiling | 25+ |
Counter Tops
Natural stone countertops, which are less expensive than they were just a few years ago, are becoming more popular, and one can expect them to last a lifetime. Cultured marble countertops have a shorter life expectancy, however.
| COUNTERTOPS | YEARS |
| Concrete | 50 |
| Cultured Marble | 20 |
| Natural Stone | 100+ |
| Laminate | 20 to 30 |
| Resin | 10+ |
| Tile | 100+ |
| Wood | 100+ |
Decks
Decks are exposed to a wide range of conditions in different climates, from wind and hail in some areas, to relatively consistent, dry weather in others. See FASTENERS & STEEL section for fasteners.
| DECKS | YEARS |
| Deck Planks | 10 |
| Composite | 8 to 15 |
| Structural Wood | 5 to 20 |
Exterior Doors
Exterior fiberglass, steel and wood doors will last as long as the house, while vinyl and screen doors have a shorter life expectancy. The gaskets/weatherstripping of exterior doors may have to be replaced every five to eight years.
| DOORS | YEARS |
| Closet (interior) | 100+ |
| Fiberglass (exterior) | 100+ |
| Fire-Rated Steel (exterior) | 100+ |
| French (interior) | 30 to 50 |
| Screen (exterior) | 10 |
| Sliding Glass/Patio (exterior) | 10 (for roller wheel/track repair/replacement) |
| Vinyl (exterior) | 10 |
| Wood (exterior) | 30+ |
| Wood (hollow-core interior) | 20 to 30 |
| Wood (solid-core interior) | 30 to 100+ |
Electrical Wiring & Components
Copper-plated wiring, copper-clad aluminum, and bare copper wiring are expected to last a lifetime, whereas electrical accessories and lighting controls, such as dimmer switches, may need to be replaced after 10 years. GFCIs could last 30 years, but much less if tripped regularly. Remember that faulty, damaged or overloaded electrical circuits or equipment are the leading cause of house fires, so they should be inspected regularly and repaired or updated as needed.
| ELECTRICAL | YEARS |
| Accessories | 10+ |
| Arc-Fault Circuit Interrupters (AFCIs) | 30 |
| Bare Copper | 100+ |
| Bulbs (compact fluorescent) | 8,000 to 10,000+ hours |
| Bulbs (halogen) | 4,000 to 8,000+ hours |
| Bulbs (incandescent) | 1,000 to 2,000+ hours |
| Bulbs (LED) | 30,000 to 50,000+ hours |
| Copper-Clad Aluminum | 100+ |
| Copper-Plated | 100+ |
| Fixtures | 40 |
| Ground-Fault Circuit Interrupters (GFCIs) | up to 30 |
| Lighting Controls | 30+ |
| Residential Propane Backup Generator | 12 |
| Service Panel | 60 |
| Solar Panels | 20 to 30 |
| Solar System Batteries | 3 to 12 |
| Wind Turbine Generator | 20 |
Beams, Framing & Floors
Floor and roof trusses and laminated strand lumber are durable household components, and engineered trim may last 30 years.
| ENGINEERED LUMBER | YEARS |
| Engineered Joists | 80+ |
| Laminated Strand Lumber | 100+ |
| Laminated Veneer Lumber | 80+ |
| Trusses | 100+ |
Fasteners, Connectors & Steel
Fastener manufacturers do not give lifespans for their products because they vary too much based on where the fasteners are installed in a home, the materials in which they’re installed, and the local climate and environment. However, inspectors can use the guidelines below for humid and coastal environments to make educated judgments about the materials they inspect.
| FASTENERS, CONNECTORS & STEEL | YEARS |
| Adjustable Steel Columns | 50+ |
| Fasteners (bright) | 25 to 40 |
| Fasteners (copper) | 50 to 65 |
| Fasteners (electro-galvanized) | 10 to 30 |
| Fasteners (hot-dipped galvanized) | 15 to 60 |
| Fasteners (stainless) | 100 |
| Steel Beams | 50 to 100+ |
| Steel Columns | 100+ |
| Steel Plates | 35 to 75 |
Flooring & Floor Surfacing
Flooring life is dependent on maintenance and the amount of foot traffic the floor endures.
| FLOORING | YEARS |
| All Wood Floors | 100+ |
| Bamboo | 100+ |
| Brick Pavers | 100+ |
| Carpet | 8 to 10 |
| Concrete | 50+ |
| Engineered Wood | 50+ |
| Exotic Wood | 100+ |
| Granite | 100+ |
| Laminate | 15 to 25 |
| Linoleum | 25 |
| Marble | 100+ |
| Other Domestic Wood | 100+ |
| Slate | 100 |
| Terrazzo | 75+ |
| Tile | 75 to 100 |
| Vinyl | 25 |
Foundations; Concrete & Block
Concrete and poured-block footings and foundations will last a lifetime, assuming they were properly built. Waterproofing with bituminous coating lasts 10 years, but if it cracks, it is immediately damaged.
| FOUNDATIONS | YEARS |
| Baseboard Waterproofing System | 30 |
| Bituminous-Coating Waterproofing | 6 |
| Concrete Block | 75+ |
| Insulated Concrete Forms (ICFs) | 80 |
| Post and Pier | 15 to 45 |
| Post and Tensioned Slab on Grade | 80+ |
| Poured-Concrete Footings and Foundation | 80+ |
| Slab on Grade (concrete) | 75 |
| Wood Foundation | 5 to 20 |
| Permanent Wood Foundation (PWF; treated) | 50 to 75 |
Structural; Framing & Poured Concrete Systems
Framing and structural systems have extended longevity; poured-concrete systems, timber-frame houses, and structural insulated panels will all last a lifetime.
| FRAMING | YEARS |
| Log | 75+ |
| Poured-Concrete Systems | 80+ |
| Steel | 75+ |
| Structural Insulated Panels (SIPs) | 75+ |
| Timber Frame | 80+ |
Garage Doors
The quality and frequency of use will affect the longevity of garage doors and openers.
| GARAGES | YEARS |
| Garage Doors | 10 to 30 |
| Garage Door Openers | 10 to 15 |
Home Technology Systems
Home technology systems have diverse life expectancies and may have to be upgraded due to evolution in technology.
| HOME TECHNOLOGY | YEARS |
| Built-In Audio | 20 |
| Carbon Monoxide Detectors* | 5 |
| Doorbells | 35 |
| Home Automation System | 5 to 50 |
| Intercoms | 20 |
| Security System | 5 to 20 |
| Smoke/Heat Detectors* | less than 10 |
| Wireless Home Network | 5 to ? |
HVAC; Air Conditioning & Heating Systems
Thermostats may last 35 years but they are usually replaced before they fail due to technological improvements.
| HVAC | YEARS |
| Air Conditioner (central) | 5 to 12 |
| Air Exchanger | 15 |
| Attic Fan | 15 to 25 |
| Boiler | 40 (if installed) |
| Burner | 10+ |
| Ceiling Fan | 5 to 10 |
| Condenser | 5 to 7 (for coastal areas, or 15 to 20 inland) |
| Dampers | 20+ |
| Dehumidifier | 8 |
| Diffusers, Grilles and Registers | 25 |
| Ducting | 60 to 100 |
| Electric Radiant Heating | 40 |
| Evaporative Cooler | 15 to 25 (if installed) |
| Furnace | 15 to 25 (if installed) |
| Gas Fireplace | 15 to 25 |
| Handler Coil | 1 to 3 |
| Heat Exchanger | 10 to 15 |
| Heat Pump | 10 to 15 |
| Heat-Recovery Ventilator | 20 |
| Hot-Water and Steam-Radiant Boilers | 40 |
| Humidifiers | 12 (if installed) |
| Induction and Fan-Coil Units | 10 to 15 |
| Chimney Cap (concrete) | 50+ |
| Chimney Cap (metal) | 8 to 10 |
| Chimney Cap (mortar) | 10+ |
| Chimney Flue Tile | 20+ |
| Thermostats | 35 |
| Ventilator | 7 |
Insulation Systems
As long as they are not punctured, cut or burned, and are kept dry and away from UV rays, cellulose, fiberglass and foam insulation materials will last a lifetime. This is true regardless of whether they were installed as loose-fill, housewrap, or batts/rolls.
| INSULATION & INFILTRATION BARRIERS | YEARS |
| Batts/Rolls | 100+ |
| Black Paper (felt paper) | 15 to 30 |
| Cellulose | 100+ |
| Fiberglass | 100+ |
| Foamboard | 100+ |
| Housewrap | 80+ |
| Liquid-Applied Membrane | 50 |
| Loose-Fill | 100+ |
| Rockwool | 100+ |
| Wrap Tape | 80+ |
Exterior Masonry Systems
Masonry is one of the most enduring household components. Fireplaces, chimneys and brick veneers can last the lifetime of the home.
| MASONRY & CONCRETE | YEARS |
| Brick | 75+ |
| Insulated Concrete Forms (hybrid block) | 75+ |
| Concrete Masonry Units (CMUs) | 75+ |
| Man-Made Stone | 15 |
| Masonry Sealant | 2 to 10 |
| Stone | 75+ |
| Stucco/EIFS | 25+ |
| Veneer | 75+ |
Trim; Molding & Millwork
Custom millwork and stair parts will last a lifetime and are typically only upgraded for aesthetic reasons.
| MOLDING, MILLWORK & TRIM | YEARS |
| Attic Stairs (pull-down) | 50 |
| Custom Millwork | 100+ |
| Pre-Built Stairs (interior) | 100+ |
| Stair Parts (interior) | 100+ |
| Stairs (interior) | 100+ |
Interior Wood Components
The lifetime of any interior wood product depends heavily on moisture intrusion.
| PANELS | YEARS |
| Flooring Underlayment | 25 |
| Hardboard | 40 |
| Particleboard | 60 |
| Plywood | 100 |
| Softwood | 30 |
| Oriented Strand Board (OSB) | 60 |
| Wall Panels | 100+ |
Plumbing; Pipes, Fixtures & Faucets
The quality of plumbing fixtures varies dramatically. The mineral content of water can shorten the life expectancy of water heaters and clog showerheads. Also, some finishes may require special maintenance with approved cleaning agents per the manufacturers in order to last their expected service life.
| PLUMBING, FIXTURES & FAUCETS | YEARS |
| ABS and PVC Waste Pipe | 50 to 80 |
| Accessible/ADA Handles | 100+ |
| Acrylic Kitchen Sink | 50 |
| Cast-Iron Bathtub | 100 |
| Cast-Iron Waste Pipe (above ground) | 40 |
| Cast-Iron Waste Pipe (below ground) | 50 to 60 |
| Concrete Waste Pipe | 100+ |
| Copper Water Lines | 70 |
| Enameled Steel Kitchen Sink | 5 to 10 |
| Faucets and Spray Hose | 15 to 20 |
| Fiberglass Bathtub and Shower | 20 |
| Galvanized Pipe | 50 |
| Gas Lines (black steel) | 75 |
| Gas Lines (flex) | 30 |
| Hose Bib | 20 to 30 |
| Instant (on-demand) Water Heater | 10 |
| PEX | 40 |
| Plastic Water Lines | 75 |
| Saunas/Steam Room | 15 to 20 |
| Sewer Grinder Pump | 10 |
| Shower Enclosure/Module | 50 |
| Shower Doors | 20 |
| Showerheads | 100+ (if not clogged by mineral/other deposits) |
| Soapstone Kitchen Sink | 100+ |
| Sump Pump | 7 |
| Toilet Tank Components | 5 |
| Toilets, Bidets and Urinals | 100+ (if not cracked) |
| Vent Fan (ceiling) | 5 to 10 |
| Vessel Sink (stone, glass, porcelain, copper) | 5 to 20+ |
| Water Heater (conventional) | 6 to 12 |
| Water Line (copper) | 50 |
| Water Line (plastic) | 50 |
| Well Pump | 15 |
| Water Softener | 20 |
| Whirlpool Tub | 20 to 50 |
Roofing Materials
The life of a roof depends on local weather conditions, building and design, material quality, and adequate maintenance. Hot climates drastically reduce asphalt shingle life. Roofs in areas that experience severe weather, such as hail, tornadoes and/or hurricanes may also experience a shorter-than-normal lifespan overall or may incur isolated damage that requires repair in order to ensure the service life of the surrounding roofing materials.
| ROOFING | YEARS |
| Aluminum Coating | 2 to 6 |
| Asbestos Shakes | 30 to 50+ |
| Asphalt Shingles (3-tab) | 10 to 12 |
| Asphalt (architectural) | 15 to 20 |
| BUR (built-up roofing) | 5 to 15 |
| Clay/Concrete | 80+ |
| Coal and Tar | 18 |
| Copper | 50+ |
| EPDM (ethylene propylene diene monomer) Rubber | 10 to 15 |
| Fiber Cement | 18 |
| Green (vegetation-covered) | 5 to 20 |
| Metal | 17 to 20 |
| Modified Bitumen | 10 |
| Simulated Slate | 10 to 25 |
| Slate | 50+ |
| TPO | 10 to 12 |
| Wood | 25 |
Exterior; Siding, Components & Drainage Systems
Exterior siding materials typically last a lifetime. Some exterior components may require protection through appropriate paints or sealants, as well as regular maintenance. Also, while well-maintained and undamaged flashing can last a long time, it is their connections that tend to fail, so seasonal inspection and maintenance are strongly recommended.
| SIDINGS, FLASHING & ACCESSORIES | YEARS |
| Aluminum Siding | 20 to 35 |
| Aluminum Gutters, Downspouts, Soffit and Fascia | 15 to 35+ |
| Asbestos Shingle | 20 |
| Brick | 80+ |
| Cementitious | 80+ |
| Copper Downspouts | 80 |
| Copper Gutters | 40+ |
| Engineered Wood | 80+ |
| Fiber Cement | 75+ |
| Galvanized Steel Gutters/Downspouts | 15 |
| Manufactured Stone | 80+ |
| Stone | 80+ |
| Stucco/EIFS | 25+ |
| Trim | 18 |
| Vinyl Siding | 50 |
| Vinyl Gutters and Downspouts | 20+ |
| Wood/Exterior Shutters | 15 |
Site & Grounds Elements
Site and landscaping elements have life expectancies that vary dramatically.
| SITE & LANDSCAPING | YEARS |
| American Red Clay | 75+ |
| Asphalt Driveway | 10 to 15 |
| Brick and Concrete Patio | 8 to18 |
| Clay Paving | 75+ |
| Concrete Walks | 30+ |
| Controllers | 12 |
| Gravel Walks | 4 to 6 |
| Mulch | 1 to 2 |
| Polyvinyl Fencing | 75+ |
| Sprinkler Heads | 8 to 12 |
| Underground PVC Piping | 50+ |
| Valves | 12 to 15 |
| Wood Chips | 1 to 5 |
| Wood Fencing | 10 |
Swimming Pools
Swimming pools are composed of many systems and components, all with varying life expectancies, depending on their exposure to climatic and weather conditions. Also, proper maintenance is key, especially concerning the pool water’s chemical balance.
| SWIMMING POOLS | YEARS |
| Chlorine Generator (salt water) | 5 |
| Cover | 3 to 5 |
| Deck Finish (acrylic) | 5 |
| Diving Board | 8 to 10 |
| Gas Heater | 3 to 5 |
| Filter (sand) | 5 to 10 (sand must be replaced every 3 years) |
| Filter (cartridge) | 2 |
| Filter Grid (DE) | 5 |
| Heat Pump | 5 to 8 |
| Interior Finish | 10 to 20 |
| Motor* | 5 to 8 |
| Vinyl Liner | 8 to 10 |
| Pool Lights (fiber optic) | 3 to 5 |
| Pool Lights (incandescent) | 3 |
| Pool Lights (LED) | 5 to 7 |
| Pool Water Heater | 5 |
| PVC Ball Valve | up to 2 |
| Shell (concrete) | 20+ |
| Shell (fiberglass) | 20+ |
| Solar Heater | 10 to 20 |
| Waterline Tile | 10+ |
* Replacement motors tend to last half the lifespan of their original counterparts.
Windows
Aluminum windows are expected to last between 15 and 20 years, while wooden windows should last nearly 30 years.
| WINDOWS | YEARS |
| Aluminum/Aluminum-Clad | 10 to 15 |
| Double-Pane | 5 to 15 |
| Skylights | 5 to 15 |
| Jalousie | 30 to 40 |
| Window Glazing | 8+ |
| Vinyl/Fiberglass Windows | 10 to 30 |
| Wood | 15+ |
Note: Life expectancy varies with geographic location, usage, weather, installation, maintenance, and quality of materials. This list should be used only as a general guideline and not as a guarantee or warranty regarding the performance or life expectancy of any appliance, product, system or component.
Firewall Separation Between House & Garage
What are the requirements for fire separation between an attached garage and the house?

There are requirements for the walls and ceiling, door to the house and other garage/house penetrations. Let’s take them one at a time:
WALLS AND CEILING – The wall between an attached garage and the house living area is required to be minimum 1/2” drywall. Most garages have a ceiling secured to the bottom chord of the roof trusses or rafters, and that has to be 1/2” drywall also. If there is no ceiling and the roof structure is exposed in the garage, then the wall separating the garage from the dwelling must extend up to the underside of the roof sheathing. There is a high incidence of fires started in garages due to the gasoline and other flammable materials often stored there and, either way, the intent is to create a 1/2” drywall barrier between the garage and house for fire protection.
Only common walls between garage and house (not perpendicular walls) must meet this requirement. If a garage is detached, but within 3-feet of the residence, any walls within 3-feet must have 1/2” drywall. When there is a living area (habitable space) above the garage, the ceiling requirement ramps up to 5/8” Type X fire-rated drywall.

While all of this is intended to create a fire barrier between garage and house, it is not specified as “one-hour rating” or “fire wall”, It is called a “separation.”
DOOR TO HOUSE – This is the only place where any fire rating is specified. If the door is not solid wood or steel/honeycomb and at least 1-3/8” thick, then it must have a 20-minute fire rating. By the way, cutting a hole in the door to install a pet-door flap voids the 20-minute rating. Installing a steel door with a glass panel in it also voids the rating unless the glass is fire-rated too, which is obtainable but very expensive.
Garage Interior Door Standards
What are the building standards for a door from the garage to the house?

Flammable liquids, such as gasoline, paint thinner, degreaser, and other solvents, are often stored in a garage. A car in the garage can leak gasoline onto the floor, and the gas itself or its vapor is easily ignitable by a spark. Also, the carbon monoxide fumes generated by a car left running in the garage are deadly if allowed to seep into the home. So, for all these reasons, we recommend you consider the following.
Interior Garage Door Standards
The door cannot open directly onto a room used for sleeping purposes (bedroom) and must be one of the following types:
- Solid wood door not less than 1-3/8” thick.
- Steel door, with a solid of honeycomb core, not less than 1-3/8” thick.
- A door with a 20-minute fire-rating.
Here are examples we see during our inspections of when the safety standard has not been met:
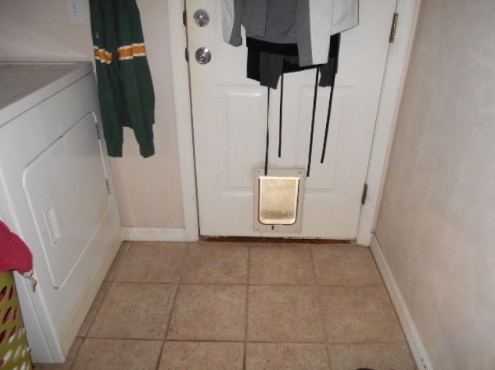
- An opening has been cut into the bottom of an otherwise acceptable door to install a pet door.
- A steel door with a fixed glass panel that is not fire-rated has been installed. We check the “bug” on the glass and it is usually safety glass, but have yet to find one with glass that is fire-rated. The door shown below is an example.
- A remodeler doing a “flip” house changes out all the doors in the home to update the interior, and replaces the old door to the garage with a hollow-core interior door.
We recommend that the door between the garage and residence should be equipped with a self-closing device, although they are no longer required by the IRC and FBC.
Grading Around Foundations
Mastering Grading and Protecting Foundations: A Veteran Home Inspector’s Guide for Hawaii Homeowners
Introduction
Aloha, proud homeowners of the beautiful Hawaiian Islands! With over two decades of inspecting homes in this tropical paradise, we’re here to share crucial insights about a fundamental aspect often overlooked—proper grading around your home’s foundation. Let’s dive into the significance of this and why you should pay special attention.
Understanding Proper Grading
1. Defining Grading:
Grading isn’t just about aesthetics; it’s about strategically shaping and leveling the soil around your home to ensure effective water drainage.
2. Importance of Proper Grading:
Living in Hawaii, where rain is a frequent visitor, mastering proper grading is your shield against potential water-related issues that can impact your home’s foundation.
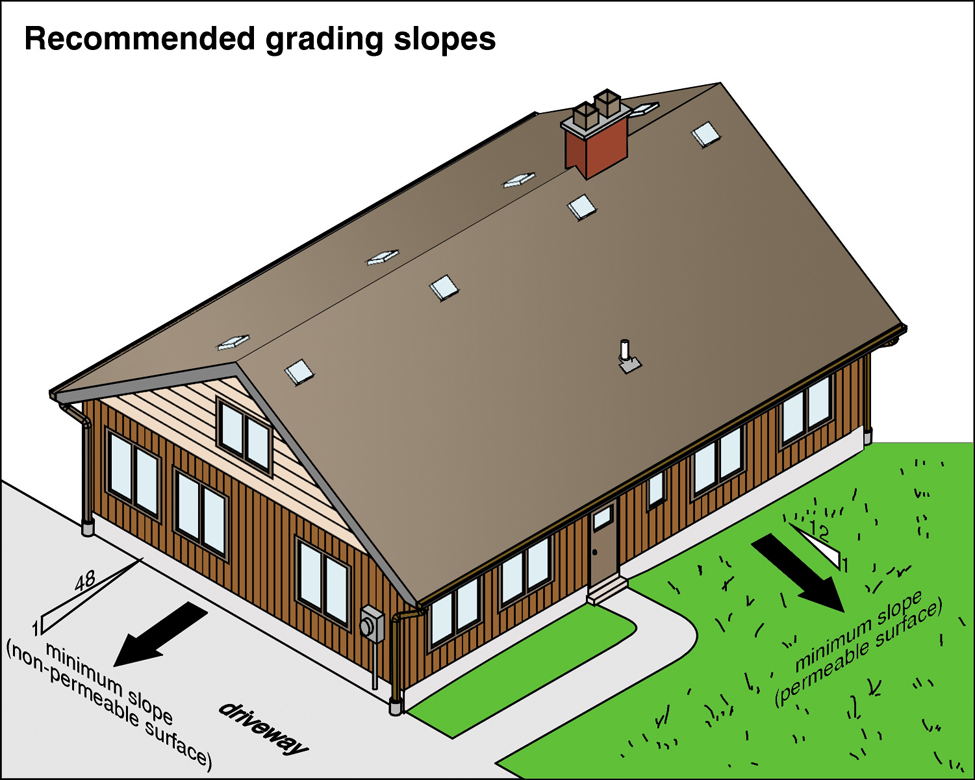
What Proper Grading Looks Like
1. Gentle Slope Away from the Home:
A well-graded yard features a subtle slope away from the foundation. This allows rainwater to flow away naturally, preventing pooling near your home.
2. Compacted Soil:

Compacted soil around the foundation acts as a barrier, preventing water from infiltrating and causing damage.
3. Strategic Landscaping:
Strategic placement of plants and mulch aids in moisture retention and proper water runoff, ensuring the stability of your home’s foundation.
The Plumbing Reminder
1. Importance of Accessible Cleanouts:
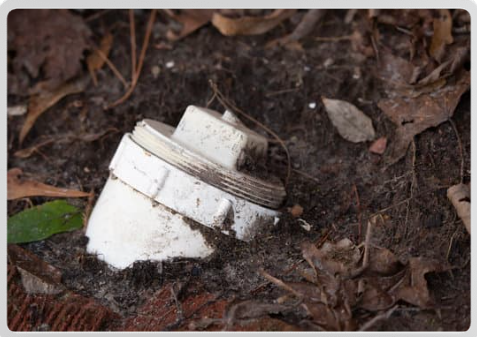
Plumbing sewer cleanouts should never be covered up. Accessibility is crucial for maintenance and can prevent costly plumbing issues.
2. Regular Checkups:
Include routine inspections of cleanouts in your home maintenance checklist. Ensuring they are easily accessible can save you from potential plumbing headaches.
Signs Your Grading Needs Attention

1. Standing Water:
Pooling water around your home, especially after rain, signals a need for grading adjustments.
2. Foundation Cracks:
Visible cracks in the foundation are often a consequence of poor water drainage. Upgrading grading can help prevent structural damage.

3. Dampness Issues:
Consistent dampness in basements or crawl spaces signifies water infiltration, indicating a need for grading improvements.
Supporting Arguments for Grading Updates
1. Climate Adaptation:
With changing weather patterns, periodic grading assessments become essential to adapt to new challenges effectively.
2. Landscape Maturation:
As your home and landscaping mature, adjustments to grading become vital to accommodate changes in soil structure and plant growth.

3. Post-Storm Evaluation:
After heavy storms, a thorough evaluation of your grading ensures it remains effective in diverting water away from your home.
3. Check Gutters & Downspouts:

Be sure gutters have unobstructed flow to downspouts. Run-off water needs to flow away from the side of the house at least 6 feet. This will allow the run-off to get far enough away to not interfere with the foundation.
Conclusion: Preserving Your Island Haven
As seasoned home inspectors, we encourage you to prioritize proper grading as a proactive measure in preserving the structural integrity of your Hawaiian home. Remember, your home is a sanctuary, and by investing in its protection, you ensure it stands strong against the test of time and weather. Mahalo for your dedication to maintaining your unique slice of paradise!
Hawaii Style Homes
Learn more about the home you’re buying.
Article below from “Owner Built Design”
From the sugar shacks on old plantation grounds to the soaring towers of Honolulu, Hawaiian construction spans a huge variety of styles. On the island of Oahu, you’ll find multi-million dollar European-style villas, plantation-style “coffee shacks”, some upgraded, some not, that resemble cabins as much as modern homes–and neighborhoods chock-full of single-wall mid century-modern homes built during the housing boom of the ’50s and ’60s. Those single-wall homes are a source of fascination for some and confusion or dismay for others. But contrary to the expectations of many builders and homeowners from the mainland U.S., they’ve stood the test of time–some with few upgrades or none at all–for decades. Still others have been upgraded to offer the same features and standard of living as new-construction homes, without sacrificing their trademark island appeal and character.
Characteristics of Hawaii’s Single-Family Homes
Single-wall construction isn’t unique to Hawaii. It’s also common in some areas of the mainland U.S., where residents enjoy climates without the broad temperature fluctuations that render insulation necessary. But those single-wall construction homes in the mainland tend to feature more or less “traditional” wood framing: a wooden framework providing the skeleton of a home, to which planking materials were added to complete walls. In these homes, the timber frame itself was designed to bear the weight of the home’s structure. Single-wall homes in Hawaii might look a bit similar on the surface, but they’re constructed in a radically different way. Lacking the structure of a typical wood-framed home, single-wall homes in Hawaii are typically supported by the same type of post-and-beam framework you might see in North American pole barns or steel-framed sheet metal buildings. They’re not unlike a house of cards in this regard. Look for a stud, and you won’t find one in the usual sense. Walls consist of tongue-in-groove boards that, when stabilized by a small beam along the top of the wall, support the weight of the roof. Framing simply supports the doors and windows and anchors the corners of each room.
Typical Features of Single-Wall Homes in Hawaii:
- Tongue-in-groove walls that provide both the interior living surface and the outdoor protection against the elements
- Elevation blocks (often called tofu blocks) and pier construction that take the place of traditional slab foundations
- Batten boards on the external seams of the home, creating a uniquely Hawaiian bungalow-style curb appeal
- Surface-mounted junction boxes and surface conduit providing power to the homes’ interiors
Unlike most single-wall homes in the mainland, the single-wall lifestyle in Hawaii is still going strong. The more well-cared-for of these homes aren’t the run-down shacks a mainlander might expect. Instead, they’re modern, still very well-functioning homes that, unlike a house of cards, are still standing strong. In many well-established Oahu neighborhoods, these single-wall homes make up the vast majority of single-family residences, and they’re still considered highly desirable by many Hawaii homebuyers.
Materials Used in the Construction of Hawaii’s Single-Walled Homes
Not everything about life in Hawaii is exotic, but many of the building materials used in these single-wall homes certainly qualify for the adjective. Redwood In the mid-1800’s, a perfect storm brought ships loaded with redwood to the shores of the Hawaiian islands. Demand for newly-built homes in Hawaii increased, but at the time lumber was in short supply thanks to poor forestry practices amidst Hawaii’s early sandalwood industry. Around the same time, gold was discovered in California–and would-be millionaires flocked to the American west coast. For many of those enterprising adventurers, their stories became those of loggers in California’s redwood forests, which became a lucrative source of hardwood that could be shipped across the Pacific to serve the needs of the Hawaiian islands. Thanks to its affordability and the termite- and weather-resistant properties of redwood, it became a building staple. For some Hawaiian residents, the ability to order their choice of “prefabricated home” in the form of precut redwood planks was more than a little appealing. These homes were relatively inexpensive to build and offered the luxury and convenience of floor plan selection to those who couldn’t afford to hire a builder to design a home for them. By the 1970’s, thousands of homes in Oahu had been constructed from imported redwood planks.
Canec Fiberboard
The ceiling/roofing materials, on the other hand, looked a little different–if just as uniquely Hawaiian. A drywall-like substance created from bagasse, a by-product of sugarcane processing, was created to provide a smooth surface for interior walls and ceilings. Canec was originally the brand name of one company’s specific version of this pressed fiberboard, but it eventually came to refer to all boards made from these sugarcane byproducts. Canec particle board was used in home construction across the state of Hawaii throughout the 1950’s, most often as a ceiling material. The fiberboard was processed using inorganic arsenic compounds to ward against termites–and it’s this processing that makes long-term exposure to canec potentially dangerous when it is damaged/disintegrating. Canec is smooth-finished on the outside, much like drywall, with visible V-shaped seams where boards meet. It is typically installed like ceiling tiles in squares or long, rectangular boards spanning segments of the ceiling. Unlike drywall, canec is rather soft; a fingernail can leave a mark on its surface. In 1960, Oahu’s largest canec processing plant caught fire and burned to the ground, mostly ending the use of canec as an everyday building material. But it’s not at all uncommon to see canec, still undamaged and in good condition, in the ceilings of single-wall Hawaiian homes.
Jalousie Windows
Take a drive through an older residential section of any of the Hawaiian islands, and you’ll spot many homes with jalousie windows: long window slats set in parallel lines that open and close like blinds. Jalousie windows were fairly standard in mid-century Hawaiian homes. These low-cost windows allowed homeowners to capitalize on Hawaii’s tradewinds, allowing plenty of ventilation that homeowners could control with the flip of a handle.
Jalousie windows feature removable glass slats, available in privacy-frosted or clear options, that allow replacement of individual panes when damaged. In the mid-1900’s, these glass panes typically snapped into aluminum frames; today, replacement options are available in a wide range of materials, with glass slats in key locations sometimes replaced by vinyl, acrylic, or conventional wood. The main downfalls of jalousies? Original jalousie windows aren’t typically quite as weatherproof as you might expect from a window; when closed, persistent windy rain can make its way indoors on occasion (modern jalousies tend to have weather stripping on each pane; older windows did not). Because slats can easily be removed, they also don’t offer the same level of security as traditional modern windows. The multitude of cracks does little or nothing to contain air-conditioned air, which makes them highly impractical for any home with an air conditioning system.
Challenges Faced by Single-Wall Homeowners
The airy, old-school charm of many single-wall homes are more than enough for many homeowners in Hawaii. But others balk at the thought of living without features like insulation, a climate control system, and some form of noise reduction from the outside world. These creature comforts are more important, of course, in higher-temperature, less-breezy areas of the island, and in high-traffic neighborhoods or areas with a higher noise level.
Difficulty in Obtaining Repair Materials
Many single-wall homes have held up beautifully over the years, but repairs are inevitable. And although local hardware stores carry replacements for some materials, others are much more difficult to find. Jalousie window hardware and slats are readily available, and custom window manufacturers in the area offer modern versions of jalousie windows that hold up much better than their mid-century counterparts. But redwood boards for the walls are, of course, unavailable–unless you get lucky at a restoration/salvage yard. The alternatives you’ll find locally aren’t cheap. Similarly, canec, once damaged, is impossible to replace and quite challenging to match if segments of ceiling material need to be repaired. The alternative? Carefully removing canec to follow arsenic mitigation guidelines, and replacing all the ceiling material at once.
Hurricane Safety Issues
During extreme weather, older Hawaiian homes–particularly those near the coasts–are typically the first to sustain catastrophic damage. Single-wall homes weren’t exactly built with hurricane preparedness in mind. The roof and foundation design of these homes make them particularly vulnerable to having the roofs lifted off in very high winds. During previous hurricanes, some single-wall homes have been pulled off their foundations entirely.
The Breezy Island Aesthetic
The look of single-wall homes tends to be light, open, and breezy, with ample natural light and ventilation from jalousie windows and an indoor-outdoor lifestyle that’s hard to replicate. But it is possible to replicate that feel while maintaining many of the 21st-century comforts that contemporary homeowners expect.
Contemporary Upgrades
For some, it’s more than worth it to add insulation and another layer of interior walls to existing single wall homes, essentially creating a double-walled home that can be efficiently climate controlled. And with a knowledgeable local builder, it’s possible to make that happen–a significant lifestyle upgrade– without sacrificing the home’s old-school charm. Many owners of these older Hawaiian homes opt to retrofit their home with modern hurricane precautions in mind. Hurricane clips along the rooftops help prevent older roofs from flying off in the face of high winds. Foundation anchoring also helps prevent these older homes–which are certainly built to a different set of standards than modern homes–from being pulled off their foundations in hurricane-strength winds. For other homeowners, it makes sense to build a new home from the ground up that features the island aesthetic as well as all the creature comforts of a modern home. In recent years, a resurgence of homes mimicking the historic “plantation” look and/or the sleek mid-century single-wall style have been popping up in neighborhoods across the islands. These homes typically feature exterior batten-board styling, ample windows, and an open floor plan, while meeting all modern building codes and the expectations of contemporary homeowners. Whether you’re considering updating your single-wall home or designing and building (https://ownerbuiltdesign.com) with the help of a local professional, we can help. From drafting your dream home to navigating the permitting process, we’ve been serving Hawaii for over three decades. Feel free to get in touch (https://ownerbuiltdesign.com/oahu-drafting-service-start/) with a member of our team for a free consultation.
Homes Built in the 1950’s
One of the most common questions we receive is “What issues should I be aware of when buying a house built in the 1950’s?”
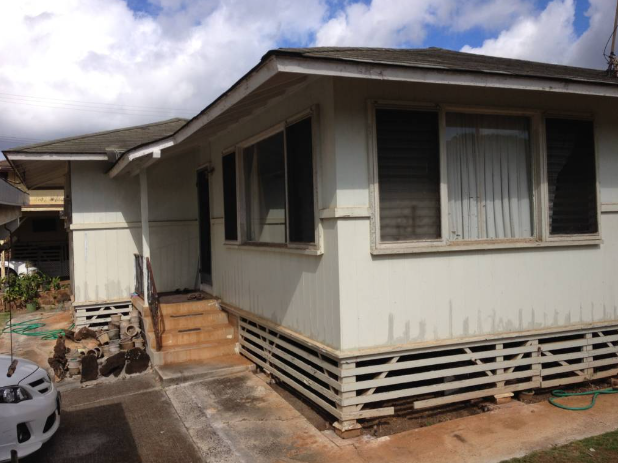
This is a great question and brings up the fact that all homes are not the same. Just like a vehicle, technologies evolve over time. The construction methods and safety items are continuously improving. Older homes may have components that are, well, old.
This article is not intended to dissuade you from purchasing an older home! Older homes certainly have a charm that is not present in modern homes. However, your expectations should meet the reality of buying an older home. If you are considering buying a house that was built more than 50 or 60 years ago, there are some things you must consider so that you are not disappointed once you move in.
Your home inspector has identified some older components even if they are functioning properly. They consist of old technologies and or possibly insufficient for today’s modern families. These components include but are not limited to, electric service panels, ungrounded circuits, insulation, windows, etc.
Electrical
Prior to the 1950’s the only appliances in most homes were a gas range and maybe a gas water heater. Electricity was primarily used for lighting which is why there were so few receptacles installed in those houses. It was adequate for a few lamps. It was in the 1950’s when electricity really became a staple component in a home. “Better Living Through Electricity” brought electric appliances to center stage. And for the first time electric appliances were introduced in mass quantities. They were marketed heavily by the manufacturers and the electric utility companies.
Clothes washers, televisions, electric ovens, percolators, – even electric clocks (no more winding) – were all promoted heavily to make life “better”. Many people also felt that electricity was a safer option than gas due to a concern for fires. The old electrical systems had to be upgraded to supply enough electricity to operate all these new machines safely. Old electric systems often had only a few circuits. After all, they only needed to supply enough power for the afore-mentioned lights. Bigger appliances draw enough power to require a dedicated circuit that is not shared with the lighting circuit. The biggest risk with drawing too much current through a wire is that it will overheat and cause a fire. Fuses were the original safety feature which prevented house fires due to over-heated wires. They contain a thin wire inside that is designed to break if too much current is demanded on a circuit. This prevents the wire inside the wall from overheating.
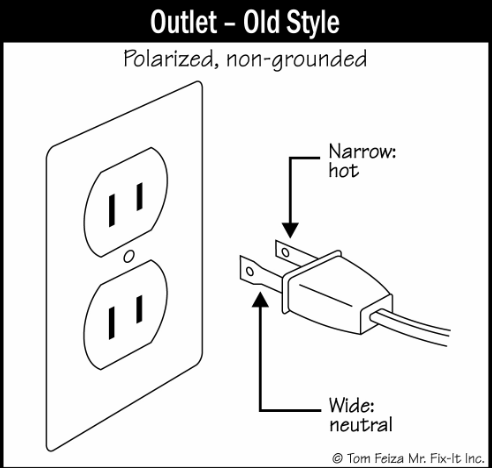
From today’s perspective, older electric panels can be under-sized meaning that they were designed to provide enough electricity for a house in the 1950’s. The main service panel may only be rated at 60 AMP’s. Back then the average kitchen had only a few countertop appliances consisting of a toaster, a percolator and maybe an electric can opener. When touring an older house you may only see one receptacle at the kitchen counter. Those electric systems were modern for the time. They were not designed for all the appliances we use today such as microwave ovens, heavy duty mixers, toaster ovens, etc. Today houses can have 5 TV’s, several computers, cable boxes, stereos, hair dryers, game consoles, ceiling fans, air conditioning, hot tubs, pools – you get the idea.
An electric panel that provides less than 100 AMP’s is considered undersized and will not provide enough electricity for the average family home. If it is less than 100 AMP’s, you will likely want to upgrade the electric panel which can cost a couple thousand dollars or more.
An old electrical system will also not have the safety features of a modern system. Primarily, the system may not be grounded like a modern system. If you see two-prong receptacles the system is probably not grounded adequately. Proper grounding improves safety and without it you may have problems with sensitive electronic equipment. Again, if you have two-prong receptacles you may want to budget for an upgrade of the electrical system. If you have receptacles that have been improperly upgraded (open-ground) you will need to consult an electrician for your options.

Another very important upgrade to an electrical system is the installation of GFCI receptacles. GFCI stands for Ground Fault Circuit Interrupter. These devices monitor the flow of electricity and if they detect a difference in the supply and return of electricity, or a possible flow of electricity to ground, they will shut off the power. For example, if you touch a bad cord and a plumbing fixture, electricity will flow through you to the plumbing fixture – an electrocution hazard. A GFCI can protect you from this hazard. They are now required within 6 feet of a plumbing fixture, in garages, and at the exterior of a home. Although the seller is not required to install GFCI’s it is a good idea to install them for safety.
There have been many other technological improvements to electrical systems. Too many to list here, but the idea is that an old house may need an electrical upgrade.
The EPA considers asbestos dangerous when it becomes air-borne. Exposure to asbestos dust is not likely unless there is damage to components containing asbestos. This happens when the asbestos is disturbed or damaged. If you will be working in the attic, be sure not to touch, break or otherwise disturb the asbestos. Determining the presence of asbestos is beyond the scope of a home inspection. But your home inspector should have the knowledge to recognize components that may contain asbestos. Typically, a “cover-and-leave-in-place” is recommended.
Plumbing
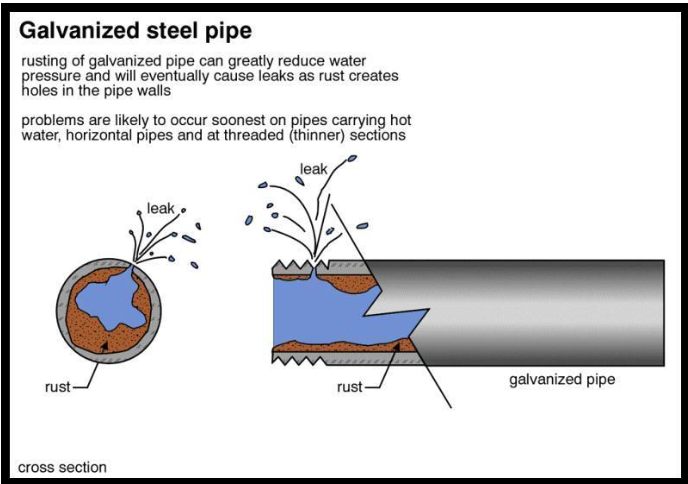
Another system that may be near the end of its useful life is the plumbing system. Older homes were plumbed with galvanized steel pipes, which do rust over time. When these pipes rust, it is like having clogged arteries. You may notice reduced pressure and rust-colored water when valves are first opened. Galvanized water systems should be replaced with copper to avoid leaks.

On the drainage side of the plumbing system, cast iron pipes were used for the drain pipes. These heavy iron pipes have a life expectancy of 40 – 50 years. Simple math dictates that these pipes are near the end of their useful life. Often these pipes may look OK, but cast iron drain- lines often rust from the inside, collapse, leak, occlude and root growth is common.
Upgrading the drainage system can be costly, and this is something that is commonly needed in an older home. The new standard material for drain lines is ABS plastic. This new material is black plastic that does not rust, and since the joints are glued together like PVC pipes, roots are less likely to find their way inside the pipes.
A drain line video inspection is highly recommended for cast iron drain pipes in addition to a home inspection. The drain line video will show if the buried pipes are deteriorated, clogged, or rusted. This is important because replacing a deteriorated drain line between the house and the sewer can be expensive. Digging up and replacing rusted cast iron drain lines can cost between $10,000 – $20,000 depending on the distance, landscaping and hardscape. Do your research about drain line replacement. It can be an unpleasant surprise if you are unprepared to do it.
Roof

A roof is one of the most expensive components of a home. Hundreds of different materials have been used as roofing material from sticks to plastic, and grass to glass. When you are looking for a home you need to know what type of roofing material is installed, if it was installed correctly and the current condition. A thorough home inspection will include a detailed evaluation of the roof. A roof in poor condition can be a deal breaker, so here are some things to look for that can give you a heads-up about the condition of a roof.
The majority of the houses we inspect range in age from the 1950’s to new. The most common roof type we see for the older single wall constructed home is the pitch and gravel roof. “White”, acrylic or silicone coated roofing materials are the most common replacement for old tar-and-gravel roof coverings. With the old Pitch & Gravel roof the tar was the water-proofing material, gravel was added to protect the tar from the deteriorating effects of the sun. If the gravel was washed away, or brushed off by low hanging branches, the tar quickly deteriorated resulting in a leak.
Asphalt shingles were developed to replace tar-and-gravel. Asphalt shingles are made of oil-impregnated fiberglass material with an aggregate (which looks like kitty litter) pressed into the surface and functions exactly like the old tar that was covered in gravel. It is made in a factory and shipped to the site, thus lowering costs. The aggregate adds color, but its primary purpose is to protect the shingles from UV exposure. Once the aggregate is worn, the shingles deteriorate rather quickly. The majority of asphalt shingles have a life expectancy of 20 or 30 years.
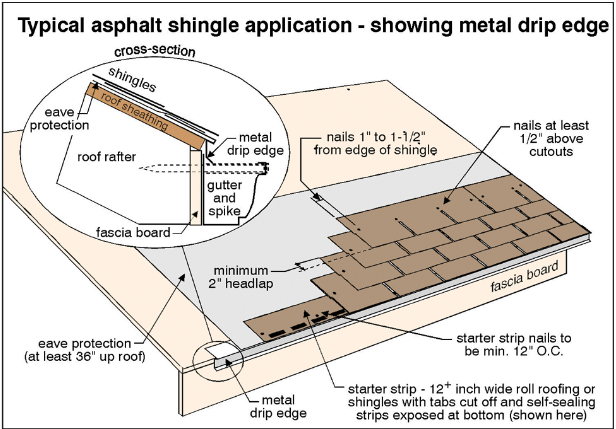
Before making an offer on a house take a close look at the roof. If you see worn areas, it indicates that the shingles are nearing the end of their life. You can also do some simple math to estimate the age of the roof. If you are looking at a house built in 1950, the house is 60 years old. Assuming that the house originally had a 20-year asphalt roof, it was most likely replaced in the early 1970’s, and again in the 1990’s. If it does not have a new roof, the current roof might be nearing the end of its 20 year expected life.
Look around the perimeter of the house for evidence that the aggregate is washing off of the roof. If you see piles of gritty material which is the same color as the roof, you’ll know that the roof is deteriorating.
In Hawai‘i a house can only have two layers of roofing material. If a house built in 1950 has had a new layer of roofing installed every 20 years without a tear-off, it may already have two layers on it. When the current roof material wears out a complete tear-off will be needed.
Windows

During the 1950’s a lot of new products were introduced in the home-building industry. Among these were “modern” windows made of aluminum. These were considered a great improvement from the wood sash windows that had been installed in the 1940’s and before.
The old wood windows were often built onsite and had large iron counterweights in the wall. New designs were introduced such as crank windows and Jalousie windows. While these window designs allowed for more air flow, they do not seal very well, and are not very secure.
The new aluminum windows were manufactured off site, and were easy for the builder to install keeping the costs down and reducing construction time. These windows also did away with the iron counterweights in the walls which were difficult to repair when the sash cords broke.
Safety Glass
Original windows and glass doors in older homes most likely do not have “Safety Glass”. Instead they are regular plate glass which can shatter into large, sharp pieces. Many injuries and even deaths are caused each year from human impact with glass. These most often occur at sliding glass doors or floor to ceiling windows, but can also occur in bathrooms with glass doors at the tub/shower, at stairwell landings, and adjacent to doors. Old sliding glass doors are considered so unsafe that we will typically recommend that these doors get replaced or at least upgraded with safety film upon sale of the house. If you will be renting out your house, please be aware that courts have upheld liability claims against landlords for injuries caused by unsafe shower doors and windows.
Structure

A lot of homes from this era were built on a raised foundation. This was cheaper than pouring a concrete slab, and made it easy for plumbing to be installed under the house. The typical design included a perimeter foundation of concrete with wood beams and joists supported by wood posts. Today we see many of these “post and pier” systems that are showing the effects of time. Occasionally the dirt or sand beneath the concrete pier has settled and the post no longer provides adequate support. If you notice “springy” floors in the house, settlement may have occurred. This is usually repaired with new or additional posts.
We often report on posts that are no longer in alignment or have been poorly repaired. You should expect some comments regarding the floor structure and the condition, along with an evaluation of any repairs. This can include metal fasteners or diagonal bracing to add rigidity to the floor structure.
Slab Foundations
Slab foundations are not uniform. Older ones may not include reinforcing steel (rebar), and are not likely to have a moisture barrier beneath them, whereas newer ones are likely to have both. You should also be aware that slabs are rarely perfectly level, and often settle out level or are displaced by movement. Our inspection of them is that of a generalist and not a specialist. We check the visible portion of the stem walls on the outside for any significant cracks or structural deformation, but we do not move furniture or lift carpeting and padding to look for cracks or evidence of moisture penetration, and we do not use any specialized devices to establish relative elevations and confirm differential settling or movement. However, slabs are commonly built or move out of level, but the average person is not likely to sense this until there is a difference of more than one inch in twenty feet, which most authorities regard as being tolerable. Significantly, most slabs are found to contain cracks when the carpet and padding are removed, including some that contour the footing around the edges and can be quite wide. They typically result from shrinkage and usually have little structural significance. Regardless, there is no absolute standard for evaluating cracks, and those that are less than 1/4″ and which exhibit no significant vertical or horizontal displacement are generally not regarded as being significant.

Additionally, it is relatively common to find “spalling” at the exterior perimeter of the foundation. Spalling is a common finding likely caused by corrosion or rust at the embedded rebar. As the rebar expands it causes pressure and the outer layer of masonry flakes off. This is not generally a structurally significant issue and in my opinion as a generalist of no real consequence. Expect routine repairs and maintenance
Although, as previously stated, they typically result from common shrinkage, they can also be caused by a deficient mixture of concrete, deterioration through time, seismic activity, adverse soil conditions, and poor drainage, and if these cracks are not sealed they can allow moisture to penetrate the slab and cause musty odors. However, if the slab is reasonably level and there is no visible evidence of damage, we will not recommend that you consult with a specialist, but this should not deter you from seeking the opinion of any such specialist, and we’d be happy to refer one. As a word of caution, if you have carpet and padding or other finish floors removed, you should expect to see cracks. However, they are typically not structurally alarming, so be wary of any contractor with a vested interest, and certainly be wary of anyone who uses inflammatory language, or who identifies deficiencies based solely on current structural standards and not those that were in existence when the residence was constructed.
Homes Built in the 1980’s/1990’s
Houses built in the 1980’s & 1990’s are considered “modern”

…and were usually built on a stem wall or piers, but some homes were concrete slab-on-grade, typically with thickened edges that serve as a foundation. For the most part, these homes are weathertight and structurally sound with attic insulation, good ventilation, airtight windows, subfloors and large eaves. Most of the Country experiences building booms every 20 – 30 years. This happened right after World War II with all the GI’s returning from the war, and again in the 1980’s. Even though most of us don’t think of the 1980’s as that long ago, it has been about 40 years! People love to use the car analogy. Every year cars get better. New safety features are developed, better materials are used, and techniques that proved to be inferior are no longer used. This is the case with homes, too. It is important for your home inspector to identify certain components of the house even if they are functioning properly. They may be old (20-40 years+), consist of old technology, or may not be what you expect – such as single pane windows or wood tilt-up garage doors.
Electrical Systems

Generally speaking electrical systems that were installed in the 1980’s are considered “modern” electrical systems. They consist of circuit breakers (instead of fuses), the systems are grounded with three-prong receptacles, conductors are copper, and they are much safer than older systems of the 1970’s or before. There will also be far more receptacles than in older houses for convenience and safety.

It was during the 1980’s that the use of Ground Fault Circuit Interrupters (GFCI’s) began in areas of the house other than the bathrooms and garage. Prior to 1987 they were not required in kitchens, which is a question that is often asked. Houses built after the 1970’s do not have aluminum wiring at their branch lighting circuits (for receptacles and switches). Aluminum wiring was the cause of house fires, but its use was limited to the mid-1960’s through the mid-1970’s. Aluminum wire is still used on dedicated circuits of 30 AMP’s or more such as dryers, ranges, or AC condensers. The standard capacity for an electric panel installed in the 1980’s is 100 AMP’s which is adequate for most homes. It will accommodate multiple computers, TV’s, ceiling fans, and many other modern items. In some cases you may be limited if you want to add a hot tub, additional receptacles in the garage (for shop equipment), or a pool. Some houses built in the early 1980’s have electrical panels that are no longer considered safe.
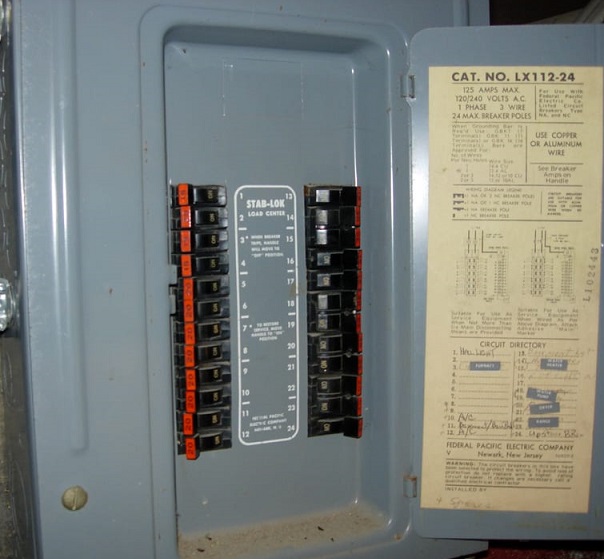
The two brands of panels that should be replaced were manufactured by Federal Pacific Electric (left) identified by distinctive red/orange-tipped breakers, and Zinsco panels which are typically horizontal, and have multi-colored breakers. Both of these brands of panels have a poor reputation, and have been suspected of causing house fires by overheating or breakers that fail to trip when overloaded.

If you have either of these panels your inspector will likely recommend further evaluation by a licensed electrician to provide you either with peace of mind or an estimate for replacement. Many of the 100 AMP panels also had limited space for breakers. As the building code evolved, more dedicated circuits were required. A new house will have many more dedicated circuits such as one for the microwave, one for the refrigerator, one for the dishwasher, etc. In the 1980’s many of these appliances were still sharing one circuit. You should take note to see if the panel is full, or has additional capacity. This is important if you want to add a hot tub or more receptacles in the garage. If the panel is full, a sub-panel may be required, or a new panel – both of which can cost hundreds or a couple thousand dollars.
Plumbing
To save money, many of the huge housing developments used a new type of plumbing in the 1980’s and 1990’s. It was a plastic product called Polybutylene (or Qwest) that was supposed to be the answer to many traditional plumbing problems. The plastic plumbing system was easier to install than copper and required no soldering. Because the plastic tubing is flexible, long runs could be installed quickly. The sections of tubing were fastened together using plastic connectors (much like a drip system) and crimps to hold the tubing onto the various connectors. In addition to the cost savings to the developer, the plastic tubing was supposed to be unaffected by corrosion. Unfortunately many of these plumbing systems failed causing property damage. Although an exact cause could not be determined, it is expected that the chlorine in water caused the fittings to fail. In some early installations with aluminum crimps, the crimps failed due to thermal expansion.

A huge class action lawsuit was settled with the manufacturers of the Polybutylene which paid to repair or replace plumbing systems which failed. Many of the early systems were repaired by replacing the plastic fittings with brass or copper fittings and copper crimps (as shown in this picture). These upgrades were considered satisfactory, but these systems still can fail. If the house you are buying has Polybutylene plumbing, you should obtain a quotation for a whole house re-pipe prior to the end of your contingency period, as you will want to have the plumbing system upgraded.
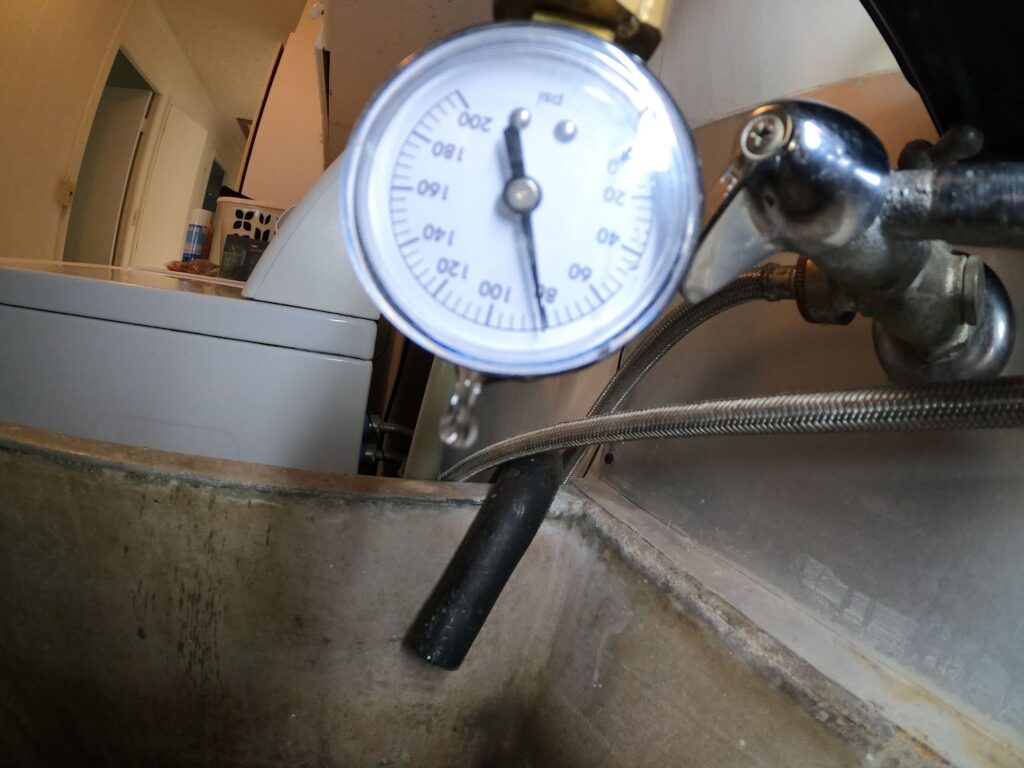
One contributing factor to failed plumbing systems, (copper or Polybutylene) is high water pressure. The street pressure in many parts of Oahu is high – as high as 120+ psi. To keep the pressure below 80 psi in a house, a pressure regulator is installed at the main water line. These pressure regulators can fail. When they do fail, water pressure in the house can exceed 80 psi which puts tremendous stress on faucets, plumbing, toilet fill valves, etc. Your home inspector MUST check the water pressure as many regulators fail after 15 years. Insulation Most of the houses built in the 1980’s and after have ample insulation. The products used do not contain asbestos, and are most typically made of fiberglass.
Roof

Everything in a house will wear out. This includes components of the roof. Even a tile roof has an underlayment commonly referred to as tar paper. This underlayment lasts 20-25 years depending on installation and sun exposure. Many roofs that were installed in the 1980’s are currently in need of having the underlayment replaced. The same life expectancy applies to concrete or clay tile roofs. This involves removing the concrete tiles, removing the tar paper, and replacing the paper with a new underlayment. The original tiles can be reused if they are in good condition. An asphalt-shingle roof is also likely at the end of its life. It is made of oil-impregnated fiberglass material, with an aggregate (which looks like kitty litter) pressed into the surface. The aggregate adds color, but its primary purpose is to protect the shingles from UV exposure. Once the aggregate is worn, the shingle deteriorates rather quickly. Most of these roofs are 30 or 40 years old roofs. Do the math. If the roof looks worn it is likely in need of replacement.
Windows

Most windows installed in the 1980’s have aluminum frames. Higher-end houses may have double pane windows. Not all houses built in the 1980’s have double pane windows. Double pane windows were considered an upgrade. We often have clients who are disappointed to find that the modern house they want to buy has single pane windows. Be sure to check this out. The most common problem we see with older windows consists of worn glides or rollers. This makes the windows difficult to slide. This is considered a hazard. The added force required to slide these windows could cause the window to be slammed shut resulting in broken glass or damaging the frame. The majority of issues with jalousie windows are damaged handles, cranks or corroded components, loose glass, missing rivets, even missing glass. Floor to ceiling windows, or windows below 44 inches, although built in this condition and predating any current standard, there is a potential safety concern at the windows that you should be aware of; a person, in theory, could trip and run, head first, into these non-safety glass type windows. This is especially true with jalousie windows
Hopefully this information will help set your expectations of what to expect from a home inspection performed on a 30 or 40 year old house. We don’t want you to be surprised with the items in the report. You should ask the seller if any upgrades have been performed. If not, you may need to budget for upgrades after you move in. Of course this information cannot cover every scenario as each house is unique.
Hurricane Preparedness
State of Hawaii
Hawaii Emergency Management Agency
Home » Public Resources » Preparedness Information

PREPAREDNESS INFORMATION
Stock your emergency preparedness kit with enough food and water for at least 14 days. Other essential items include, a battery-operated radio to receive emergency communications and essential medication.
Storage
HI-EMA recommends you store your emergency supplies in a sturdy kit such as a rolling cooler. An added bonus to using a sturdy container is that it can be used as a seat if you need to evacuate to a shelter.
Water
Water is essential to sustaining life and is an important part of your emergency preparedness kit. General guidance is for people to store one gallon of water per person, per day for at least 14 days. This can be done by storing cases of water in a cool, dry place or by storing your own tap water. The Honolulu Board of Water Supply demonstrates proper water storage techniques in this YouTube video.
Food
Store high calorie, shelf stable food in a cool, dry place. Examples of high calorie food that do not require heat or additional water to prepare include nuts, ready-to-eat cereals, peanut butter, dried fruit, and canned soups. The United States Department of Agriculture provides information on keeping food safe during an emergency here.
Other Needs
Having access to information is important before, during, and after a disaster. A battery operated radio will often work when other methods of communication are not available. HI-EMA strongly recommends a radio as part of every emergency preparedness kit.
If you are trapped by debris after a storm or earthquake, a whistle could save your life. It is more easily heard and takes less energy than using your voice to call for help and takes very little space in your emergency kit.
Hygiene and cleanliness is important to your overall health. Including items such as hand sanitizer, sanitary wipes, toilet paper, and bags to contain waste could help to keep you healthy in the days and weeks following a disaster.
Medication and Other Medical Supplies
If you have a condition requiring medication, make sure to stock extra with your emergency supplies. A hard copy of any prescriptions may also help if you need to resupply after a disaster. If your medication requires refrigeration, consider purchasing a generator or storing a supply of ice packs and a cooler for use if power goes out.More special needs information can be found here.
Insulated Glass: What You Need to Know
Possible Reasons for Failure

1] This may be the result of power washing prior to exterior paint updates. The high pressure damages the seal and allows the trapped gas to escape resulting in failure. Be sure to evaluate ALL of the windows, not just the one(s) we pointed out to you in this report.

2] Out of all of the enemies, solar pumping is perhaps the least obvious. Built into every thermal pane window frame is a silica desiccant to absorb the small amounts of moisture inevitably drawn into the window. The desiccant, however, has a limited capacity and lifespan. At some point the desiccant will have absorbed all the moisture it can hold and that is the day a hazy, misty, bluish fog clouds your glass window pane. From this point on the window begins deteriorating rapidly. If left untreated, the trapped moisture quickly corrodes the inner window glass surfaces, eventually leaving mineral deposits and a permanent white silica haze.
Maintenance
When windows fog and fail, the only viable option might be replacement. Even if repair is possible, it is extremely difficult, expensive, and the glass might have been damaged by the minerals in the moist air. The best way to prevent a broken seal is proper maintenance. Every two years the exterior seam where the glass and wood meet should be caulked. Wood frames should receive a fresh coat of paint. But the best way to prevent a broken seal is to purchase a quality window from the start. Make sure the window has a long and comprehensive warranty.
Anatomy of a Thermal Window
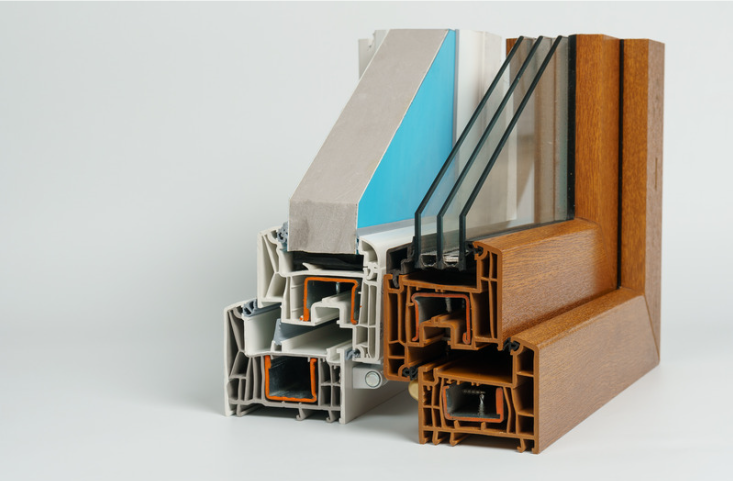
A thermal window features two or three panes of glass with open space between the panes. This window assembly is known in the industry as an IGU—an acronym that stands for insulated glazing unit or insulated glass unit. Thermal windows are sometimes called thermopanes or insulated windows.
The space between the glass panes of an IGU is emptied of air by means of vacuum suction, and it is often filled with an inert (noble) gas, such as argon or krypton, to slow the passage of heat through the window unit. Inert gasses are less heat-conductive than air or a vacuum space.
However, if the seals that protect the edges of the IGU develop a break, then the inert gasses can escape and ambient air and moisture can enter the space between the panes, resulting in the IGU losing its extra insulating value. The visible symptom of this failure is the tell-tale fogginess or condensation inside the IGU unit, on the inside surface of the glass. Not only do you lose the aesthetic value of a clear window, but the energy-saving value of the window will be cut dramatically.
Understanding IGU Seals

The edges of the glass panes in double- or triple-pane IGU windows are embedded in a sealing material. While it appears to be one seal, it is actually two seals working together. The inner sealant is typically made of polyisobutylene (PIB). The outer sealant is an elastic rubber-like seal that, according to AkzoNobel (a maker of the gases used to fill thermal windows), “functions as an adhesive, holding the glass unit together and keeping it tight during the service life.”
Although these window seals are meant to be long-lasting and may hold up for decades, they can and do fail. Seals can be damaged by house painters using heat guns to strip paint or by homeowners using pressure washers to clean the windows. Improper installation of an IGU window can also cause a seal to fail. But even when there is no such dramatic event, the seals are still destined to fail—eventually. The International Association of Certified Home Inspectors estimates that the gas escapes at a rate of approximately 1 percent per year under ideal conditions. This loss of gas can be faster if an IGU is poorly manufactured.
Structures & Foundations
Framing System Types
About Platform Framing

Platform framing is the industry standard for wood framing methods. It is a light-weight construction type for roof, wall and floor planes. Additional members like studs and joists are used and are spaced accordingly to account for various loads. In this method, each floor is framed out as a separate unit by nailing the horizontal frame member to the top of the wall studs. First , one structure is securely supported by the foundation. That ground level is then used as the stage or platform to build up to the next floor.Joists are run perpendicular to the sill plate and a joist header is then attached to the end of each individual joist. Next, studs are attached to the joints and run the height on ground to ceiling.
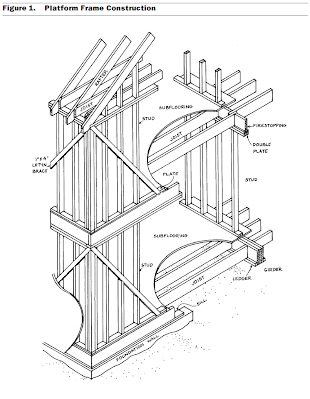
Once the necessary amount of floors is reached, rafters and roof joints are constructed. Advantages to using platform framing:
- uses minimal amount of wood
- smaller pieces of wood can be used
- fire stopping does not need to be used (stud spaces are enclosed by floor platforms)
- very safe to construct (simple tools are used)
- requires less labor (low construction costs)
About Balloon Framing
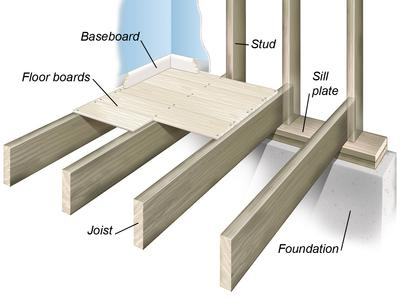
Balloon Framing is an older and less effective wood construction method compared to platform framing and no longer used in today’s modern construction practices. that stopped in the 1930s. The members used are the same as in platform framing except that the stud sizes are much larger. This is because the studs run continuously from the sill on top of the foundation to rafters. Upper floor construction is different.

Floor joists are supported on a ribbon rather than a joist header and all run off of the same studs that are running up the house’s entire height. Instead of relying on joinery, nails are used to secure each piece and create the frame.
A few disadvantages:
- potential fire hazard (typically uninstalled wall cavities that run continuously allow fire to spread quickly)
- labor intensive
- expensive (due to heavy and large amounts of wood used)
About Steel Framing for Homes

Steel framing offers a strong, accurate, stable, and durable framing alternative to traditional wooden frames. In fact, lightweight steel framing is the superior choice for residential construction. Steel frames come in a wide range of sizes and shapes, much more so than standard lumber, and yield a high-quality home.
Most steel construction involves extremely strong light gauge steel. Prepared in a factory and assembled on-site, steel framing can accommodate essentially any structural need.
Buildings can deteriorate over time without regular maintenance and care. Steel framing, however, is a good building alternative because it is known for its ability to withstand common causes of deterioration, requiring low maintenance needs. Your steel building lifespan can increase if you maintain it regularly and address small damage in a timely manner.

There are many reasons why home builders are turning to steel framing as replacements for wood, especially for those who want to leave a smaller ecological footprint.
Which Foundation Is Better for Building a Home: Slab or Crawl Space – Slab and crawl space are the most popular foundation choices, but each one has key features that can make all the difference in the construction of your home
Pros of Steel Framing – Steel is a lightweight and high-quality material that weighs less than wood and has many other advantages as a framing material.
Durability – Steel has the upper hand over wood when it comes to durability. Steel doesn’t warp or expand, and it can withstand extreme earthquakes and hurricanes because it’s flexible and can bend without cracking. The lifespan for steel framing with exterior exposures in higher humidity and external pollutants is estimated to be 150 years or more.
Fire Resistance – Steel’s inflammability limits the spread of fires, which wooden frames simply can’t compete with.
Although it does not burn, steel tends to lose strength once exposed to temperatures over 550 degrees Fahrenheit—residential house fires can reach 1,100 degrees Fahrenheit—at which steel retains only 50% of its normal strength.
Moisture Resistance – Steel is highly resistant to mold and copes better with water damage than wood does. Galvanized steel or zinc coating treatments also increase rust resistance.
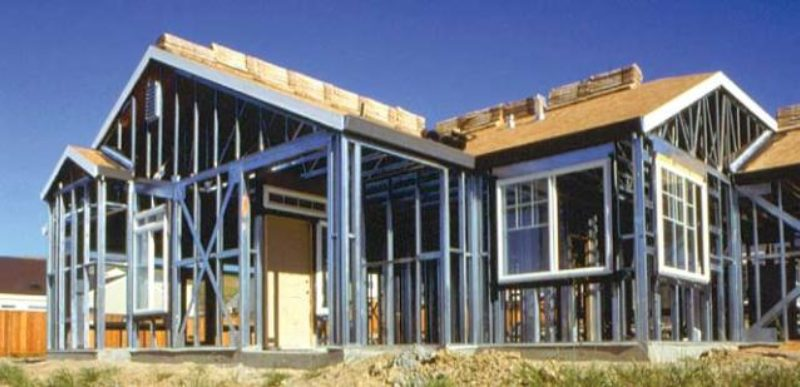
Time-Saving – No heavy equipment is necessary when building steel framing. Steel components can be quickly ready-made then transported to the site for a quick assembly. They are also manufactured with pre-punched holes for running piping and electrical wiring, minimizing preparation work or additional labor.
Customizable – Steel framed homes provide homeowners with customization cladding options such as brick siding, wood, cement, and vinyl. You can also easily remodel your home’s steel frame, as non-loadbearing walls can easily be removed, altered, or relocated.
Environmentally Friendly – Steel is not made of hazardous chemicals, and it does not require more processing when it is reused. All steel products are 100% recyclable—the steel industry is the single largest recycler in North America. This reduces building waste from your construction site.
Cons of Steel Framing – While steel framing does have some advantages, it also has some drawbacks.
Insulation – Steel-framed houses suffer from relatively poor insulation and low energy efficiency. This is because steel conducts more heat than wood does, reducing the insulating properties by 60% because of thermal bridging. This may lead to higher energy costs. One effective way for a homeowner to counteract this problem is to wrap insulation board around the steel beams, in addition to typical insulation between studs. Another option is using hybrid steel/wood frames, which take advantage of both steel and wood’s strength, durability, and support benefits. A local insulation contractor will be able to tell which solution fits your home.
Design Limitations – Steel framed homes are durable but have limitations when it comes to roofing designs. Unlike wood roofs, metal-framed roofs rarely have high pitches or dormers. Adding a wooden frame for the roof of a steel-framed home can solve this design problem, though.
Rust – While steel is immune to damage, rust can become a real problem, especially when metal is exposed to leak for long periods of time. If left untreated, rust can affect the stability of your infrastructure and lead to costly repairs. However, barrier coatings and paints are readily available to coat steel surfaces and isolate them from water, sun, and oxygen to withstand corrosion.
Cost – Steel frames are slightly more expensive than their wood frame counterparts. To install steel frames, builders need special tools. Making metal frames will cost between 10 and 20% more than wood frames. Add additional insulation costs, rust prevention, and any extra work when adding or modifying walls when you hire qualified house framing contractors. However, steel-framed homes would have lower insurance fees in some areas.
Foundations
About Slab Foundations

A slab foundation (or slab on grade) is a layer of concrete, generally poured out over a prepared surface of soil or gravel, upon which a house or other structure is built. More appropriate to climates where ground freezing and thawing, and the associated soil movement, are not of particular concern, slab foundations are nevertheless anchored into the ground securely to prevent structural damage from environmental causes such as severe weather or shifting of the soil. While a structure built on a slab foundation has no “below grade” space that can be used for residential or storage purposes, it’s generally much less costly to build than a comparable structure with a basement.

Beside providing a stable, flat, and level surface for occupants, a slab’s purpose is to distribute much of the weight that’s placed upon it. For example, many walls are “load bearing,” and without a foundation of some sort to rest upon, would not only sink into the soil to some extent, but would also respond to the soil’s every movement. This is one reason that the soil underneath slab-type foundations must be prepared before the concrete is poured. For example, the soil will usually be leveled and overlaid with gravel and moisture barriers. The thickness of the foundation is calculated based upon a number of factors, including the anticipated load the slab will bear.
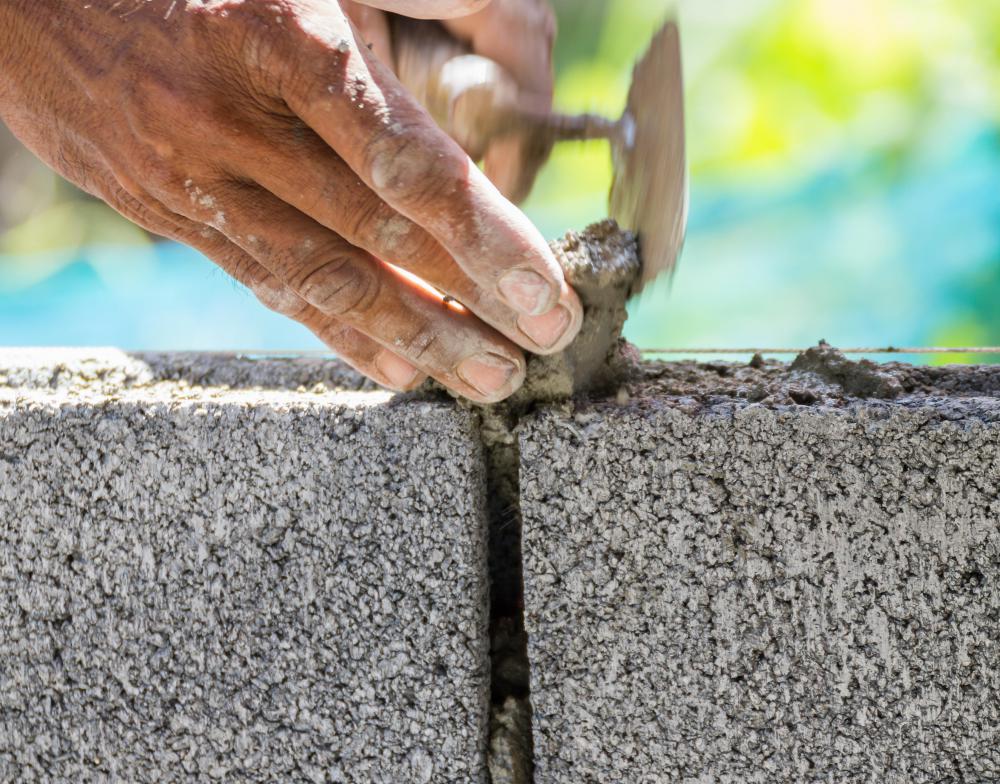
Another critical element of slab construction is footings — “anchors” of concrete poured into holes dug in the ground for that purpose. When the foundation is poured, it either rests on these anchors or is attached to them by means of rebar, reinforcing bars made of steel that are sunk into the footings while they’re still wet, providing a high degree of stability for the slab foundation.
The main benefit of slab-type foundations is cost; a slab is the least costly foundation option available. There are many drawbacks to a slab foundation, though, especially in residential construction. For instance, a slab puts a great deal of stress on the legs, feet, and backs of the inhabitants when they walk on the ground floor. Even with carpeting, much of the shock of every step taken is absorbed by the skeleton and not the floor. Plumbing and electrical lines are either run down through the slab, making access difficult, or must run out a wall, incurring added costs of securing and weatherizing.
About Post and Pier Construction
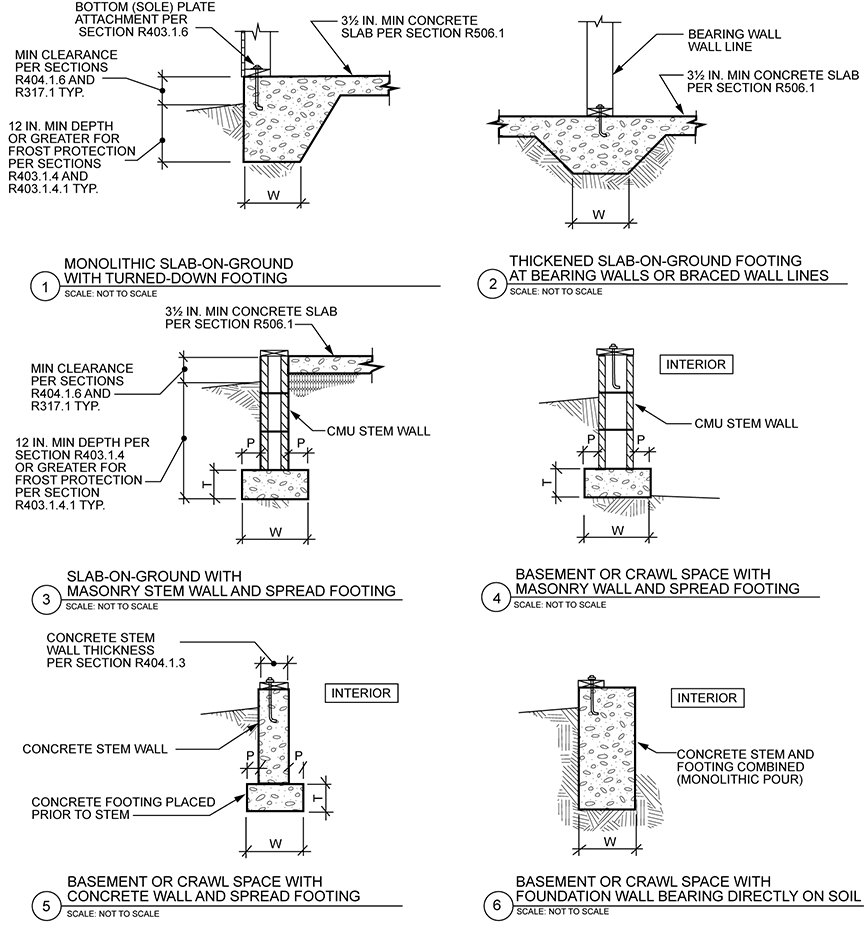
Post and pier construction is very popular in Hawai`i and is a technique used to build the foundations of many single wall construction homes and can be built quickly. This type of construction is characterized by lack of a perimeter foundation or foundation pad. It is often employed in the tropics and in flood-prone regions, for reasons which will become apparent shortly, and it is also commonly used in low-cost construction.
In post and pier construction, the weight of a home is distributed across a series of posts installed under the home and mounted to piers, which may be wedge-shaped or square concrete blocks that distribute the weight across the ground. Typically, posts and piers are mounted all the way around the perimeter, and at key points in the middle of the home to ensure that the floors, and the rest of the house, do not sag.

Obviously, a home which has been built using this construction method does not have a basement, because the house is elevated. It is not uncommon to use cladding or facing between the ground and the floor of the home so that the underside of the house is not exposed, although in some regions, this area is left open.
In areas where flooding is common, post and pier construction can significantly reduce flood damage, as the house is lifted above the water. Areas prone to subsidence can also be suitable for this construction method, as a perimeter or slab foundation would crack, whereas individual posts and piers can be jacked up and replaced as needed. It also tends to keep insects out and reduces mold, mildew, and rot, because it promotes air circulation under the house and lifts the house out of range of insect pests.
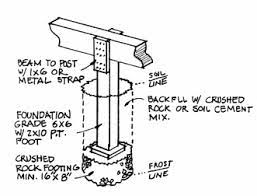
The danger of post and pier construction is that, if posts or piers start to fail, it can be dangerous. In perimeter and slab foundations, the weight is distributed very evenly, so a partial failure or crack is an issue, but not an immediate safety problem. In post and pier homes, the weight is concentrated on the individual spots, so if something breaks, rots, or shifts, that area of the house may start to sag. In extreme cases, a house may even crack open as the weight shifts across the remaining posts and piers.
About Walkout Basements

When building a house, the first consideration is your basement. After all, a house without a solid foundation isn’t much of a house. But when it comes to your basement, you have options besides four block walls and a load of backfill. Lots of homeowners prefer a walkout basement. But what is a walkout basement?
A walkout basement is the basement of a house that features at least one wall entirely above grade. This allows homeowners to put a door in their foundation wall, allowing them access directly to the basement.
The advantages of a walkout basement are clear: easier access to the basement, more natural light, and the potential to add a basement apartment or in-law suite. But there are also cons, efflorescence and high humidity and water vapor conditions can be problematic
A walkout basement allows someone to literally “walk out” of a basement. That means that some part of one or more basement walls is completely above grade. A walkout basement may be part of the original plan for the house or added after the fact.

Walkout basements are most commonly found where the property’s slope is great enough where one end of the structure sits completely above grade and the other end is mostly below. There are many other instances where a walkout basement is found, but a sloped yard is most common.
Homeowners can create a walkout basement as a renovation, although this is typically a very large undertaking, not to mention costly. Creating a walkout basement in an existing house is also only practical for a house on a slope. It doesn’t work as much for homes below grade, which would require a dug-out stairwell to “walk out”.
About Masonry Foundation; Stone, Brick, CMU Block

A masonry foundation is a structural foundation made from masonry. Historically, bricks or dressed stone were often used to create this type of foundation. Today, concrete masonry units (CMUs) are a common choice of building material for a new masonry foundation or a retrofitted foundation. The purpose of a masonry foundation is to support the weight of a structure while distributing the weight across subsurface strata, and to act as an anchor to keep the structure in place.
Masonry foundations are established in the form of perimeter or pier foundations. A perimeter foundation follows the footprint of the structure, with the weight being transferred evenly across the entire perimeter. Pier foundations consist of a series of masonry piers scattered across the footprint to support the weight, which is typically transferred by posts. Perimeter foundations are generally preferred in new construction.
A number of considerations go into the design and installation of a masonry foundation. It is important to make sure that the foundation is large and sturdy enough to support the weight of the structure, and to address issues such as groundwater seepage. A masonry foundation is at risk of a number of problems which can be addressed during the design phase to make the foundation more stable. A poorly designed foundation can fail, causing serious problems and leading to expensive repair bills.
Efflorescence

…is evidence of moisture or water vapor moving through masonry. While this is common and not typically structurally significant, this area will need to be monitored, the steel rebar within can rust and expand causing damage. Other water vapor related conditions include but are not limited to; staining at stored belongings, higher “humidity” levels, water vapor damage. Plans should be made to install a water management system to keep water from entering the this area if needed

One common issue is settling and ground movement. Over time, ground naturally settles, which causes houses to list. In extreme cases, houses can even crack in two as a result of settling. Ground movement caused by earthquakes, landslides, and other events can also be a problem, as can frost heave, which occurs in cold climates. Water intrusion is also an issue, especially when a house is built into a hillside, in which case water runoff will tend to erode the foundation.
The depth of a foundation varies, depending on the size of the structure. High rises need very specialized foundations which penetrate deep into the ground to anchor and support the structure. Homes need much smaller foundations, and have less stringent design requirements. It is also much easier to retrofit the foundation of a home, with the home simply being jacked up while the foundation is replaced. While the foundation is being retrofitted, it is usually possible for people to continue using the structure, although they may need to exercise caution to avoid disturbing the jacks used to hold the house up.
Structural vs. Non-structural Foundation Cracks
Cracks in the foundation of a home can be classified broadly into two categories – structural cracks and non-structural cracks. Let’s delve deeper into them. Is there any difference? Yes, there’s a big difference between these two types of cracks, and as you’ll soon find out, their ramifications differ too. One is superficial in nature and less severe, while the other is deep-seated and potentially dangerous. Knowing the differences between these two will help you identify which type of crack you’re dealing with and take the appropriate measures.
If you’re not sure of what kind of crack has developed, ask your local contractor to come and inspect the foundation. They will tell you what sort of crack has appeared on your foundation and recommend a cost-effective solution. Feel free to ask for a breakdown of foundation repair costs before work starts.
Non-structural Cracks in the Foundation
Also known as cosmetic cracks, these don’t pose a threat to the structural integrity of your home. They can occur over time because of changes in weather conditions, thermal movement, hydrostatic pressure and exposure to moisture. Some cracks appear because of aging. Well, many of these factors are natural and universal. Some of the major signs of non-structural cracks in the foundation include:
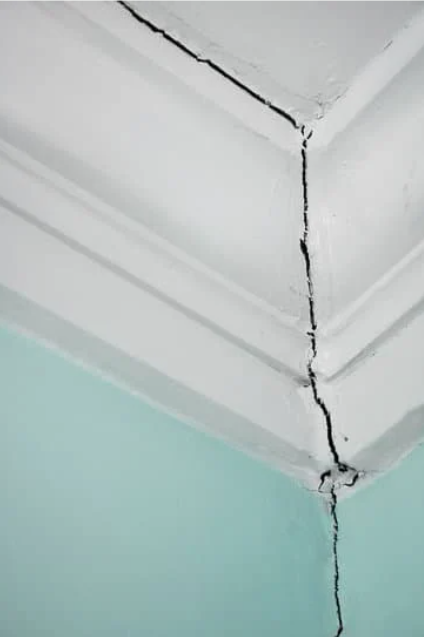
- Cracks on plaster
- Vertical or diagonal cracks
- Narrow cracks measuring 1-2 mm wide
- Cracks near doors or the edge of the window
Unlike structural cracks, cosmetic ones are mostly thin and less aggressive. They don’t require elaborate repairs. Crack injection method is commonly used to repair them. When fixed, they tend to last long. The only thing you should worry about is when water starts seeping through them. When this happens, it can lead to mold growth.
Structural Cracks in the Foundation
As the name suggests, structural cracks occur because of poor construction sites, overloading or poor soil bearing. These cracks may not introduce water right away, but over time, you can rest assured they will. Telltale signs of structural cracks in your foundation are:
- Stair-step cracks
- Cracks on foundation slabs or beams
- Vertical cracks that are wide at the bottom or top
- Cracks measuring 1/8″ in width
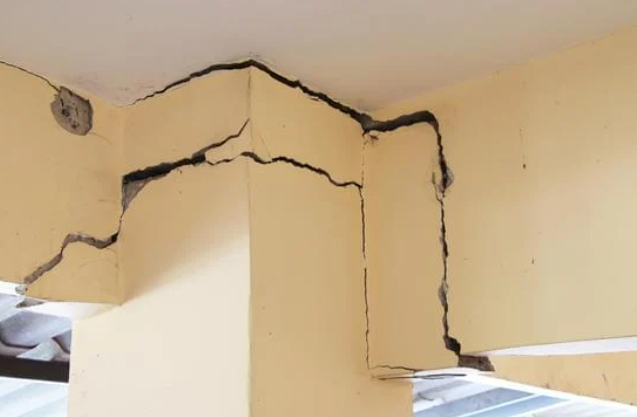
Structural cracks in concrete walls and the foundation signify a considerable shift in the home’s foundation. Any delay in fixing the problem will only lead to further problems. Repairs will get more expensive and complicated. Only a qualified basement and foundation repair contractor should handle the problem.
Because of the risks they pose to your home and loved ones, structural cracks should be fixed by a competent foundation repair contractor as soon as possible. The most common method of repairing them is installing carbon fiber strips or reinforcing steel beams to the damaged walls.
When Should I Worry About Foundation Cracks?
A number of things should alert you to the possibility that you’re not just dealing with a simple problem. The first is a crack that’s more than a quarter of an inch wide. If you have such a crack, contact your foundation repair contractor immediately. The other sign is the number of cracks in the foundation. It’s normal to have a few cracks. But if you have many cracks that cut across the length or breadth of your foundation, that’s a bad sign.

Cracks in the foundation will also affect your frames, beams and roofing. Doors and windows can refuse to shut properly. Walls may leak, especially if you have a basement. All these should ring bells that there could be a structural problem with the foundation. The severity of a crack depends on the size, location and number of cracks in the foundation.
Whether harmless or severe, never ignore the signs of a crack on your foundation. Pay attention to other areas of the home too. Monitor changes to cracks and identify new ones. Seek the opinion of a basement and foundation repair contractor. By inspecting your home, they will be able to determine the kind of crack and recommend a corrective solution.
Stucco Cracks
Are They Serious?

Stucco, made from cement, sand, lime, and water, is a durable and low-maintenance siding choice. Yet, like any material with cement, stucco can develop cracks. While various factors can lead to stucco cracks, the main culprits are the house settling and natural drying-induced stresses.
Understanding Stucco Cracking Issues
Not all stucco cracks are equal; smaller hairline cracks aren’t as serious as larger ones. However, even hairline cracks can allow moisture into your walls, leading to more significant problems like material softening, peeling, and even mold growth. Moisture trapped in walls can cause paint issues, wood rot, musty smells, and irreversible damage.

Small cracks, typically less than 1/16 inches, usually don’t compromise the stucco’s integrity. Swiftly repairing them with high-quality caulk, textured to blend with the surface, and proper painting can prevent further deterioration.
In Hawai`i, where rain is common, it’s advisable to check and fix any stucco cracks before the rainy season to maintain your home’s stucco effectively.
Identifying Serious Stucco Cracks
Unlike hairline cracks, larger ones may suggest a structural problem. These often appear at wall intersections, upper corners of windows/doors, or joints between wood and masonry. Large cracks, wider than 1/16 inches, with misaligned edges, may indicate significant structural shifts, like uneven foundation settling.
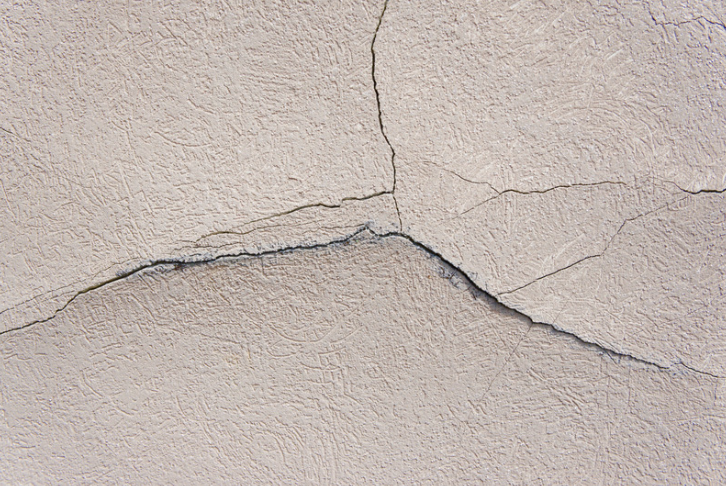
For large or deep cracks, it’s crucial to consult a professional. Attempting repairs without understanding the root cause can lead to recurring issues. Professionals can assess the situation, provide the right solution, and ensure the problem doesn’t return.
Since stucco shields your home in Hawai`i, addressing even the smallest crack promptly using quality products is vital for your home’s health and durability.
Electrical
Aluminum Wiring; Understanding the Potential Issues
About Aluminum Wiring
by Nick Gromicko, CMI® and Kenton Shepard

Between approximately 1965 and 1973, single-strand (solid) aluminum wiring was sometimes substituted for copper branch-circuit wiring in residential electrical systems due to the sudden escalating price of copper. After a decade of use by homeowners and electricians, inherent weaknesses were discovered in the metal that lead to its disuse as a branch wiring material. Aluminum will become defective faster than copper due to certain qualities inherent in the metal. Neglected connections in outlets, switches and light fixtures containing aluminum wiring become increasingly dangerous over time. Poor connections cause wiring to overheat, creating a potential fire hazard. In addition, the presence of single-strand aluminum wiring may void a home’s insurance policies. Inspectors may instruct their clients to talk with their insurance agents about whether the presence of aluminum wiring in their home is a hazard, a defect, and a problem that requires changes to their policy language.
According to the InterNACHI Home Inspection Standards of Practice, a home inspector is required to report upon single-strand, solid conductor aluminum branch-circuit wiring, if observed by the home inspector.
Facts and Figures
- On April, 28, 1974, two people were killed in a house fire in Hampton Bays, New York. Fire officials determined that the fire was caused by a faulty aluminum wire connection at an outlet.
- According to the Consumer Product Safety Commission (CPSC), “Homes wired with aluminum wire manufactured before 1972 [‘old technology’ aluminum wire] are 55 times more likely to have one or more connections reach “Fire Hazard Conditions” than is a home wired with copper.”
Aluminum as a Metal
Aluminum possesses certain qualities that, compared with copper, make it an undesirable material as an electrical conductor. These qualities all lead to loose connections, where fire hazards become likely. These qualities are as follows:
- higher electrical resistance. Aluminum has a high resistance to electrical current flow, which means that, given the same amperage, aluminum conductors must be of a larger diameter than would be required by copper conductors.
- less ductile. Aluminum will fatigue and break down more readily when subjected to bending and other forms of abuse than copper, which is more ductile. Fatigue will cause the wire to break down internally and will increasingly resist electrical current, leading to a buildup of excessive heat.
- galvanic corrosion. In the presence of moisture, aluminum will undergo galvanic corrosion when it comes into contact with certain dissimilar metals.
- oxidation. Exposure to oxygen in the air causes deterioration to the outer surface of the wire. This process is called oxidation. Aluminum wire is more easily oxidized than copper wire, and the compound formed by this process – aluminum oxide – is less conductive than copper oxide. As time passes, oxidation can deteriorate connections and present a fire hazard.
- greater malleability. Aluminum is soft and malleable, meaning it is highly sensitive to compression. After a screw has been over-tightened on aluminum wiring, for instance, the wire will continue to deform or “flow” even after the tightening has ceased. This deformation will create a loose connection and increase electrical resistance in that location.
- greater thermal expansion and contraction. Even more than copper, aluminum expands and contracts with changes in temperature. Over time, this process will cause connections between the wire and the device to degrade. For this reason, aluminum wires should never be inserted into the “stab,” “bayonet” or “push-in” type terminations found on the back of many light switches and outlets.
- excessive vibration. Electrical current vibrates as it passes through wiring. This vibration is more extreme in aluminum than it is in copper, and, as time passes, it can cause connections to loosen.
Identifying Aluminum Wiring
- Aluminum wires are the color of aluminum and are easily discernible from copper and other metals.
- Since the early 1970s, wiring-device binding terminals for use with aluminum wire have been marked CO/ALR, which stands for “copper/aluminum revised.”
- Look for the word “aluminum” or the initials “AL” on the plastic wire jacket. Where wiring is visible, such as in the attic or electrical panel, inspectors can look for printed or embossed letters on the plastic wire jacket. Aluminum wire may have the word “aluminum,” or a specific brand name, such as “Kaiser Aluminum,” marked on the wire jacket. Where labels are hard to read, a light can be shined along the length of the wire.
- When was the house built? Homes built or expanded between 1965 and 1973 are more likely to have aluminum wiring than houses built before or after those years.
Options for Correction
Aluminum wiring should be evaluated by a qualified electrician who is experienced in evaluating and correcting aluminum wiring problems. Not all licensed electricians are properly trained to deal with defective aluminum wiring. The CPSC recommends the following two methods for correction for aluminum wiring:
- Rewire the home with copper wire. While this is the most effective method, rewiring is expensive and impractical, in most cases.
- Use copalum crimps. The crimp connector repair consists of attaching a piece of copper wire to the existing aluminum wire branch circuit with a specially designed metal sleeve and powered crimping tool. This special connector can be properly installed only with the matching AMP tool. An insulating sleeve is placed around the crimp connector to complete the repair. Although effective, they are expensive (typically around $50 per outlet, switch or light fixture).
Although not recommended by the CPSC as methods of permanent repair for defective aluminum wiring, the following methods may be considered:
- application of anti-oxidant paste. This method can be used for wires that are multi-stranded or wires that are too large to be effectively crimped.
- pigtailing. This method involves attaching a short piece of copper wire to the aluminum wire with a twist-on connector. the copper wire is connected to the switch, wall outlet or other termination device. This method is only effective if the connections between the aluminum wires and the copper pigtails are extremely reliable. Pigtailing with some types of connectors, even though Underwriters Laboratories might presently list them for the application, can lead to increasing the hazard. Also, beware that pigtailing will increase the number of connections, all of which must be maintained. Aluminum Wiring Repair (AWR), Inc., of Aurora, Colorado, advises that pigtailing can be useful as a temporary repair or in isolated applications, such as the installation of a ceiling fan.
- CO/ALR connections. According to the CPSC, these devices cannot be used for all parts of the wiring system, such as ceiling-mounted light fixtures or permanently wired appliances and, as such, CO/ALR connections cannot constitute a complete repair. Also, according to AWR, these connections often loosen over time.
- alumiconn. Although AWR believes this method may be an effective temporary fix, they are wary that it has little history, and that they are larger than copper crimps and are often incorrectly applied.
- Replace certain failure-prone types of devices and connections with others that are more compatible with aluminum wire.
- Remove the ignitable materials from the vicinity of the connections.
In summary, aluminum wiring can be a fire hazard due to inherent qualities of the metal. Inspectors should be capable of identifying this type of wiring.
Arc-Fault Circuit Interrupters (AFCIs)
by Nick Gromicko, CMI® and Kenton Shepard

Arc-fault circuit interrupters (AFCIs) are special types of electrical receptacles or outlets and circuit breakers designed to detect and respond to potentially dangerous electrical arcs in home branch wiring.
How do they work?
AFCIs function by monitoring the electrical waveform and promptly opening (interrupting) the circuit they serve if they detect changes in the wave pattern that are characteristic of a dangerous arc. They also must be capable of distinguishing safe, normal arcs, such as those created when a switch is turned on or a plug is pulled from a receptacle, from arcs that can cause fires. An AFCI can detect, recognize, and respond to very small changes in wave pattern.
What is an arc?
When an electric current crosses an air gap from an energized component to a grounded component, it produces a glowing plasma discharge known as an arc. For example, a bolt of lightening is a very large, powerful arc that crosses an atmospheric gap from an electrically charged cloud to the ground or another cloud. Just as lightning can cause fires, arcs produced by domestic wiring are capable of producing high levels of heat that can ignite their surroundings and lead to structure fires.
According to statistics from the National Fire Protection Agency for the year 2005, electrical fires damaged approximately 20,900 homes, killed 500 people, and cost $862 million in property damage. Although short-circuits and overloads account for many of these fires, arcs are responsible for the majority and are undetectable by traditional (non-AFCI) circuit breakers.
Where are arcs likely to form?
Arcs can form where wires are improperly installed or when insulation becomes damaged. In older homes, wire insulation tends to crystallize as it ages, becoming brittle and prone to cracking and chipping. Damaged insulation exposes the current-carrying wire to its surroundings, increasing the chances that an arc may occur.
Situations in which arcs may be created:

- electrical cords damaged by vacuum cleaners or trapped beneath furniture or doors.
- damage to wire insulation from nails or screws driven through walls.
- appliance cords damaged by heat, natural aging, kinking, impact or over-extension.
- spillage of liquid.
- loose connections in outlets, switches and light fixtures.
Where are AFCIs required?
Locations in which AFCIs are required depend on the building codes adopted by their jurisdiction.
The 2006 International Residential Code (IRC) requires that AFCIs be installed within bedrooms in the following manner:
E3802.12 Arc-Fault Protection of Bedroom Outlets. All branch circuits that supply120-volt, single-phase, 15- and 20-amp outlets installed in bedrooms shall be protected by a combination-type or branch/feeder-type arc-fault circuit interrupter installed to provide protection of the entire branch circuit.
Exception: The location of the arc-fault circuit interrupter shall be permitted to be at other than the origination of the branch circuit, provided that:
- The arc-fault circuit interrupter is installed within 6 feet of the branch circuit overcurrent device as measured along the branch circuit conductors, and
- The circuit conductors between the branch circuit overcurrent device and the arc-fault circuit interrupter are installed in a metal raceway or a cable with metallic sheath.
The National Electrical Code (NEC) offers the following guidelines concerning AFCI placement within bedrooms & most living spaces:
Dwelling Units. All 120-volt, single phase, 15- and 20-ampere branch circuits supplying outlets installed in dwelling unit in family rooms, dining rooms, living rooms, parlors, libraries, dens, sun rooms, recreation rooms, closets, hallways, or similar rooms or areas shall be protected by a listed arc-fault circuit interrupter, combination-type installed to provide protection of the branch circuit.
Home inspectors should refrain from quoting exact code in their reports. A plaintiff’s attorney might suggest that code quotation means that the inspector was performing a code inspection and is therefore responsible for identifying all code violations in the home. Some jurisdictions do not yet require their implementation in locations where they can be helpful.
What types of AFCIs are available?

AFCIs are available as circuit breakers for installation in the electrical distribution panel.
Nuisance Tripping
An AFCI might activate in situations that are not dangerous and create needless power shortages. This can be particularly annoying when an AFCI stalls power to a freezer or refrigerator, allowing its contents to spoil. There are a few procedures an electrical contractor can perform in order to reduce potential “nuisance tripping,” such as:
- Check that the load power wire, panel neutral wire and load neutral wire are properly connected.
- Check wiring to ensure that there are no shared neutral connections.
- Check the junction box and fixture connections to ensure that the neutral conductor does not contact a grounded conductor.
Arc Faults vs. Ground Faults
It is important to distinguish AFCI devices from Ground Fault Circuit Interrupter (GFCI) devices. GFCIs detect ground faults, which occur when current leaks from a hot (ungrounded) conductor to a grounded object as a result of a short-circuit. This situation can be hazardous when a person unintentionally becomes the current’s path to the ground. GFCIs function by constantly monitoring the current flow between hot and neutral (grounding) conductors, and activate when they sense a difference of 5 milliamps or more. Thus, GFCIs are intended to prevent personal injury due to electric shock, while AFCIs prevent personal injury and property damage due to structure fires.
In summary, AFCIs are designed to detect small arcs of electricity before they have a chance to lead to a structure fire.
AFCIs; Nuisance Tripping

AFCI circuit breakers are specialty safety devices that have been around for well over two decades, and their job is to prevent fires. They get better and better as time goes on, but they’re still not a perfect product. The main problem that homeowners experience with older AFCI circuit breakers is nuisance tripping. It’s what we call it when an AFCI device trips for no apparent reason. The two main causes for nuisance tripping at AFCI circuit breakers are improperly wired circuits and incompatibility with electronic devices.
Wiring Problems – when an AFCI circuit breaker is installed, the wiring for that circuit needs to be done a little bit differently. When AFCI devices first started being installed, it was common for electricians to have problems with nuisance tripping because the neutral conductors for different circuits were connected together at some point outside of the main panelboard. This has never been correct, but it would often happen with no ill effects, so nobody knew it was wrong. With AFCI circuit breakers, this improper wiring will cause the breaker to trip.
Another wiring problem is more of an incompatibility issue than a wiring issue, and it has to do with multi-wire circuits. Check out Charles Buell’s blog post for a good explanation of a multi-wire circuit. When older AFCI single-pole circuit breakers were used on multi-wire circuits, the circuit breakers would trip as soon as a load was applied to the circuit. Today, manufacturers make AFCI circuit breakers that are compatible with multi-wire circuits. GE makes single-pole breakers that are compatible with multi-wire circuits, Siemens makes a 2-pole AFCI circuit breaker, and so does Square D.
Incompatible Electronic Devices – AFCI devices prevent fires by detecting electrical arcs, and attempting to differentiate normal electrical arcs from those that could cause a fire. Unfortunately this isn’t a perfect science, and many electronic devices fool AFCI devices into thinking there is a dangerous arc even when there isn’t, leading to nuisance tripping. Some of the most common offenders are treadmills, televisions, and fluorescent lights. Check out this 2011 document on nuisance tripping from the National Electrical Manufacturers Association (NEMA): Recommendations on AFCI / Home Electrical Product Compatibility. Some electronic devices simply give AFCI devices problems. Newer generations of AFCI devices are less prone to problems, but are certainly not immune.
What to do – If you have an electronic device that constantly trips an AFCI device, try using it on a different AFCI circuit. If this same device trips a different AFCI circuit breaker, it’s the result of incompatibility between the electronic device and the AFCI breaker, or possibly a major problem with the device. If using this same device on a different AFCI breaker does not produce the same nuisance tripping, try having an electrician replace the AFCI breaker that was experiencing the nuisance tripping. If you don’t know what’s tripping your AFCI device, try unplugging everything, then using one thing at a time until the problem can be duplicated.
If none of that helps, it’s time to call in an electrician to troubleshoot. In some cases, an AFCI device may trip without anything plugged into any outlets; in those cases, it’s likely a wiring problem. Unfortunately, some electricians get tired of troubleshooting tripping AFCIs and give up. The panel shown below was installed in a 2012 built home, which should have had AFCI protection for about half of the circuits in the house.

What really happened was that the electrician simply removed the AFCI circuit breakers and installed standard circuit breakers. I was at first disgusted with the electrician, but after reading about how much time and money AFCI devices have cost electricians, I understood a little bit more where the electrician was coming from… not that it excuses this in any way, of course.
I was dumbfounded to find this relatively new panel without a single AFCI circuit breaker, so I followed up with the seller. They explained to me that they kept experiencing nuisance tripping after moving into their newly built home, so their electrician installed circuit breakers that could better handle the electricity. At least that’s how it was explained to them.
BX, AX or “Armored” Electrical Cable
Credit to DonHester on Tue, 03/26/2013
As home inspectors we see a lot of wiring in locations that need protection. Many common areas I find unprotected wiring are in closets and cabinets.
But another very common area I find unprotected wiring during a home inspection is on the exterior of homes. Any wiring that is on the exterior of the home needs to be rated for use in damp or wet locations.
During a Home Inspection I came across the use of what is often called BX cable. BX is actually a brand name like Romex and Kleenex. BX is not defined as a term by the NEC and is technically called AC (armored cable).

Armored cable was first listed with Underwriters Laboratories Inc. in 1899 for the Sprague Electric Co. of New York. It was originally called “Greenfield Flexible Steel-Armored Conductors,” after one of its inventors, Harry Greenfield. Some will refer to this cable as Greenfield cable. Armored cable (AC) first appears in the 1903 NEC.
There were originally two initial versions of armored cable. One was called “AX” and the other “BX,” with the “X” standing for “experimental.” The “BX” version became the one that eventually was produced, and hence the name “BX” became the common name.BX became the registered trade name of AC Cable distributed by General Electric who had acquired Sprague Electric.

So “BX” is defined as “AC” cable (armored clad) and “MC” is defined as Metal Clad cable. These two cable assemblies are very similar in construction. (See note on FMC below)
The biggest difference between the two cable systems is that MC has full size ground wire while AC uses a combination of the jacket and a thin bonding strip or wire to function as the equipment ground. The bonding wire is unique to AC cable and this allows the outer metal armor in conjunction with the bonding wire to be used as an equipment ground.
Note: Early AC cable often does not have this bonding wire.
Now AC cable cannot be used in exterior or damp locations. Where MC Cable may be used in exterior applications but must be suitable for exterior or direct burial. This type of MC Cable will have a continuous PVC outer jacket.
Here are two examples from home inspections of AC/MC cables being used in exterior applications that are not appropriate. As you can see they do not have a protective PVC outer jacket that would allow the use on exterior applications.
Knowing when and where a type of cabling system can and cannot be used is very important in electrical installations and is often a mark that a professional has not done the work.
Note: There is also FMC, (flexible metal conduit) called by the slang of “Greenfield” that comes without conductors installed.
Cloth Wiring: Do You Need To Replace It?
By Steve MangekinMay 10, 2021
Most of the wiring found in homes is coated in plastic and this is standard and common practice. However, homes built in the 1950s-70s or even rewired during that time used cloth wiring. This is because it was inexpensive and the norm until the plastic covering became more available. Cloth wiring is cloth insulation that is around wires. If you have it in your home, do you need to replace it? The answer is yes. Replacing it with the standard plastic wiring is necessary.
Let’s take a look at why you need to know about cloth wiring, why it is dangerous, 4 point inspection, insurance, how to identify it, cost and benefits of replacing and other issues.
Why You Need to Know About Cloth Wiring
As mentioned above, cloth wiring was used in homes in the 1950’s to 1970’s. The cloth can become brittle as it deteriorates over time (that is really old wiring!) and can cause a fire. Some places it might be difficult to get homeowners insurance if this is in the home. Other places it might not matter but you are better off replacing it for safety.
Why Cloth Wiring is Dangerous
Installed 45-70 years ago
As with anything, cloth wiring can deteriorate over time.
Cloth Was Added Over Bare Wire
Another reason is that the cloth was put over the bare wire. Thus, this is a fire hazard. Eventually, the cloth over the bare wiring faded away and plastic was added in between the cloth and wire.
Insects and Rodents
They often can get to the wires quicker as the cloth deteriorates, leaving the homeowner with fire hazards and possible electrocuted pests. Also, arcing can happen which is the electricity jumping from one wire to another and exposing wires. This is very dangerous.
Asbestos
We know that asbestos was used in the ceiling tiles for a long time, but did you know that it was also used in paper? The cloth-covered wires were covered with a paper that had asbestos and then the asbestos was airborne. This is very dangerous.
Wires Are Not Insulated
The cloth covering does not provide insulation in the wires so the electricity can flow through effectively. In fact, excess heat can build up and cause a fire.
Insurance with Cloth Wiring
Some companies will ask for an electrician to evaluate the wiring. If the electrician decides that the wire is not deteriorating, he/she usually writes a letter that you can give to the insurance company. Then, the insurance company will decide if it is sufficient or if you need to replace the wiring in the home. If the insurance company does accept it, keep in mind that your premiums may be higher due to the wiring in the home.
If the electrician notes that the wiring is deteriorating, then replacing the wiring will be necessary before the insurance company will insure the home.
How to Identify Cloth Wiring
Cloth wiring used in homes came from some of the following manufacturers:
- Ammcoflex
- Dutrax
- Cirtex
- Cablex
- Cres-Flex
- Essex
- Etcoflex/Ettcoflex
- Hatflex
- KFlex
- Narax
- Paraflex
- Phelps Dodge
- Roflex/Romex
- Southwire
- Triangle PWC
Cost to Replace Cloth Wiring
An electrician may charge a few hundred dollars for replacing a few circuits, but it will also depend on the size of the home. If there are other issues such as knob and tube wiring, you can expect the cost to go into the thousands. Call a professional to get an estimate.
Benefits of Replacing Cloth Wiring
- The modern plastic insulated wiring is readily available and safe
- Plastic wiring passes inspection
- Lower premiums for insurance
- Peace of mind that the new wiring is safer
GFCI Protection
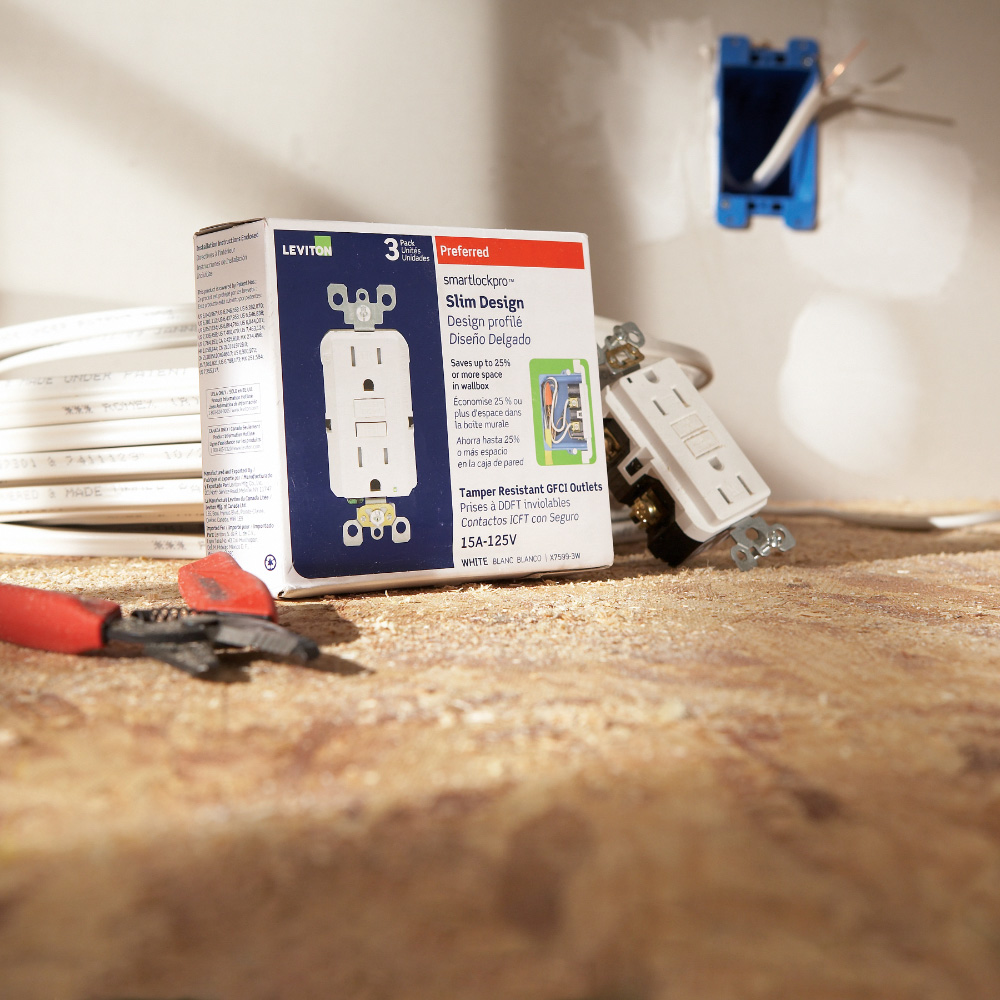
GFCI, or ground-fault circuit interrupter, protection is required in receptacles or outlets installed near a water source. Requirements and standards for GFCI are established by the National Electrical Code to protect against shock.
Where GFCIs Are Required

GFCI protection is required for 125-volt to 250-volt receptacles supplied by single-phase branch circuits rated 150 volts or less to the ground. GFCI receptacles are required in bathrooms, garages, crawl spaces, basements, laundry rooms and areas where a water source is present.
Federal Code for DwellingsThe National Electrical Code® requires GFCI protection for 125-volt to 250-volt receptacles supplied by single-phase branch circuits rated 150 volts or less to the ground in:

Bathrooms
- All areas
Garages & Accessories
- Includes areas used for storage or work
Outdoors
- Receptacles installed under the eaves of roofs
- Multifamily dwellings with individual entrances at grade level must have at least one GFCI-protected receptacle
- Outlets installed 150 volts to ground or less and up to 50 amps
CrawlspacesSpaces at or below grade level
- Areas where heating, AC and refrigeration equipment is installed
- Includes 120-volt lighting outlets
Basements
- Unfinished areas not intended for habitable rooms
- Receptacles for permanent smoke detectors or burglar alarms do not require GFCI protection
Kitchen Countertop Surfaces
- Receptacles serving countertop surfaces
- Required for dishwasher outlets
Sinks
- Receptacles within 6 feet of the top inside edge of the bowl of a sink
Boathouses
- All areas
- Includes boat hoist outlets not exceeding 240 volts
Bathtubs or Shower Stalls
- Receptacles within 6 feet of the outside edge of a bathtub or shower stall
Laundry Areas
- All areas
Federal Code for Non-Dwellings & Other Structures
GFCI protection is required for all 125-250-volt receptacles rated 50 amps or less, not exceeding 150 volts to ground, supplied by a single-phase branch circuit in:
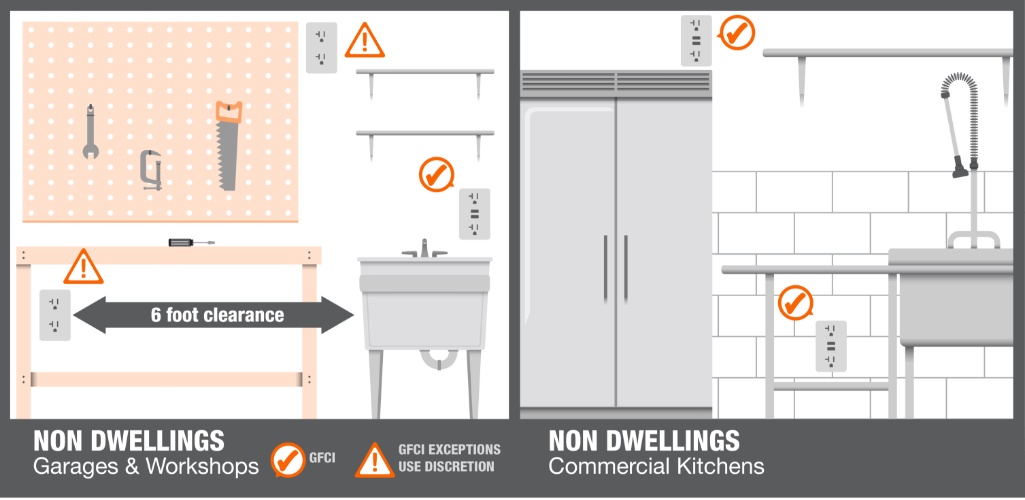
Bathrooms
- All areas
Kitchens
- All areas
Rooftops
- All areas
- Receptacles must be installed within 25 feet of heating, AC and refrigeration equipment
- Receptacles must be readily accessible from the rooftop’s surface area
Outdoors
- All areas
Sinks
- All receptacles within 6 feet of the top inside edge of the bowl of a sink
- Not required for industrial laboratory sinks where the removal of power would introduce a greater hazard
Indoor Wet Locations
- All areas
Locker Rooms
- All areas with showers
Garages
- Includes service bays and similar areas
- Does not include showrooms and exhibition halls
Crawlspaces
- All areas
Unfinished Portions of Basements
- All areas
NEC GFCI Requirements

The National Electric Code has expanded GFCI requirements in every code change since 1971, including the latest updates for 2020. These guidelines are adopted as legislation by state. Check with your state or municipality to know which NEC is used in your state.
Revisions are made every three years.
- The latest standards were released in 2020.
- The next codes and standards release is 2023.
- Anyone can submit a change via public input .
GFCI Code Changes From 2020
- Revisions to dwellings require GFCI protection in both finished and unfinished basements. They also expand outdoor protection from receptacle outlets to all outlets.
Revisions to dwellings
- Require GFCI protection in both finished and unfinished basements
- Expand outdoor protection from receptacle outlets to all outlets
Revisions to non-dwellings require GFCI protection for HVAC equipment, indoor service equipment and indoor service equipment requiring a dedicated space.
- Require GFCI protection for HVAC equipment, indoor service equipment and indoor service equipment requiring a dedicated space
GFCI Code Changes From 2017
Revisions to dwellings define distance between a water source and receptacles that require GFCI protection as “the shortest path the cord of an appliance connected to the receptacle would follow without piercing a floor, wall, ceiling, or fixed barrier, or passing through a door, doorway, or window.”
Revisions to dwellings:
- Define distance between a water source and receptacles that require GFCI protection as “the shortest path the cord of an appliance connected to the receptacle would follow without piercing a floor, wall, ceiling, or fixed barrier, or passing through a door, doorway, or window.”
Revisions to non-dwellings require GFCI protection on single-phase receptacles 50 amps or less, rated 150 volts to ground or less, and three-phase receptacles 100 amps or less, rated 150 volts to ground or less. They also expand GFCI requirements to crawl spaces at or below grade level and unfinished areas of basements.
- Require GFCI protection on single-phase receptacles 50 amps or less, rated 150 volts to ground or less, and three-phase receptacles 100 amps or less, rated 150 volts to ground or less.
- Expand GFCI requirements to crawl spaces at or below grade level and unfinished areas of basements.
Why GFCIGround-fault circuit interrupters, GFCIs or GFIs, are safety devices built into outlets that protect against electrical shock. Their circuitry monitors electrical input. When a ground fault occurs, the GFCI quickly—in a fraction of a second—shuts off the power. Ground fault causes include:

- Operating equipment in wet or damp areas
- Running faulty or leaking tools and appliances
- Using damaged cords or wiring
- Feed-Through ProtectionGFCI outlets protect all outlets on the same circuit, as well as connected tools and appliances.
Self-Testing
- The latest UL Standards require GFCIs to be self-testing. This requirement began in 2015.
GFCI Vs. GFI
- There is no difference between GFCI and GFI protection. Ground-fault circuit interrupters are commonly referred to as ground-fault interrupters.
GFCI Vs. AFCI
- Arc-fault circuit interrupters protect against fires caused by arcing faults that come from faulty or damaged wiring. GFCIs protect against electrical shocks from ground faults.
GFCI Vs. Circuit Breakers
- GFCIs are different from circuit breakers in that they are more sensitive. On their own, circuit breakers only protect against overloads and resulting fires. GFCIs, however, protect against electrical currents that are too low to trip breakers but are more than enough to cause injury. Having both GFCI and circuit breakers helps safeguard against electrical shock and fires.
Knob-and-Tube Wiring
by Nick Gromicko, CMI® and Kenton Shepard

Knob-and-tube (K&T) wiring was an early standardized method of electrical wiring in buildings, in common use in North America from about 1880 to the 1940s. The system is considered obsolete and can be a safety hazard, although some of the fear associated with it is undeserved. InterNACHI inspectors should always disclaim knob-and-tube wiring during their inspections.
Facts About Knob-and-Tube Wiring:
- It is not inherently dangerous. The dangers from this system arise from its age, improper modifications, and situations where building insulation envelops the wires.
- It has no ground wire and thus cannot service any three-pronged appliances.
- While it is considered obsolete, there is no code that requires its complete removal.
- It is treated differently in different jurisdictions. In some areas, it must be removed at all accessible locations, while others don’t, but inspect it for safety reasons.
- It is not permitted in any new construction.
How Knob-and-Tube Wiring Works:
K&T wiring consists of insulated copper conductors passing through lumber framing drill-holes via protective porcelain insulating tubes. They are supported along their length by nailed-down porcelain knobs. Where wires enter a wiring device, such as a lamp or switch, or were pulled into a wall, they are protected by flexible cloth or rubber insulation called “loom.”
Advantages of Knob-and-Tube Wiring:
- K&T wiring has a higher ampacity than wiring systems of the same gauge. The reason for this is that the hot and neutral wires are separated from one another, usually by 4 to 6 inches, which allows the wires to readily dissipate heat into free air.
- K&T wires are less likely than Romex cables to be punctured by nails because K&T wires are held away from the framing.
- The porcelain components have an almost unlimited lifespan.
- The original installation of knob-and-tube wiring is often superior to that of modern Romex wiring. K&T wiring installation requires more skill to install than Romex and, for this reason, unskilled people rarely ever installed it.
Problems Associated with K&T Wiring:
- Unsafe modifications are far more common with K&T wiring than they are with Romex and other modern wiring systems. Part of the reason for this is that K&T is so old that more opportunity has existed for improper modifications.
- The insulation that envelopes the wiring is a fire hazard.
- It tends to stretch and sag over time.
- It lacks a grounding conductor. Grounding conductors reduce the chance of electrical fire and damage to sensitive equipment.
- In older systems, wiring is insulated with varnish and fiber materials that are susceptible to deterioration.
Compared with modern wiring insulation, K&T wiring is less resistant to damage. K&T wiring insulated with cambric and asbestos is not rated for moisture exposure. Older systems contained insulation with additives that may oxidize copper wire. Bending the wires may cause insulation to crack and peel away. K&T wiring is often spliced with modern wiring incorrectly by amateurs. This is perhaps due to the ease by which K&T wiring is accessed.
Building Insulation:
K&T wiring is designed to dissipate heat into free air, and insulation will disturb this process. Insulation around K&T wires will cause heat to build up, and this creates a fire hazard. The 2008 National Electrical Code (NEC) requires that this wiring system not be covered by insulation. Specifically, it states that this wiring system should not be in…

hollow spaces of walls, ceilings and attics where such spaces are insulated by loose, rolled or foamed-in-place insulating material that envelops the conductors.
Local jurisdictions may or may not adopt the NEC’s requirement. The California Electrical Code, for instance, allows insulation to be in contact with knob-and-tube wiring, provided that certain conditions are met, such as, but not limited to, the following:
- A licensed electrical contractor must certify that the system is safe.
- The certification must be filed with the local building department.
- Accessible areas where insulation covers the wiring must be posted with a warning sign. In some areas, this sign must be in Spanish and English.
- The insulation must be non-combustible and non-conductive.
- Normal requirements for insulation must be met.
Modifications:
When K&T wiring was first introduced, common household electrical appliances were limited to little more than toasters, tea kettles, coffee percolators and clothes irons. The electrical requirements of mid- to late-20th century homes could not have been foreseen during the late 18th century, a time during which electricity, to many, was seen as a passing fad. Existing K&T systems are notorious for modifications made in an attempt to match the increasing amperage loads required by televisions, refrigerators, and a plethora of other electric appliances. Many of these attempts were made by insufficiently trained handymen, rather than experienced electricians, whose work made the wiring system vulnerable to overloading.
- Many homeowners adapted to the inadequate amperage of K&T wiring by installing fuses with resistances that were too high for the wiring. The result of this modification is that the fuses would not blow as often and the wiring would suffer heat damage due to excessive amperage loads.
- It is not uncommon for inspectors to find connections wrapped with masking tape or Scotch tape instead of electrical tape.
K&T Wiring and Insurance:

Many insurance companies refuse to insure houses that have knob-and-tube wiring due to the risk of fire. Exceptions are sometimes made for houses where an electrical contractor has deemed the system to be safe.
Advice for those with K&T wiring:
- Have the system evaluated by a qualified electrician. Only an expert can confirm that the system was installed and modified correctly.
- Do not run an excessive amount of appliances in the home, as this can cause a fire.
- Where the wiring is brittle or cracked, it should be replaced. Proper maintenance is crucial.
- K&T wiring should not be used in kitchens, bathrooms, laundry rooms or outdoors. Wiring must be grounded in order to be used safely in these locations.
- Rewiring a house can take weeks and cost thousands of dollars, but unsafe wiring can cause fires, complicate estate transactions, and make insurers skittish.
- Homeowners should carefully consider their options before deciding whether to rewire their house.
- The homeowner or an electrician should carefully remove any insulation that is found surrounding K&T wires.
- Prospective home buyers should get an estimate of the cost of replacing K&T wiring. They can use this amount to negotiate a cheaper price for the house.
In summary, knob-and-tube wiring is likely to be a safety hazard due to improper modifications and the addition of building insulation. Inspectors need to be wary of this old system and be prepared to inform their clients about its potential dangers.
Modern 3 Wire Systems
- Neutral wire is the return conductor of a circuit; in building wiring systems, the neutral wire is connected to earth ground at only one point. North American standards state that the neutral is neither switched nor fused except in very narrowly defined circumstances. The neutral is connected to the center tap of the power company transformer of a split-phase system, or the center of the wye connection of a polyphase power system.

United States electrical codes require that the neutral be connected to earth at the “service panel” only and at no other point within the building wiring system. Formally, the neutral is called the “grounded conductor”; as of the 2008 NEC, the terms “neutral conductor” and “neutral point” have been defined in the Code to conform to what had been common usage.

- Hot is any conductor (wire or otherwise) connected with an electrical system that has electric potential relative to electrical ground or neutral.
- Ground is a safety conductor with a low impedance path to earth. It is often called the “ground wire,” or safety ground. It is either bare or has green insulation.[1]
- Leg as in “hot leg” refers to one of multiple hot conductors in an electrical system. The most common residential and small commercial service in Canada and the U.S., single split-phase, 240 V, features a neutral and two hot legs, 240 V to each other, and 120 V each to the neutral. The most common three-phase system will have three hot legs, 208 V to each other and 120 V each to the neutral. An older, but still widely used high-leg delta system uses three phases with 240 volts phase-to-phase for motor loads, and 120 volts for lighting loads by use of a center-tapped transformer; two of the phases are 120 volts to neutral. The third phase, the “high leg” of the system (also referred to as the “wild leg”), has 208 V to neutral and is not usually used for single-phase connections, so is distinctively colored. For larger commercial installations, 277/480 V or 347/600 V three phase is common.
- An outlet is defined by the NEC as “a point in the wiring system at which current is taken to utilization equipment”.[1] This definition includes receptacles, lighting, motors, etc. Ordinary switches control but do not consume electricity, and therefore are not defined as outlets in this sense.
Outlet Spacing in General Living Areas
For code purposes, “general areas” are defined as rooms such as living rooms, family rooms, bedrooms, and hallways.
Receptacles shall be installed such that no point measured horizontally along the floor line of any wall space is more than 6ft from a receptacle outlet.
This spacing is chosen so that a lamp, computer, television, or other appliance will never be more than 6 feet away from an electrical outlet.
Spacing outlets more frequently is allowed, but it is not required by code. If the space receives heavy use, such as with people charging phones or plugging in laptops, shorter spacing between outlets may be a good idea.
One exception to the rule: If the wall is less than 24 inches wide, an outlet is not required. Again, you are allowed to place an outlet in this space if you so choose.
Hallways more than 10 feet long must have at least one electrical outlet, preferably at the mid-point.
Outlet Spacing in Bathrooms
On bathroom walls, there must be a receptacle at least within 3 feet of the outside edge of the sink basin. Generally, it is desirable to install the outlet above the countertop. But the code’s 3-foot designation provides leeway in case this is not possible or practical.
Outlet Spacing in Kitchens
In kitchens, electrical outlets should be placed no farther than 48 inches apart, so that no point on the countertop is more than 24 inches away from a receptacle. Any countertop 12 inches wide or more should have an outlet on the wall behind the countertop.
Outlets should not be positioned higher than 20 inches above countertops, with certain exceptions for physically disabled persons and for islands or peninsulas where this height rule cannot be met.
Amperage of Outlet Receptacles
General-purpose outlet receptacles should have a rating that is appropriate for the amperage of the circuit they serve. Generally, these household circuits will provide 15-amps or 20-amps of service, and the outlet receptacle rating should not exceed this amperage. Check the circuit’s breaker in the service panel to find out whether it is 15 amp or 20 amp service, and choose receptacles appropriate to that rating.
There is no danger to installing 15-amp outlet receptacles on a 20-amp circuit (in fact, this is the standard practice), but under no circumstances should a 20-amp receptacle be installed on a 15-amp circuit. A 20-amp receptacle is designed to accept the special plug on heavier-use appliances, and if such an appliance plugs into a 15-amp circuit, there is a danger of drawing too much power and overloading the circuit. A 20-amp receptacle is only installed on a 20-amp or larger circuit, and it is generally reserved for locations where a heavy-duty appliance is typically used, such as an outlet that might power a space heater.
How do electrical outlets work?
Electrical outlets connect to your electrical supply via a branch circuit. Home circuits have either two or three sockets for inserting electrical cords. The two higher sockets are the “hot” and “neutral” sockets, while the lower socket is the “ground.” The hot socket connects to a black “hot” wire. The hot wire carries voltage from the panel to the outlet. The neutral socket connects to a white “neutral” wire. The neutral wire carries the leftover electrical voltage to the panel, completing the circuit. The ground socket connects to a grounding wire, which protects against short-circuiting.
The wires connect into the outlets by wrapping around screws connected to metal terminals. The hot wire charges the outlet’s hot terminal with voltage. The neutral wire connects to the neutral terminal and carries voltage back through the circuit. When you plug an appliance, you’re adding that appliance into the branch circuit by connecting it to these terminals. Voltage from the hot wire flows through the electrical cord and into the appliance, supplying it with power. Any leftover voltage exits the appliance via the neutral plug and returns to the panel via the neutral wire.
How do they wear out?
Outlets naturally start to wear down over time as a result of natural use. As you plug and unplug different devices, metal plugs are grinding up against metal terminals over and over. Eventually, all that pushing and shoving loosens the connections between the wires and the terminal screws just a little. When connections start to loosen, voltage can’t arc from wire to terminal to appliance as easily. This can lead to all sorts of different problems.
First, the more electrical resistance there is in the outlet, the more heat builds up inside of the outlet. This heat can warp the plastic of the outlet, damage its internal components, or even ignite nearby objects. Electrical resistance also makes it more difficult for voltage to flow through the circuit properly, which could make the outlet less effective. Eventually, the outlet may not be able to handle as much voltage as it should. Excess voltage could trip circuit breakers, crack or further damage outlet components, or even generate sparks.
When should I upgrade my outlets?
There are four main cases when we highly recommend you replace your existing electrical outlets. They are:
1. Your outlet is warped, damaged, or faulty
If you’ve started to notice any of the symptoms outlined above, replace your outlet immediately. Warping, cracking, discoloration, or (yikes!) sparking are all signs that the internal components of your outlet are breaking down. The easiest and most effective way to fix those problems is to replace the outlet. Contemporary fixtures last much longer than their older counterparts.
2. Your outlet is old or inadequate for your voltage needs
Even if your outlets aren’t obviously damaged, you should consider replacing them if they’re getting old. Older outlets may not be rated for the amount of voltage contemporary use requires. If you demand too much voltage, you could wear them down faster.
3. Your outlets aren’t grounded
Make sure each of your outlets has three sockets, including the ground socket. Every outlet in your home should include a ground socket. In fact, the National Electrical Code has required all outlets installed in new construction to be grounded for quite some time. Existing ungrounded outlets aren’t illegal… but they aren’t necessarily safe either.
4. The outlets in your kitchen and bathroom aren’t GFCI outlets
Finally, you should make sure all of the outlets in your kitchen and bathrooms are GFCI outlets. A GFCI (or Ground Fault Circuit Interrupter) outlet senses when the voltage-current running through it is behaving irregularly and temporarily breaks its connection with the hot wire. This enables it to prevent electric shock if an appliance suddenly contacts water while you’re using it.
GFCI outlets are three-pronged and have “test” and “reset” buttons built into their framings. “Testing” the GFCI outlet breaks its connection, cutting it off from power. “Resetting” it restores that connection, allowing voltage to flow into the outlet again. GFCI outlets are very important for proper electrical safety in your kitchen and bathroom. If you don’t have them installed already, we highly recommend investing in them.
Plumbing
Chlorinated Polyvinyl Chloride Pipes (CPVC)

CPVC tubing comes in nominal sizes ranging from 1/2 to 2 in. copper tube size (CTS), and pipe sizes ranging from 1/2 to 24 in. (Sch 40/80) iron pipe size (IPS). CPVC tubing is SDR11 (1/2 to 2 in.) with standard hydrostatic pressure ratings of 400 psi at 73ºF (2,750 kPa at 23ºC) and 100 psi at 180ºF (690 kPa at 82ºC). Consult the specific CPVC pipe manufacturer’s literature and listings for appropriate pressure ratings. CPVC tubing and pipe are sold in straight lengths.
Definition
PVC (polyvinyl chloride) that has been chlorinated via a free radical chlorination reaction. CPVC is produced by adding chlorine to PVC in a water slurry or fluidized bed chlorination process. The chlorination reaction is initiated by ultraviolet light. The chlorinated PVC is compounded with ingredients necessary for the desired properties for further processing. The chlorine added to PVC gives CPVC higher temperature performance and improved fire and corrosion resistance.
Overview
CPVC is a high-temperature plastic pressure piping system introduced for potable plumbing in 1959. It has also been used extensively in fire sprinkler systems since 1985. This material is also used for many industrial and process piping applications. CPVC pipe is available in nominal sizes from 1/2″ to 24″ and is approved in all model plumbing and mechanical codes across the United States and Canada. In addition, CPVC pipe and fittings from select manufacturers are listed for light hazard fire sprinkler systems, as defined in NFPA 13, 13R and 13D standards.
CPVC Advantages
- Safety of potable water and long-term reliability
- Resistance to corrosion, tuberculation, deposits
- Chlorine and chloramine resistance
- Lightweight, easy to transport
- Available in wide range of sizes
- Noise and water hammer resistance
- No scrap value, avoiding jobsite theft
- Durability and toughness to survive jobsite installations
- No flame used for joining, solvent cement joints
- Universal compatibility of pipes/fittings
- Professional installed appearance
CPVC Applications
- Hot and cold water plumbing distribution, residential and commercial
- Fire protection: One- and Two-Family Dwellings and Manufactured Homes (NFPA 13D), Low-Rise Residential Occupancies (NFPA 13R) and Light Hazard Occupancies (NFPA 13)
- Reclaimed water piping (purple pipe)
- Chilled water piping
- Hydronic piping and distribution (radiators, fan coils, etc.)
- Suitable for many industrial and process piping applications
Copper Water Pipes
Copper pipe is mostly used for hot and cold water distribution, as well as being regularly used in HVAC systems for refrigerant lines. Although once used in gas piping, this is no longer allowed in most jurisdictions. Copper piping works in both underground and above-ground applications, but copper can be affected by some soils and it should have a protective sleeve if used underground.
For many years, copper was the gold standard for water supply pipes, as galvanized steel fell from favor. Copper plumbing pipes can last for up to 50 years, but as it ages, copper thins out, eventually leading to pinhole leaks. More recently, various forms of plastic have replaced copper as the favorite, though copper pipes and fittings are still widely available. Due to the price of copper and the longer labor needed to install, many builders have switched to alternative water distribution piping, especially PEX.
Copper comes in different thicknesses which are labeled M, L, and K. M is the thinnest grade of copper. Copper can be connected in different ways, including compression fittings, push-fit fittings, or sweat-soldering.
Galvanized Water Pipes
If you live in a home built before 1960, chances are your plumbing system is made of galvanized steel or iron pipes. Galvanized pipes were the standard in homebuilding for decades, but times have changed, and many homeowners are making the switch to alternatives like copper.
But do you really need to worry about galvanized pipes? In this article, we’ll get into a little background on these older pipes and talk about what they mean for the health of your home and its plumbing system. If you happen to have galvanized pipes in your home, we’ll give you our two cents on how best to proceed — whether you should stick with them or have them replaced.
What Are Galvanized Pipes?
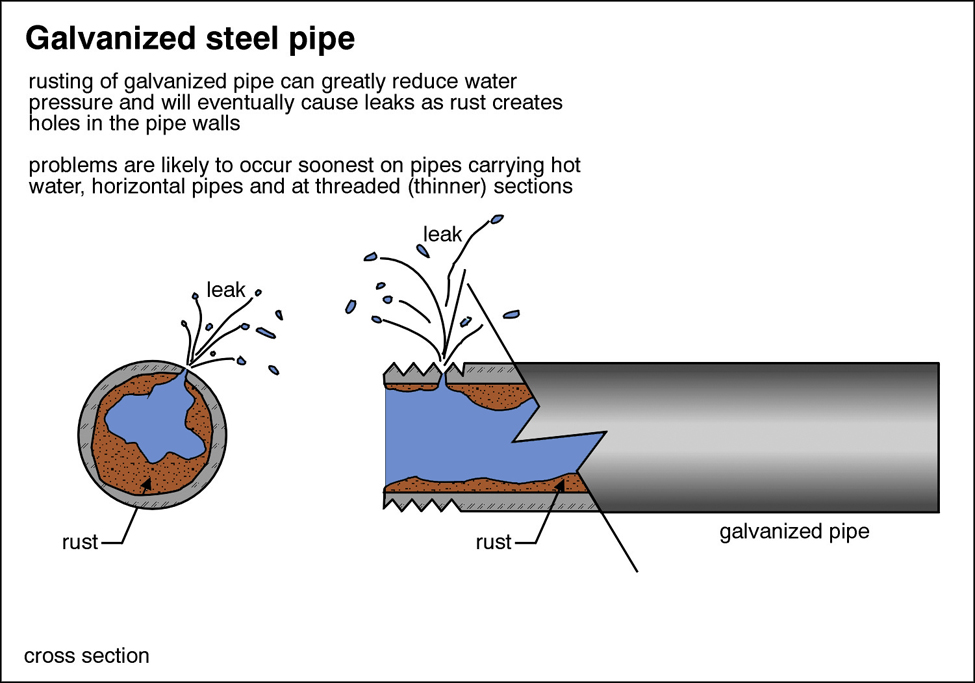
For most of the modern era, lead pipes were used when building plumbing systems (yes, even for drinking water). Thankfully, we eventually realized that lead pipes are a giant public safety hazard. So lead pipes were out, and we needed a new material. Iron and steel were perfectly good alternatives, except for one little snag; both iron and steel rusts over time.
Enter galvanization. By coating iron and steel in a protective layer of zinc, pipes had a buffer zone against the elements. Starting around 1960, these galvanized pipes became the staple in homes all around the world. Unfortunately, it wasn’t exactly a perfect solution, as you’ll soon learn.
As time went on, it became clear that there were some problems with galvanized pipes. While a freshly installed network of galvanized steel plumbing typically works without a hitch, after 30 or 40 years, a few issues start to pop up:
- Rust buildup. Galvanized pipes are often victims of corrosion and rust over time. Galvanization doesn’t stop rust, it just creates a new layer on the pipe that is exposed to rust first. But as years and decades go by, the protective zinc layer eventually becomes completely corroded.
- Low pressure and leaks. Homes with galvanized pipes can eventually suffer problems with water pressure and even leaks or pipe bursts. Pipe leaks often occur at the pipe joints — typically behind walls — where the buildup of water and moisture can go unnoticed for long periods of time. Which could mean eventual structural damage, toxic mold, and expensive repairs.
- Potential health risks. The zinc layer in galvanized pipes often contains impurities like lead or other heavy metals. Lab tests have found that galvanized pipes can have up to 10 times the amount of lead deemed hazardous by the Environmental Protection Agency. Once corrosion sets in, these contaminants can work their way into your drinking water, which is a problem you don’t want to have.
- Rust colored water. Once the interior of galvanized pipes has been corroded enough, iron can get into the water, giving it a rusty brown color.
As you can see, having a galvanized steel plumbing system is a bit of a ticking time bomb. And if you live in an older home, there’s a pretty good chance your plumbing network is using this outdated material. But how can you know for sure?
Do I Have Galvanized Pipes?
You don’t have to go digging through building records to determine if your home has galvanized pipes. Just find an area of exposed pipe and scratch it with a nickel or screwdriver to reveal its true color. Use a strong magnet; if it sticks it’s likely galvanized pipe If it looks like a penny, you have copper piping. If it looks metallic gray, you probably have galvanized steel or iron pipes.
Should Galvanized Pipes Be Replaced?
The short answer is yes, you should definitely look into an upgrade if your home is outfitted with galvanized pipes. Replacing your old pipes with new copper pipes might be an expensive job, but it can save you a ton of money in the long run. However, if your pipes seem to be in a good state currently and you aren’t planning on living in your home for several decades, you might be fine with just a little minor maintenance.
The first thing you have to consider is money saved on future repairs. Since we know that galvanized pipes break down over time, replacing them can significantly lower your chances of expensive leaks, pipe bursts and water damage.
Water damage that builds up over time can lead to some serious repair bills. And the small, undetected leaks that cause invisible water damage also waste hundreds, even thousands of gallons of water every year, costing you even more on your utility bills.
Getting Smart About Plumbing
- Upgrade your plumbing network with modern, copper pipes. In addition to being resilient to rust and corrosion, copper pipes don’t pose a risk for lead or other nasty substances. A brand-new copper plumbing system can last up to 75 years.
- Learn about different ways to maintain healthy plumbing in your home. Winterizing your pipes, learning how to deal with clogs, and taking care of your garbage disposal can save you a ton of money in the long run. Small changes can lead to huge benefits.
- Use a smart home water security system like Flo by Moen. Its Smart Water Shutoff proactively monitors your home’s water pressure and flow, as well as ambient temperature, to detect even the smallest microleak. And all that information is sent directly to your smartphone, so you can check up on the state of your plumbing wherever you are. If your pipe bursts, it is even smart enough to shut off your home’s water in order to protect it from serious damage.
- In the current landscape of plumbing technology, galvanized pipes are slowly becoming a thing of the past. New constructions virtually never use them. If you’re looking at ways to make your home last far, far into the future, replacing your old plumbing network should make its way to your to-do list.
PEX Piping; Cross-linked Polyethylene
What is PEX Plumbing?
PEX piping or cross-linked polyethylene is a type of flexible piping that has been gaining popularity recently. As an alternative to copper and galvanized piping, PEX synthetic piping is a favorite among DIYers and in new construction projects.
We’ll explain how PEX plumbing is used and go over the pros and cons for you.
PEX Piping 101
Cross-linked polyethylene was invented in the late 1960s and started appearing in homes and new construction in the U.S. in the ’80s and ’90s. First used for radiant floor heating, PEX quickly became popular due to its price, performance, and flexibility.
PEX is unique because it’s produced by linking polymer molecules in polyethylene which increases its flexibility and durability.
PEX pipe manifold in new construction
PEX Pipe Advantages
There are many benefits of PEX piping, including:
- Lower cost to install. PEX costs roughly the third of the price that copper piping costs. And if you’re looking for whole-home piping in new construction, the cost savings can really add up. Also, the price of copper varies in different markets while PEX is less prone to price changes.
- Corrosion resistance. Unlike galvanized steel pipes and copper piping, PEX is resistant to corrosion, mineral buildup, and erosion.
- Ease of installation. For many minor DIY projects, it doesn’t require a plumbing license to do your own PEX pipe installation (although there are special tools). For example, one can replace old pipes in a leaky sink. Since PEX is flexible, it allows for easy installation in hard to reach places.
- Efficiency. PEX pipes have a smaller diameter than other types of pipes, so the wait for hot water is shorter, resulting in less waste of water. Additionally, PEX material has greater thermal conductivity properties than other types of pipes which reduces heat loss.
- Quiet operation. You won’t have to worry about pipes rattling with PEX since they are made out of synthetic plastic.
PEX Pipe Disadvantages
- Installation errors. While some people may find PEX installation to be easy, others may be in over their heads. We recommend leaving pipe installation up to the professionals, especially if it involves more moving parts, running lines from other rooms, or in brand new construction.
- Heat damage. PEX is susceptible to failure in high-heat situations so it cannot be installed directly to water heaters (although there are connection materials to workaround). It also cannot be placed near recessed lighting.
- UV light. PEX is very sensitive to UV light, so it’s important that all PEX piping be hidden from direct sunlight and UV light bulbs. Many manufacturers recommend total darkness for PEX pipes so this limits where it can be installed.
- Chemical issues. Some types of PEX have been known to leach toxic chemicals like BPA and other contaminants. PEX can also be damaged due to high levels of chlorine in the water. Always have your water tested before PEX installation to see if it’s suitable to use.
- Permeability. Since PEX is plastic, there’s a likelihood of damage, and rodents can even chew through the pipes. PEX is not suited for outdoor installation or exposure to elements. PEX is permeable which means liquids can enter the pipe.
Plumbing Vents
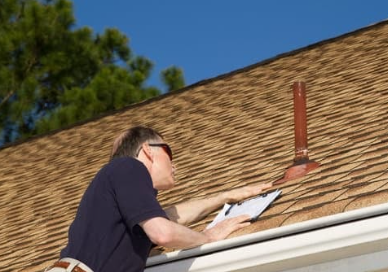
Why Does My Home Need Plumbing Vents?
Most homeowners will encounter a plumbing issue now and then, but diagnosing the problem involves more than just checking the water pipes. Plumbing vents can also become clogged or damaged, causing stoppages and a host of other issues. Understanding this sensitive part of your plumbing system is important in order to keep the drains flowing smoothly in your home. We’re here to provide answers to some of the most common questions homeowners ask about plumbing vents.
What Exactly Is a Plumbing Vent?
The plumbing vent, also known as a vent stack, helps regulate the air pressure in your plumbing system. Just as drain pipes remove water and waste from your home, the plumbing vent pipe – also known as a plumbing air vent – removes gas and odors. It also allows fresh air into the plumbing system to help water flow smoothly through the drain pipes. However, no water runs through the plumbing vent pipe. It is a vertical pipe attached to a drain line and runs through the roof of your home. The vent stack is the pipe leading to the main roof vent. It channels the exhaust gasses to the vent and helps maintain proper atmospheric pressure in the waste system.
Why Are Plumbing Air Vents Important?
Your home’s plumbing system is designed to efficiently remove water and waste. Its drainage and vent functions are actually two systems that work together.
Drainage pipes carry waste out of your home to either the city sewer or a septic tank. Vent pipes supply fresh air to each plumbing fixture in the house, which helps the system move water through the drainage pipes each time a toilet is flushed or a sink is drained.
Plumbing air vents also prevent sewer gasses from entering the home and allow wastewater gas and odor to escape. Plumbing vent pipes are located on roofs, away from windows or air conditioning units, so that the fumes can easily dissipate.
How Can I Fix Problems with Plumbing Vent Pipes?
When plumbing air vents or vent stacks do not work properly, neither will your home’s plumbing drainage system. If you hear gurgling sounds coming from your drains, see standing water in your sink or bathtub, or notice a slow drain in the bathroom or kitchen, a blocked vent may be the issue.
When a plumbing vent pipe or vent stack is blocked, negative pressure builds up in drainage pipes and water flow is interrupted. Though you may have success clearing a clogged drain yourself, stoppages will continue to occur if a blocked vent is the culprit.
Ongoing stoppages and slow-flowing drains can lead to sediment forming inside the drain pipes. This can further damage your plumbing system and may result in hefty pipe repair or replacement costs down the road.
If you can’t clear a slow-flowing drain with a plunger, auger or drain cleaner the vent blockage may be severe. If the plumbing air vent or vent stack becomes completely blocked, a vacuum will form, and you will no longer hear gurgling. You will also be able to smell sewer gasses in the rooms where the affected fixtures are located. This is a problem that requires immediate attention from a plumbing professional.
American Home Shield warranties cover a variety of plumbing issues, offering peace of mind when it comes to one of your most important investments – your home.
Polybutylene Piping
Polybutylene (PB) was a plastic manufactured between 1978 and mid-1995 for use as piping in home plumbing systems. It was inexpensive and offered plenty of advantages over other materials, such as flexibility, ease of installation, resistance to freezing. Pipes made from polybutylene were installed in up to 10 million homes in the United States during that period. Despite its strengths, production ceased in mid-1996 after scores of allegations surfaced claiming that polybutylene pipes were rupturing and causing property damage. In the homes that still contain this material, homeowners must either pay to have the pipes replaced or risk a potentially expensive plumbing failure.
How Does Polybutylene Fail?
Two studies in particular in papers published by the University of Illinois at Chicago have shown that certain disinfectants can react with the polybutylene and cause it to flake apart at any location within the PB piping system. Small fractures can deepen over time and eventually work their way to the pipe’s exterior, allowing water to escape. Some manufacturers, however, claim that the majority of leaks occur at joints and unions, which is where a leak would likely appear if a pipe were improperly installed. Despite this contention, class-action lawsuits filed against PB manufacturers have been successful and resulted in payouts to homeowners reaching $1 billion.
Polybutylene Pipes Should Be Replaced
Although no regulations require the replacement of polybutylene piping with other material, many plumbers recommend doing this, at a cost several thousand dollars. Leaking can happen without warning and can result in flooding and serious damage to a home’s interior if it is not immediately stopped. PB pipes installed behind sheetrock can leak unnoticed for long periods of time and cause mold and water damage. InterNACHI believes it is far cheaper to replace polybutylene pipes before they fail and release their contents onto floors, appliances and furniture. They can also reduce a home’s value or prolong its time on the market. Homeowners might face higher insurance premiums or be denied coverage entirely. For homeowners who are concerned about this problem and wish to replace the PB piping in their home with copper or other material, there are companies that specialize in this type of work.
Identifying Polybutylene
An inspector can use the following tips to identify polybutylene plumbing. Polybutylene pipes are:
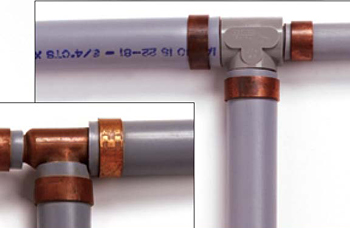
- usually stamped with the code “PB2110”;
- flexible and sometimes curved, unlike rigid piping materials such as copper;
- not used for waste, drain or vent piping;
- most commonly gray in color, but they can also be white, silver, black or blue. Blue PB is used primarily outdoors and should only be used to carry cold water. Inspectors should be aware that black or white pipes might not be polybutylene (they might be polyethylene or PVC, respectively). Also, PB color is somewhat region-dependent. For instance, experienced home inspectors in California might never come across gray PB, while it is quite common elsewhere;
- ½” to 1” in diameter.
Polybutylene pipes can be in a home’s interior or exterior in any of the following locations:
Interior:
- protruding from walls to feed sinks and toilets;
- running across the ceiling in unfinished basements;
- near the water heater.
Exterior:
- entering the home through the basement wall;
- at the water meter;
- at the main water shut-off valve.
Note:
- Home inspectors are not required to note the presence of polybutylene, and no tests for weaknesses should be performed. Any deterioration of polybutylene pipes happens from within and cannot be detected without turning off the water and dismantling the pipe, which is far beyond the standards of practice of home inspection.
- Inspectors should check an entire pipe for PB, not just a portion of it. Some copper piping systems have been found to use PB at junctures. A common example of this union is where PB pipe links with copper “stub outs” that feed bathroom fixtures.
Other piping materials not to be confused with PB:
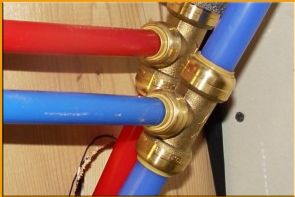
- PEX (pictured at right): Common in radiant-heating systems, this cross-linked polyethylene can be black, blue or red. It is more easily coiled and more flexible than PB. It can withstand higher temperatures than polyethylene.
- PVC: A popular building material commonly used in residential plumbing. CPVC is derived from PVC and is also used in plumbing. Both appear white or off-white and can be flexible or rigid.
- Polyethylene: This material is flexible and black.
- Copper: Copper is a metal that should never be confused with PB.
If in doubt, a licensed plumber can be contacted to determine whether or not a pipe is made from PB.
PVC Pipes
PVC is an acronym that stands for polyvinyl chloride. Of the different types of plastic pipe used for water supply, PVC pipe has a wide variety of plumbing uses but is mostly used for drainage PVC is rarely used in potable water applications, and in many jurisdictions it is not considered safe for drinking. PVC is also very common in pool and spa systems. PVC pipe is often white but it can also come in other colors. You can often tell what it is used for by the colors and marks on the pipe. For example, purple pipe with black lettering is sometimes used for reclaimed water. PVC also comes in a variety of thicknesses, called schedules. Schedules 40 is common for pipes used in water distribution.
PVC Piping Uses & Applications
PVC piping is used for:
- Drain-waste-vent (DWV)
- Sewers
- Water mains
- Water service lines
- Irrigation
- Conduit
- Various industrial installations
It can be used under ground or above ground in buildings. It can also be used outdoors if the pipe contains stabilizers and UV inhibitors to shield against ultraviolet radiation and it is painted with a water-based latex paint.
PVC materials are resistant to many ordinary chemicals such as acids, bases, salts and oxidants.
Because PVC piping system components can be manufactured in a variety of colors, identification of application is easy. A common color scheme (although not universal) is:
- White for DWV and some low pressure applications
- White, blue, and dark gray for cold water piping
- Green for sewer service
- Dark gray for industrial pressure applications
This color scheme has an exception in that much of the white PVC pipe is dual rated for DWV and pressure applications.
PVC piping systems should not be used to store and/or convey compressed air or other gasses. PVC piping systems should not be tested with compressed air or other gasses either.
PVC piping is recognized as acceptable material for DWV, sewers, and limited potable water services and distribution in all model plumbing codes. These Codes normally identify acceptable products for specific uses based on the ASTM Standard designation. Exposed PVC (plastic) used above ground to distribute water through the residence may be subject to UV damage from the Hawaii’s extra strong sun and the potential for degredation and or damage to the pipe is moderate to high. We recommend replace, update or upgrade any exposed pipes or consult an expert for more information
Resurfaced Tubs, Shower & Components
Reglaze, Resurface, Refinish…
What is it?
Bathtub and/or shower renovation option goes by many names resurfacing, recoating, refinishing or reglazing but has a pretty straightforward process. An expert starts by sanding down the surfaces, fills in cracks and worn areas, then applies several coats of primer and paint before doing a final buffing.
▶ It’s usually a temporary fix since reglazing is a purely cosmetic update ◀
“Think of it like you’re putting nail polish on your nails. It’s nice for a little bit, but then as you go through your daily routine, you’re going to need to get it touched up again”
Pros & Cons
Pros:
Reglazing is the most affordable bathtub renovation option available and can cost you between $200-$800 on average.
Its quick, usually taking only a day to complete!
Cons:
The substances professionals use to reglaze a tub can be a bit dangerous. “The material used to etch and glaze is very toxic and the customer would need to leave their house for a day or two so the house could ventilate properly,”
Reglazing can only be performed once. “If you get a poor job that’s already peeling, then you will have to proceed to other options anyway,”
The weather can play a factor in how long it takes for the finishing coat to dry, and how well it bonds to the surface. “Humidity is harmful to the process, so its best to avoid tub refinishings during the dog days of summers. Cooler, less-humid weather typical of fall or spring provides the ideal conditions”
Soap Scum Removers
1 part Dawn to 1 part Vinegar
If you have soap scum in your tub or shower, this duo is your new best friend. Add equal parts Dawn and vinegar to a spray bottle and shake gently to mix. If you have really tough deposits, you can heat the vinegar in the microwave before mixing for a little extra power.
Make a paste out of baking soda and water and simply work it into the surface with a scrub brush or sponge. Rinse with white vinegar to eliminate the white residue that baking soda leaves behind. Hydrogen peroxide is another way to kill mildew naturally
White vinegar is a mild acid that is known to kill roughly 82 percent of mold species, and it can even help prevent mold outbreaks in the future. … Pour plain, white distilled vinegar into a spray bottle. Because mold is such a resilient force, it’s best not to dilute the vinegar.
What You Should Know
Keep This Handy
Fill a spray bottle with equal parts vinegar and water, and you should have enough to last at least a couple of weeks. Spray down the shower after each time you use it, and the homemade shower cleaner will combat odors and prevent the growth of bacteria and the buildup of grime.
Experts say this method is safe but don’t mix the two products in the same container. Combining them creates peracetic acid, which is potentially toxic and can irritate the skin, eyes, and respiratory system
Hydrogen Peroxide + Vinegar = Nope!
Sewer Pipe Sagging Or “Belly”
Sewer line bellies are a common problem that can create aggravating sewer pipe problems for property owners. A sag in a sewer pipe will eventually lead to standing water and sediment collecting in the middle of the line, which in turn can lead to erosion, blockages, and a major backup for the homeowner.
What Is a Belly in a Sewer Pipe?
Sewer line bellies are sags or low spots in sewer lines. A normal sewer lateral (seen below) has a slope that uses gravity to help regulate the flow. A bellied sewer line interferes with the normal flow of waste water through the pipe, leading to backups and other problems because the water and sediment collects in the belly.
What Causes Sewer Bellies?
Poor planning and bad installations are often the root cause of sewer line bellies, as proper bedding compaction, good materials and correct slope are the most important factors needed to prevent the problem. However, natural occurrences like major tree roots, earthquakes, sun or heat, rain, and even cold weather fluctuations can lead to the shifts in the soil that eventually cause bellies.
To prevent bellies, the first step is to install plumbing with proper bedding. If the correct material (larger grade gravel and sand) is not used under the pipe, then it may eventually settle lower into the ground in some sections and a belly will form.
A sewer line must also have the correct slope in order to use gravity to its advantage when moving waste away from the home or building. A trenchless professional will use the best tools of the trade (such as video cameras and locator wands) to ensure proper slope in a plumbing installation thereby preventing excess build-up.
In some cases, unstable ground may cause bellies, too. Even sewer lines that have been installed with the appropriate support in place may sag if the earth below begins to shift.
Sewer Pipes: Cast Iron
Repair or Replace: Cast Iron Drain Pipes Explained

Cast iron pipes were designed with a lifespan of about 50 years, and if you notice signs of deterioration, it’s wise to consider replacement rather than a temporary fix. Various factors contribute to the breakdown of cast iron pipes.
Repairing a cast iron pipe might seem like a quick solution, but it’s usually temporary, especially if the pipes are aging. Repaired pipes often crumble, crack, or leak on either side of the fix due to the nature of cast iron.
While spot repairs can be a budget-friendly and quick option to halt a leak temporarily, it’s essential to plan for a complete replacement sooner rather than later.
DIY Repair of Cast Iron Drain Pipe: Possible or Not?

If you spot a small problematic section with a leak or crack, a DIY spot repair might work using cast iron repair paste or plumber’s epoxy. However, if leaks and cracks are widespread, it’s advisable to call in professionals.
Professional Repair Process for Cast Iron Drain Pipes
Experts usually start by assessing the condition of the pipes using advanced equipment, like tiny cameras, to inspect every inch. This helps determine the best repair method based on the identified issues. Spot repairs are often considered temporary solutions for failing cast iron drain pipes. Professionals might perform emergency spot repairs or point repairs using CIPP liners for a more lasting fix.
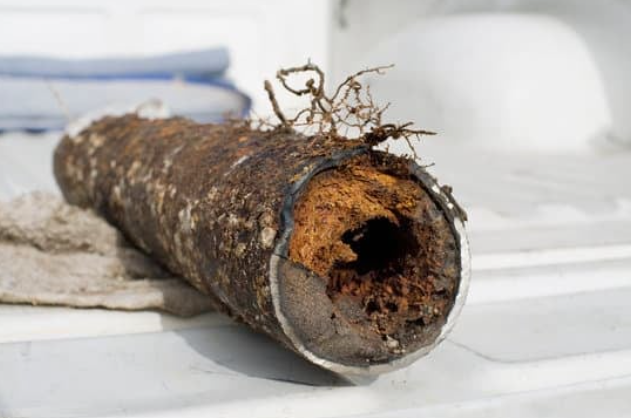
Regular inspections by professional plumbers, like Accurate Leak, are crucial if you’re experiencing plumbing issues or haven’t had your plumbing inspected for a while. A comprehensive sewer video inspection can reveal the condition of your pipes and guide decisions about repairs or replacements.
Sewer Pipes: Cleanout Location
Where is My Sewer Line Cleanout Located?
by The Original Plumber | Oct 25, 2020
A sewer drain cleanout is an essential feature of the drainage pipe system in your home. If a sink or a toilet is causing a blockage of the system which results in the sewage backup, then the cleanout is the only interface through a plumber that can unravel the mess. While a professional plumber can quickly locate the sewer line cleanout in many homes, the homeowner should stay aware of its location for emergencies. Note that the authorities usually take care of the main sewage line in the neighborhood but leave your compound’s systems under your care. Therefore, you should know the “sewer safety valve” location as it can help you remove obstructions on the system and avoid the dirty seeping on your floor.
How the sewer line cleanout works
A sewer line is a large pipe that connects every sink, shower, and toilet in your house to the municipal sewer line in the city. If one toilet, sink, or other facility causes a block on the septic line, all other facilities are affected, which calls for immediate action. Unblocking the sewer system is easy if you have a sewer cleanout in the house or the compound. Note that the service fee for unblocking the waste disposal system will partly depend on how easily a plumber can access it; you pay higher if there is no cleanout or don’t know its location.
Typically, a sewer drain cleanout is a sizable threaded pipe ending with a plug. The tube can either be metallic or plastic depending on factors like the area of residence and the weather. Moreover, its house or compound location is also influenced by factors like the weather and the house’s materials. For instance, homes in localities that experience cold weather often have sewer cleanouts near the bathroom, toilet, or garage.
Where is my sewer cleanout located?
A homeowner has various options when they need to find the cleanout. A sewer cleanout is a safety feature among the utilities. One should always know their location from the day they move into a house. However, it is easy to identify the cleanout, and sometimes you do not need professional help. That is not always the case since there are times when the cleanout is buried in the compound. Here are the various ways to locate a sewer drain cleanout.
- Examine the likely locations –The first way involves looking around in the house and the compound in places where you would expect the facility to be installed. A cleanout is a 3- or 4-inch pipe fitted with a screw cleanout cap, and it is easily identifiable. Therefore, looking around the compound is one way to determine its location. In most homes, the cleanout is located close to the bathroom, either inside or outside the house. However, this is not always the case, and your neighborhood may be different. Therefore, you should not panic if you do not find it anywhere near the bathroom. Other probable places to check include the garage area, in the basement, or near the pathway right outside the house. If the sewer cleanout access is located in drywall, you should take care and avoid cutting other pipes, cords, and cables, or you could cause a tragedy in the home.
- Grab the house plan – Sometimes the eyes may not be enough to tell where the lateral sewer line cleanout is located. In such a case and where the house plan is readily accessible, it is plausible to get it and try finding the facility from there. The advantage of using the plot plan is that all other features and facilities are documented in it, making it easy. Identifying your house’s sewer line is the first step to locating the sewer drain cleanout. Take care and avoid confusing other facilities with the main sewer line as this may have adverse effects if you damage other systems in the process. As mentioned before, the sewer cleanout could be buried in the compound instead of located inside the house.
- Professional services – In some cases, observing the compound and looking at the plot plan does not yield any results. This could be the case for old houses or those whose plans are poorly done or the case of a buried sewer cleanout. Therefore, calling a professional service may be the only option. You can quickly locate the outdoor cleanout access with expert help regardless of whether it is inside the house, sticking out, or buried in the compound. Plumbers have the tools and expertise to trace, replace, and repair parts of a drainage plumbing system. Whether that’s using a modern technique called trenchless sewer repair or using a variety of other ways to unclog your sewer, you can always be confident with their expertise. They can also discern why your drainage system is often clogging and give you professional advice on the same. Furthermore, professional plumbers will cause little or no damage when finding the sewer cleanouts. Even better, a plumber may fix any damages caused on some walls if the sewer cleanout was underneath one. One other advantage is that a plumber can install the lateral sewer line cleanout if there is none in the compound. And even though this adds to the service cost, it is well worth it unless you will be moving out of the house the same day.
Taking care of the drainage system in your house
What can you do to prevent the drainage system from clogging? You know the pain of dealing with a clogged drainage system if you ever experienced one. For people who are yet to, you’d better take precautionary measures before it is too late. Below are some practices that can prevent or reduce clogging of the drainage system in your home.
- Use hot water frequently – Hot water is known to kill germs but is also a remedy for clogging pipes as well. Cleaning the sinks with boiling water melts out oils and detaches food items from the pipes’ walls, thus getting them into the street’s central sewage system. Therefore, you should make a point of cleaning the sinks, bathrooms, and toilets with hot water frequently.
- Use a drain guard on every sink – In some instances, the drainage pipes will block because too many food items find their way in the lines. Having a drainage guard on every sink in the house reduces the size and amount of foodstuffs entering the drain. With this tip, you will also need to avoid dumping non-dissolvable waste in the sink or bathroom.
- Do NOT use chemicals to clear clogs. Chemicals are harsh and can easily damage your pipes. Additionally, these chemical will harm reefs and marine life
- Routine maintenance – Routine maintenance is the best way to stay out of trouble with drainage systems. Every homeowner should ensure that the drainage system is inspected by a professional plumber at least once a year. Possible problems that then be identified and resolved before the drain blocks. This does not only save you money eventually, but it also ensures your system is in the best condition at all times.
Conclusion
Knowing the location of the sewer cleanout in your compound is of great importance. Besides helping you reduce the cost of sewer line repairs and maintenance; it can help you keep the drain clean through DIY activities and regular inspections. Most houses have the sewer drain cleanout on the inside near the bathroom. If you cannot find the sewer cleanout by observing the house and the compound, then looking at the house plan or calling a professional plumbing service could be the salvation.
Above all other things, it is vital to keep the drainage system clean and healthy at all times.
Sewer Pipes: Orangeburg
What is Orangeburg Pipe? Everything You Need to Know
Posted by William Heinselman on Feb 17 2020
What is Orangeburg Pipe?
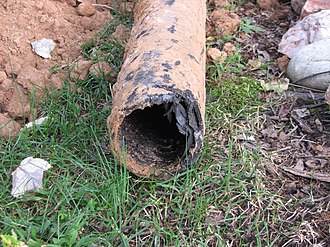
Orangeburg pipe is a type of home sewer pipe used in many properties built from 1945 to 1972. Also known as “no-corrode” pipe, Orangeburg is a type of bituminized fiber pipe made from a mixture of hot pitch and wood pulp. It gets its name from Orangeburg, New York, where it was originally mass-produced by the Fiber Conduit Company (which later changed its name to the Orangeburg Manufacturing Company).
Although various forms of bituminized fiber pipe have been used since the 1800s, Orangeburg owes its origins to World War II, when the iron and steel commonly used for sewer pipes were critical to the war effort. Because of these shortages, Orangeburg pipe was invented so more iron and steel could go toward producing war materials. Following the war, Orangeburg continued to proliferate because it was cheap.
Once installed, standard Orangeburg sewer pipes were expected to last 50 years’ time. Unfortunately, many systems began to falter after a mere 30 years of use. Most of these structural complications resulted from the material used to manufacture the pipe. Essentially, Orangeburg pipe is little more than asphalt-soaked paper and pulp. It may seem obvious in retrospect, but if you soak paper (even tar paper) with water for long enough, it will eventually deform. Combined with the pressure from the soil above the pipe, it’s not surprising these pipes began to fail so quickly.
Problems With Orangeburg Sewer Pipe
In contrast to piping made from cast iron or clay, Orangeburg pipes absorb moisture and become distorted, oftentimes in an ovular shape, under pressure. Layers of this material are also subject to bubbling up and closing the pipe off. Often described by plumbing professionals as nothing more than a “coal tar-impregnated toilet paper tube,” it’s something of a miracle that many Orangeburg pipes have lasted as long as they have.
Typically made with diameters between 2 and 18 inches, Orangeburg fell out of popularity in the early 1970s, as more reliable, efficiently produced pipe materials became available. As they were the primary option for low-cost sewer pipes until that time, Orangeburg pipe sewer systems are still featured in many older homes. For most homes built using Orangeburg, the piping has likely either already deteriorated or is on the verge of collapse. Homeowners who do not inspect and measure the deterioration of their Orangeburg systems may be faced with large-scale replacements and severe damage in time. If ignored, they could result in an extremely messy and extremely expensive sewer line collapse.
Orangeburg Pipes and Your Home
To assess the presence of Orangeburg pipes in your home, typically, homeowners need to only know the age of their home and approximate year of pipe installation. In almost any home built between the years 1945 and 1972, Orangeburg pipe systems will comprise that property’s sewage system. Additionally, landlords, real estate records and city documents will typically have this information on file.
When the deterioration of Orangeburg pipelines begins, property owners may notice the service and efficiency of their home’s sewer system and other piping change; this is the sewage system starting to fail. If this problem is left uncorrected, it can threaten the safety and health of home inhabitants.
First and foremost, if you’re buying a home that was built before 1980, have a professional plumber do an inspection to ensure there’s not Orangeburg piping (if there is, you can subtract the replacement estimate from your offer). If you’re already settled and are unsure whether you have Orangeburg piping, the previous homeowner or city documents may have the answer; if not, it’s best to bring in a professional plumber who can do an inspection for you.
Signs of Orangeburg Pipe Failure
Homeowners of properties with Orangeburg pipelines may begin to notice poor pipe flow, decreasing efficiency and other service changes over time. This gradual decline in quality, often overlooked, can develop into larger, more expensive and severe pipe collapses. By knowing common signs and indicators of deterioration, homeowners can detect pipe damage earlier and avoid major, costly renovations.
If you notice any of the following indicators of Orangeburg pipe failure, it may be time to call a professional plumbing expert in your community to assess damages:
- Frequent or persistent blockages
- Decreased flows and water pressure
- Indentations and dampness on lawns
- Lush grass concentrations
- Progressing or sudden pipe collapse
- Tree root/biological penetration into pipelines
- Frequent toilet back-ups
- Foul sewer odors inside the home
- Mold issues
- Sinkholes in the foundation
- Sudden high spikes in your monthly water bill
Each case of Orangeburg pipe systems is different. While leaks, small breaks, and deteriorated surface areas can be reinforced with trenchless technologies, a full pipe replacement with PVC piping may be necessary if the Orangeburg pipe is too far deteriorated or unsalvageable. To avoid such a costly and property-damaging scenario, it is very beneficial for homeowners to get a professional inspection of their pipe system and repair deterioration while still possible.
Orangeburg Repair Solutions
The right solution for your broken Orangeburg pipe depends on a few key factors, which change based on circumstance. Things like pipe depth, the type of break, and the severity of the break all affect what solution is best suited for your home. To evaluate pipe systems, service professionals typically use video inspection technology to determine the source of performance problems; these methods are incredibly helpful in pinpointing deteriorated areas and estimating damage severity. Once the damage has been assessed, there are a few options available for repair.
The Traditional Dig-and-Replace Method
In conventional Orangeburg pipe renovations, the damaged pipes in question would have to be manually excavated and replaced with entire new segments of pipe. While this is fine for shallow pipelines (such as those less than 1-2’ below the yard surface), it can become tricky, and pricey, with increased depth or when surface-level fixtures (driveways, sidewalks, etc.) are involved. Often, the most expensive component of traditional pipe repairs isn’t the repair itself, but the remedial landscaping tasks, lawn damage and heavy labor that is typically required.
The bottom line: dig-and-replace pipe repairs are well-suited for shallow Orangeburg pipelines, or for pipe replacements in which bursting or other non-invasive techniques could prove problematic. Traditional repairs cost anywhere from $50-250 per foot of pipe, with a project average between $4,000-13,000.
Modern Trenchless Solutions: Pipe Lining
For situations where Orangeburg pipe runs below driveways, sidewalks or other fixtures, or is fairly deep underground, dig-free pipe lining can be an affordable alternative to manual dig-and-replace repairs. Completed via application of epoxy-resin liners within existing pipe (hence the industry term, “cured-in-place pipe”), these repairs often take a matter of hours, and eliminate days, if not weeks, worth of unnecessary labor.
Trenchless technology, a method of cured-in-place pipe lining (CIPP), can effectively repair moderate pipe deterioration and damages using a fiberglass and resin Perma-liner (which molds into PVC), epoxy coating and air pressure. Today, trenchless pipe lining has become a preferred method for renovating Orangeburg pipe systems, primarily due to its seamless application and incredible efficiency.
The process is simple: A Perma-liner solution is run through damaged, targeted pipe lines, and then pressed along the existing pipe walls using an air pressure bladder. This controlled pressure forces the liner into pipe cracks, fissures and breakages, and creates virtually flawless inner walls. Ideal for Orangeburg pipe repair situations, trenchless methods can also:
- Fill entire missing segments of pipe
- Smooth pipe offsets
- Fill large cracks and seal joint connections
- Reinforce Orangeburg pipe to last for 50+ more years
- Restore cracks, root damage, and broken pipes to a new condition
CIPP lining removes stress from your existing, damaged Orangeburg pipelines and places it on the new, precisely molded PVC pipe. This vastly improves the structural integrity of your pipe system and can boost pipe life expectancy by up to 50 years. The greatest advantage of trenchless methods over other repair options, however, is its minimal effects on your property and your wallet.
Trenchless renovations do not require large-scale digging or property damage, as they are completed with existing pipelines and often use existing pipe openings. Typically, the only digging done when using trenchless technology is for two small entry and exit holes, dug at both ends of the damaged pipe. This application, also safer and ‘greener’ than full excavation replacement, can be completed in a matter of hours, often done in a single day.
It’s because of this incredible efficiency and effectiveness that trenchless technology has been embraced by homeowners and service professionals alike for Orangeburg pipe repairs. As all cases of pipe deterioration and damage are different, it is important for homeowners to accurately assess the state of their pipelines before choosing a repair method.
Pipe lining’s effectiveness depends mainly on how severe the damage is to your Orangeburg pipe. If your Orangeburg pipe is collapsed, lining won’t do much to fix the problem. The pipe is still rigid enough to hold its shape and therefore the lining would make the structure strong but the flow would still be restricted. That’s a solution, but not a good one. If the problem is because the pipe is collapsed, you’ll have to replace the pipe.
Modern Trenchless Solutions: Pipe Bursting
If the breakage is significant or widespread throughout your pipe, another trenchless solution, pipe bursting, might be the answer. Pipe bursting is a trenchless alternative to manual pipe replacement, in situations where lining the existing pipe would not restore damages fully; this is often the case for collapsed, deteriorated Orangeburg pipe.
Using steel, conical bursting heads, which are attached to new pipes, trenchless specialists can replace your collapsed pipe entirely, without digging out the entire pipe. The cone bursting head fractures and displaces the old pipe, while simultaneously laying in place new pipe, all through small entry and exit points; this preserves both your yard and your wallet, and is the most efficient way to fully replace severely damaged pipe.
The bottom line: trenchless pipe lining can cost significantly less than dig-and-replace Orangeburg repair, as landscaping and extraneous labor tasks are largely avoided. Orangeburg pipe lining costs roughly $160 per foot, and can result in a mere $3,000 to $4,000 for small- to moderate-sized projects. Non-invasive pipe bursting costs marginally more than pipe lining, but is well worth its price tag since digging up driveways or sidewalks is avoided entirely. It’s the only way to fully replace damaged pipes without intensive digging.
Can’t Afford Orangeburg Piping Replacement?
While replacing Orangeburg piping should be a priority (remember, replacement is going to ultimately be a lot less expensive than cleaning up after a collapse), we understand that immediate replacement is not a financial option for many. Unfortunately, it’s also not often covered by insurance; if your policy does include sewer lines, chances are there is a “cap” on payouts and you’ll still be on the hook for some of the expense. You should check in with them as soon as possible.
In the meantime, have your plumber send a camera down into the sewer every six months to keep tabs on the situation. This costs money too, of course, but perhaps you can share the cost by taking turns with a neighbor or two; it’s likely they have Orangeburg piping that was installed at the same time, meaning it’s probably in similar condition. If their pipes seem to be holding up, then it’s a safe bet that yours are too, and vice versa.
If the inspection reveals damage but no imminent danger, your plumber may be able to extend the life of the pipes a bit longer by snaking them while you look into a loan or other means of affording the replacement.
Out With the Orangeburg, In With the Trenchless
Fortunately, for owners of older homes and properties, trenchless technology offers an ideal solution to the problems created by deteriorating Orangeburg sewer pipe. By eliminating the need to physically dig out your damaged pipes, you keep labor to an absolute minimum and avoid any costly, stressful landscaping renovations. This lining application is ideal for virtually any type of pipe damage, whether it’s cracking due to temperature change, fracturing at critical pipe joints or deterioration with age (often the case for Orangeburg pipe systems).
By using trenchless technology to reinforce, reline, and restore your Orangeburg sewer pipe line, homeowners can also benefit from using ‘green’ technology, which reduces risks from underground toxins and substances that can arise during conventional pipe restoration and digging.
It is no wonder why this highly efficient and effective method of pipe repair has become so prevalent today. The integration of trenchless technologies with deteriorating or damaged Orangeburg pipes is now one of the simplest and most beneficial methods of Orangeburg restoration.
While Orangeburg sewer pipe served its purpose in assisting the war effort, it’s a bad idea to keep it around in its current state. Otherwise, it will just continue to collapse until it causes you a problem. If you’re aware that you have Orangeburg pipe, then it will pay you to get it lined up as soon as you can. For the best long-term sewer pipe care, homeowners should take an active stance to repair the aging pipes before full collapse. If you think your aging Orangeburg pipes may be starting to fail, don’t hesitate to contact a trenchless plumbing expert in your area.
Sewer Pipe Scoping

About Sewer Scope Inspection Process
Having a sewer scope inspection performed usually only takes a few minutes – and the inspection is just what it sounds like. A trained, professional plumber will run a specialized, flexible borescope camera, which feeds images and video to a monitor. Then, this camera is run through your home’s drainpipe, to examine the sewer lines and other underground pipes for any flaws, imperfections, or serious problems.
The entire process usually takes no more than an hour, altogether. After this, your plumber will tell you about their findings, and issue a report that’s given to you with information about the condition of the sewer line.
Sewer Scope Inspection Cost
The cost of a sewer scope inspection will vary based on the area in which it’s performed, the specifics of the house, the inspector you use, and a number of other variables. However, it’s quite affordable, in most cases. The cost will tend to vary from $250-$500.
This may seem steep. However, consider this – the cost of repairing a broken sewer line costs around $300-$400 – per foot of repaired line. Repairing and replacing an entire sewer line or a line with major structural faults could easily run you ten thousands dollars or more.
Should I Get A Sewer Scope Inspection?
Absolutely. As touched upon above, a sewer line is often one of the most costly things to repair in a home. Getting a sewer scope inspection can help you avoid investing in a home that has serious issues with the sewer/septic system.
You may even be able to save a bit of money on a sewer scope inspection if you’re able to find a home inspector who offers this service along with other traditional home inspection services, such as lead and asbestos inspections. Bundling these services usually will allow you to get a better deal.
Signs You Should Get A Sewer Scope Inspection For Home Purchase
Cracked Sewer Line
Before you go looking for a home, it’s a good idea to know what to look for, and what signs may indicate that you must get a sewer scope inspection before making an offer on a house. Here is a short list of some of the most common signs that something may be wrong with the sewer system, or that it’s at risk of being damaged.
- Water backing up inside the house or crawlspace – This could indicate damage or breakage to the sewer line, or a significant clog.
- Large trees in the yard – One of the most common causes of sewer pipe damage is the growth of roots around the pipe. Roots can grow around and constrict the pipe, breaking it, or grow into small cracks in the pipe, clogging it or causing leaks.
- The house was built more than 30 to 50 years ago – Homes built before 1984 may have clay sewer pipes, which can be easily crushed or damaged. These typically must be replaced, or at least inspected to ensure that they are in good condition.
- You notice shifting or movement of the ground around the home – If the soil around a house seems to have shifted, the pipe may have been affected. If it has moved, it could have broken or become bent and damaged, which may require a costly repair. To identify this, look at things like the sidewalk and driveway. Are the surface soils level with the driveway or walkway? Do they seem to have sunk, or become piled higher than these concrete surfaces?
- Extra-green or lush patches of grass – This is a common sign of a septic or sewer leak. Given its contents, sewer water is actually a powerful fertilizer that can help encourage plant growth. If you see a suspiciously healthy-looking area of the yard, especially if the rest of the lawn seems to be less lush or green, you should be suspicious.
Even if you don’t see any of these above issues, we would still recommend a sewer scope inspection. More minor issues with the sewer line may have few or no symptoms at all – but still cost thousands to repair.
Sewer Scope Inspection Results – What To Look For
Wondering what to look for during the inspection? You’ll typically watch the video feed throughout the process. You and your inspector will be looking for:
- Serious clogs or blockages in the sewer line
- Cracks, damage or imperfections in the line
- The type of material used for the line (clay, concrete, plastic, metal, etc)
- Roots growing through the line
- Separation or failure of the line
- Potential damage or issues with the septic tank (if present)
Your plumber should walk you through the entire process, and help you understand what you’re seeing. If no issues are detected, great! If there are some minor problems, you may be able to negotiate a better rate on the home, or at least plan for the repair in your home budget during the next few years. Finally, if there is a major issue, you likely will be able to walk away from the sale, require the homeowner to make the repair themselves, or get them to reduce the cost of the property accordingly.
Know Before You Make An Offer: Get A Sewer Scope Inspection!
Need to find a reliable home inspector for a sewer scope inspection? Here are some trusted vendors…
Licensed Plumber, Pueo Plumbing, 808-593-PUEO, Josh Stamm, Owner, License #C-34564, Pipe Scoping, Plumbing, Drain Service & Sewer Repair
Licensed Plumber, Commercial Plumbing Inc., License C-13503, Pipe Scoping, i@complumbing.com, (808) 845-4112 1820 Colburn Street, Honolulu, Hawaii 96819
Licensed Plumber, EverTrust Plumbing, Nathan Herm, Master Plumber, Pipe Scoping, evertrustplumbing@gmail.com, www.evertrustplumbing.com, (808) 841-9649 730, Mo’owaa St, Ste E Honolulu, Hawaii 96825
Licensed Plumber, Lic #C-34399, Pipe Master Plumbing, Devin Watabu, Service Technician, Pipe Scoping, Pipe Cleaning, Pipe Relining, Pipe Bursting, Pipe Coating, info@oahupipemasters.com, www.oahupipemasters.com, (808) 396-PIPE (7473), 820 W. Hind Dr., Honolulu, Hawaii 96824
Water Pressure Explained
Understanding Residential Water Pressure in Warm Climates: A Homeowner’s Guide
Introduction

As a homeowner in a warm climate, you’ve likely experienced the joy of refreshing showers and quick dishwashing thanks to consistent water pressure. But have you ever wondered how residential water pressure works in these sunny locales? Let’s dive into the basics and uncover the factors that contribute to that satisfying flow of water.
The Basics of Water Pressure
Water pressure is the force that pushes water through your pipes and out of your faucets. It’s measured in pounds per square inch (psi), and the higher the pressure, the more forcefully water flows. In warm climates, the conditions can impact residential water pressure, influencing your daily water usage experiences.
Factors Influencing Water Pressure in Warm Climates
1. Elevation and Terrain
The geographical features of your area play a role in water pressure. Homes at higher elevations might experience lower pressure due to the need for water to travel uphill. Similarly, the terrain can affect pressure as water moves through pipes across different landscapes.
2. Water Source and Supply System
The source of your water and the type of supply system in your area are crucial factors. If your water comes from a well, the pump’s capacity affects pressure. Municipal water systems use various mechanisms to maintain consistent pressure, ensuring all residents receive an adequate supply.
3. Temperature Influence
In warm climates, the temperature can impact water pressure. Extreme heat may cause fluctuations, and it’s essential to be aware of any changes, especially during peak summer months.
4. Residential Plumbing System
Your home’s plumbing system, including pipes and fixtures, contributes to water pressure. Over time, mineral deposits or pipe corrosion can affect flow, so regular maintenance is key to preserving optimal pressure.
Maintaining Optimal Water Pressure
Now that we’ve explored the factors influencing water pressure, let’s discuss how homeowners in warm climates can ensure a consistent and satisfying water flow:
1. Regular Inspections and Maintenance
Schedule regular checks on your plumbing system. Look for leaks, corrosion, or clogs that could hinder water flow. Addressing issues promptly can help maintain optimal pressure.
2. Invest in Pressure-Boosting Systems
If you find that your water pressure is consistently low, consider installing a pressure-boosting system. These devices can enhance pressure and improve the overall performance of your plumbing.
3. Consult with Professionals
If you’re experiencing persistent issues with water pressure, consult with plumbing professionals. They can assess your system, identify potential problems, and recommend solutions tailored to your home.
Conclusion
Residential water pressure in warm climates contributes to the comfort and convenience of daily living. Understanding the factors influencing pressure and taking proactive measures to maintain an optimal system ensures that you’ll continue to enjoy the benefits of a steady and satisfying water flow. Embrace the warmth, and may your showers be forever invigorating!
Roofing
Roofing: Acrylic Coating
Bringing Sunshine In: The Pros and Cons of Acrylic Roofing Materials in Hawaii
Introduction
In the vibrant and sun-drenched landscapes of Hawaii, homeowners seek roofing solutions that not only protect their homes but also embrace the unique climate. Acrylic roofing materials have emerged as a popular choice, offering a blend of durability and adaptability. Let’s delve into the pros and cons of acrylic roofing, custom-tailored for the Hawaiian setting.
Pros of Acrylic Roofing in Hawaii
1. Reflective Brilliance
Acrylic roofing materials often come with reflective coatings that bounce off a portion of the sun’s rays. This cool roof effect enhances energy efficiency, keeping homes cooler and potentially reducing the need for excessive cooling.
2. UV Resistance
Hawaii’s sun is intense, but acrylic roofing materials boast strong resistance to UV rays. This feature ensures that the roof remains resilient, maintaining its structural integrity and appearance over time.
3. Adaptability to Temperature Changes
Acrylic roofs are designed to handle temperature fluctuations. They expand and contract with changing weather conditions, reducing the risk of cracks or splits that can occur in response to Hawaii’s diverse climate.
4. Ease of Installation
Applied as a liquid coating, acrylic roofing materials facilitate a straightforward installation process. This simplicity not only saves time but may also contribute to lower labor costs.
5. Mold and Mildew Resistance
In Hawaii’s humid climate, the resistance of acrylic roofing to mold and mildew growth is a significant advantage. This ensures a clean and aesthetically pleasing roof over the years.
Cons of Acrylic Roofing in Hawaii
1. Upfront Cost
The initial cost of acrylic roofing materials may be higher compared to some traditional options. However, many homeowners view this as a wise investment in the long-term benefits of energy efficiency and durability.
2. Sensitive to Foot Traffic
Acrylic roofs can be sensitive, especially during the initial curing period. While they become robust over time, care must be taken during installation and maintenance to avoid unnecessary damage.
3. Limited Color Options
Acrylic roofing materials may offer fewer color and aesthetic choices compared to other roofing materials. Homeowners with specific aesthetic preferences may need to consider this limitation.
4. Application Conditions
Successful application of acrylic roofing requires specific conditions, including the right temperature and dry weather. Weather-related delays can impact the installation schedule.
Statistical Lifespan and Influencing Factors
The lifespan of acrylic roofing materials typically ranges but is about 15 years, depending on factors such as proper installation, adherence to maintenance guidelines, and environmental conditions.
Maximizing the Lifespan of Acrylic Roofing in Hawaii
1. Professional Installation and Regular Inspections
Opt for professional installation to ensure proper application. Regular inspections can catch issues early, preventing potential damage and maximizing the lifespan of the acrylic roof.
2. Adherence to Application Guidelines
Follow the manufacturer’s guidelines for application and maintenance. Adhering to these guidelines ensures that the acrylic roofing performs optimally throughout its lifespan.
3. Prompt Repairs and Recoating
Address any issues promptly. Acrylic roofs may benefit from periodic recoating to maintain their protective properties and extend their lifespan.
Conclusion
Acrylic roofing materials in Hawaii bring a perfect blend of resilience and energy efficiency to homeowners seeking a roof that adapts to the island’s unique climate. With advantages like reflective brilliance, UV resistance, and mold prevention, acrylic roofing stands as a reliable and forward-thinking option. While considerations like upfront cost and limited aesthetics exist, the enduring performance and adaptability of acrylic roofing make it a valuable investment. Embrace the sunshine, knowing that your roof is a beacon of durability under Hawaii’s radiant skies!
Roofing: Composition Shingles
Embracing the Sunshine: Pros and Cons of Residential Composition Roofing Shingles in Warm Climates
Introduction
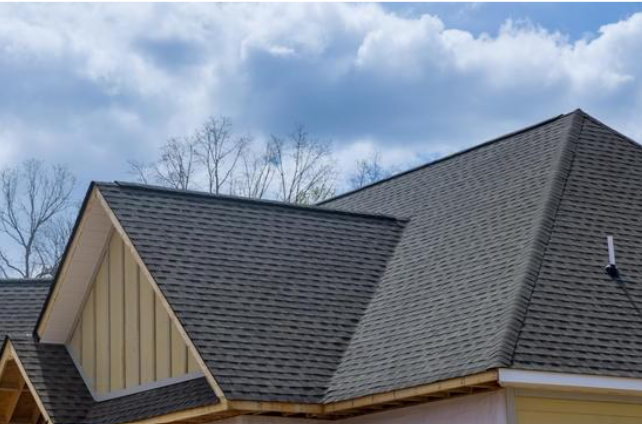
Choosing the right roofing material for your warm-climate home is a key decision that balances durability, cost-effectiveness, and aesthetics. Residential composition roofing shingles have become a popular choice, offering a range of benefits and considerations. Let’s explore the pros and cons of these shingles tailored for the sun-soaked abodes.
Pros of Residential Composition Roofing Shingles
1. Durability Under Sun Exposure
Composition roofing shingles are crafted to withstand the challenges posed by prolonged sun exposure. The materials are designed to resist the harmful effects of UV rays, preventing premature aging and ensuring a longer lifespan for your roof.
2. Affordability and Variety
One of the standout advantages is the affordability and variety of composition shingles. Homeowners in warm climates can choose from a wide array of styles and colors, achieving the desired aesthetic without breaking the bank.
3. Resistance to High Temperatures
Warm climates often come with high temperatures, and composition shingles are up to the task. Engineered to resist heat, they maintain their structural integrity even in the hottest weather, providing reliable protection for your home.
4. Cool Roof Technology
Many composition shingles now incorporate cool roof technology. This feature reflects more sunlight and absorbs less heat, helping to keep your home cooler. This not only enhances your comfort but may also contribute to energy savings.
5. Ease of Installation and Repairs
Composition shingles are relatively easy to install, which can save you time and money on labor costs. Additionally, if individual shingles become damaged, they can be replaced without requiring an extensive overhaul of the entire roof.
Cons of Residential Composition Roofing Shingles
1. Lifespan Variability
While composition shingles generally have a decent lifespan, it can vary depending on factors such as the quality of the materials, installation, and the local climate. In warm climates with intense sunlight, some shingles may experience a slightly shorter lifespan compared to cooler regions.
2. Susceptibility to Algae and Moss Growth
Warm and humid climates can create conditions conducive to algae and moss growth on composition shingles. While this doesn’t necessarily affect the structural integrity, it can impact the appearance of your roof. Regular cleaning and maintenance can help address this issue.
3. Environmental Impact
The production of asphalt shingles, a common component in composition shingles, has environmental considerations. Some homeowners may prefer more eco-friendly roofing options if sustainability is a top priority.
Maximizing the Lifespan of Composition Shingles in Warm Climates
1. Regular Inspections
Frequent visual inspections of your roof allow you to identify and address potential issues promptly, maximizing the lifespan of your composition shingles.
2. Proactive Maintenance
Clearing debris from your roof and gutters, especially after storms, prevents damage and promotes proper drainage, contributing to the longevity of your roofing system.
3. Professional Installation
Opt for professional installation to ensure that your composition shingles are properly placed and sealed, minimizing the risk of leaks and premature damage.
Conclusion
Residential composition roofing shingles are a fantastic choice for warm-climate homeowners seeking a durable and cost-effective solution. With advancements like cool roof technology, these shingles offer not only protection but also energy efficiency. While considerations like lifespan variability and susceptibility to growth exist, proactive maintenance and attention to installation quality can mitigate these concerns. Embrace the sunshine knowing that your home is sheltered under a reliable and stylish roof!
Roofing: Composition Shingles; Coating After Installation
Coating of Asphalt Shingles After Installation
–From Asphalt Roofing Manufacturers Association
Coating of Asphalt Shingles After Installation
Many types of roofing permit the application of a coating for a variety of reasons, such as increasing solar reflectivity, resisting biological growth, improving impact resistance, or increasing roof life. However, ARMA strongly advises against the application of any type of field-applied coating over installed asphalt shingles.
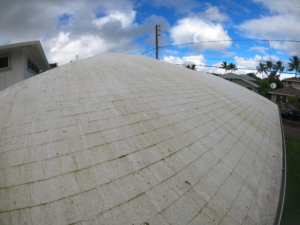
There are many types and formulations of roof coatings, so it is always important to consult the shingle manufacturer before proceeding with any type of coating. Many asphalt shingle manufacturers specifically do not recommend field coating of their shingles. Additionally, state or local building codes may prohibit this practice, as the field-applied coatings may negatively impact the performance characteristics (including the fire classification, algae resistance, impact resistance, etc.) of the roof assembly.
Some of the problems reported after asphalt shingle roofs have been field coated include shrinking of the coating, which may result in unsightly curling and/or cupping of the shingles or loosening of the granule surfacing of the asphalt shingles. In addition, non-permeable roof coatings may create a vapor-retarding layer by sealing the voids around and between the shingles. If this occurs, it may contribute to moisture accumulation within the roofing system.
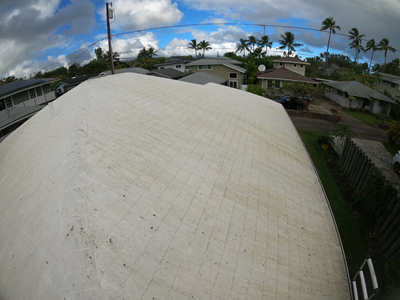
It has been suggested by some that the use of field-applied coatings over existing asphalt shingles will produce overriding benefits to the homeowner, such as longer roof life, energy-use reduction, or remediation of small roof leaks. There is limited available documentation showing the extent to which the field coating of asphalt shingles provides any of these benefits, but the risks and concerns mentioned above remain very real. Further, many coatings need regular maintenance reapplications to provide a consistent appearance.
In summary, the application of a coating may be detrimental to asphalt shingles. Be sure to:
- Check with the asphalt shingle manufacturer before determining a specific roof
- Check with the local building and zoning department and, if appropriate, your homeowner’s association to determine whether this application is
DISCLAIMER OF LIABILITY: This document was prepared by the Asphalt Roofing Manufacturers Association and is disseminated for informational purposes only. Nothing contained herein is intended to revoke or change the requirements or specifications of the individual roofing material manufacturers or local, state and federal building officials that have jurisdiction in your area. Any question, or inquiry, as to the requirements or specifications of a manufacturer, should be directed to the roofing manufacturer concerned. THE USER IS RESPONSIBLE FOR ASSURING COMPLIANCE WITH ALL APPLICABLE LAWS AND REGULATIONS.
Nothing contained herein shall be interpreted as a warranty by ARMA, either express or implied, including but not limited to the implied warranties of merchantability, fitness for a particular purpose or non-infringement. IN NO EVENT SHALL ARMA BE LIABLE FOR ANY DAMAGES WHATSOEVER, including special, indirect, consequential or incidental damages or damages for loss of profits, revenue, use or data, whether claimed in contract, tort or otherwise. Where exclusion of implied warranties is not allowed, ARMA’s liability shall be limited to the minimum scope and period permitted by law.
Roofing: Hardie Shingle/Shake
Unveiling the Challenges: Cons of Hardie Shingle Roofing Materials in Hawaii
Introduction
In the idyllic landscapes of Hawaii, where beauty and functionality converge in home design, choosing the right roofing material is a crucial decision. Hardie shingle roofing materials, known for their durability, do come with certain drawbacks. Let’s explore the cons of Hardie shingle roofing in the Hawaiian context to help homeowners make informed decisions.
Cons of Hardie Shingle Roofing in Hawaii
1. Upfront Cost
One of the primary considerations for homeowners is the upfront cost of Hardie shingle roofing. The initial investment can be higher compared to some traditional roofing materials. While this cost is often justified by the durability of the material, it’s essential for homeowners to weigh their budget considerations.
2. Installation Complexity and Labor Intensity
Hardie shingle roofing requires professional installation due to its complexity. Each shingle must be individually secured, and the installation process can be labor-intensive. While this ensures a durable roof, it can contribute to higher installation costs.
3. Weight Considerations
Hardie shingle roofing is heavier compared to some other materials. Before choosing this roofing option, homeowners should ensure that their home’s structure is adequately engineered to support the weight of the Hardie shingles, especially in regions with seismic activity.
4. Susceptibility to Impact Damage
While Hardie shingles are durable, they may be susceptible to impact damage, particularly in severe weather conditions such as hailstorms. Homeowners should consider the frequency of extreme weather events in their specific location and the potential for impact damage.
5. Potential for Moisture Absorption
While Hardie shingles are designed to resist moisture, they are not entirely impervious. In humid climates like Hawaii, there is still a potential for moisture absorption, which could lead to issues like warping or deterioration over time.
Statistical Lifespan and Influencing Factors
The lifespan of Hardie shingle roofing typically ranges from 20 to 50 years, depending on factors such as climate, installation quality, and maintenance. Proper care, including regular inspections and addressing issues promptly, can contribute to maximizing the lifespan.
Effects on Lifespan and Mitigation
1. Regular Inspections and Maintenance
Perform regular visual inspections to identify any issues promptly. Addressing potential problems early on can help prevent more significant damage and extend the lifespan of the Hardie shingle roof.
2. Professional Installation
Opt for professional installation to ensure that each shingle is correctly secured and the roof is properly constructed. Proper installation contributes to the longevity and performance of Hardie shingle roofing.
Conclusion
While Hardie shingle roofing in Hawaii offers durability and a charming aesthetic, homeowners should be aware of the associated challenges. The upfront cost, installation complexity, weight considerations, susceptibility to impact damage, and potential for moisture absorption are factors that warrant thoughtful consideration. However, with proper installation and diligent maintenance, Hardie shingle roofing can still provide a sturdy and long-lasting shelter. As homeowners weigh their options, understanding the cons allows for informed decision-making, ensuring that their roof not only withstands the elements but also aligns with their budget and maintenance preferences.
Roofing: Metal; Aluminum Shingle
Nostalgia Under the Sun: The Pros and Cons of Residential Old Aluminum Shingle Metal Roofing in Warm Climates
Introduction
For homeowners seeking a blend of vintage charm and durability in warm climates, old aluminum shingle metal roofing presents a unique option. Let’s explore the pros and cons of this nostalgic roofing material, tailored to thrive under the radiant warmth of sunny locales.
Pros of Residential Old Aluminum Shingle Metal Roofing
1. Historical Aesthetic Appeal
Old aluminum shingle metal roofing brings a touch of history and charm to your home. If you appreciate the aesthetics of classic architecture, these shingles provide a vintage appeal that complements warm climates.
2. Durability in Sunlit Environments
Aluminum, known for its corrosion resistance, provides durability, especially in areas with high sun exposure. It won’t rust, corrode, or warp under the intense sunlight common in warm climates.
3. Lightweight Construction
Old aluminum shingle metal roofing is lightweight, which can simplify the installation process and reduce stress on the structure of your home. This can be particularly advantageous for older homes.
4. Recyclability
Aluminum is a highly recyclable material, making old aluminum shingle metal roofing an eco-friendly option. If sustainability is a priority, the recyclability of these shingles contributes to a greener roofing choice.
Cons of Residential Old Aluminum Shingle Metal Roofing
1. Upfront Cost
One of the primary considerations is the upfront cost. Old aluminum shingle metal roofing may have a higher initial investment compared to some traditional roofing options. However, many homeowners view this as an investment in both durability and unique aesthetics.
2. Denting and Noise
While aluminum is durable, it can be susceptible to dents from heavy impacts, such as hail or fallen branches. Additionally, the material may produce more noise during rain or hailstorms compared to other roofing materials.
3. Limited Color Options
Old aluminum shingle metal roofing may have limited color options compared to modern roofing materials. While this limitation contributes to the nostalgic charm, it’s essential to choose a color that complements your home’s overall aesthetic.
Maximizing the Lifespan of Old Aluminum Shingle Metal Roofing in Warm Climates
1. Regular Inspection and Maintenance
Perform regular visual inspections and address any issues promptly. Routine maintenance, such as clearing debris and checking for dents, can extend the lifespan of your old aluminum shingle metal roofing.
2. Quality Installation
Opt for professional installation to ensure that the old aluminum shingle metal roofing is securely placed. Proper installation minimizes the risk of issues such as leaks and ensures the longevity of your roof.
3. Consider Coatings
Explore the possibility of coatings that can enhance the durability and resistance of old aluminum shingle metal roofing, providing additional protection against the elements.
Conclusion
Residential old aluminum shingle metal roofing combines nostalgia with durability, creating a unique and charming option for warm-climate homeowners. With features like historical appeal, corrosion resistance, and recyclability, these shingles offer a distinctive choice. While considerations like upfront costs and potential noise exist, the enduring performance and timeless aesthetics make old aluminum shingle metal roofing a cherished investment. Embrace the warmth and history, knowing that your roof is a testament to both durability and the allure of days gone by!
Roofing: Metal; Corrugated
Embracing the Aloha Breeze: The Pros and Cons of Corrugated Metal Roofing Materials in Hawaii
Introduction

In the sunny and tropical paradise of Hawaii, the choice of roofing material is crucial for withstanding the unique weather conditions. Corrugated metal roofing has gained popularity for its durability and ability to cope with both sunshine and occasional heavy rains. Let’s explore the pros and cons of corrugated metal roofing, tailored for the Hawaiian climate.
Pros of Corrugated Metal Roofing in Hawaii
1. Durability Under the Hawaiian Sun
Corrugated metal roofing is known for its durability, making it well-suited for the intense Hawaiian sunshine. The material is resistant to UV rays, preventing premature aging and ensuring a longer lifespan for your roof.
2. Weather Resistance
Hawaii experiences occasional heavy rains and storms. Corrugated metal roofing is designed to shed water quickly, reducing the risk of leaks and water damage. Its resistance to high winds also makes it a practical choice in hurricane-prone areas.
3. Cool Roof Effect
Many corrugated metal roofing options come with reflective coatings, contributing to a cool roof effect. This helps reflect sunlight and reduce heat absorption, making your home more energy-efficient by lowering cooling costs.
4. Low Maintenance Requirements
Corrugated metal roofing requires minimal maintenance. Its smooth surface discourages debris accumulation, and routine inspections can help identify and address any issues promptly.
5. Resistance to Mold and Rot
In the humid Hawaiian climate, resistance to mold and rot is a significant advantage. Corrugated metal roofing does not provide a conducive environment for mold and rot to develop, ensuring a healthier living space.
Cons of Corrugated Metal Roofing in Hawaii
1. Upfront Cost
One of the primary considerations is the upfront cost. While corrugated metal roofing offers long-term value, the initial investment can be higher than some traditional roofing options. However, many homeowners find the durability and longevity justify the expense.
2. Noise During Rainfall
Metal roofing can produce more noise during rain showers compared to some other materials. While some homeowners enjoy the sound of rain on a metal roof, others may find it disruptive. Adequate insulation can help mitigate this issue.
3. Denting in Hailstorms
While resistant to most impacts, corrugated metal roofing may dent in severe hailstorms. Considerations for hail frequency in your specific location should be taken into account.
Maximizing the Lifespan of Corrugated Metal Roofing in Hawaii
1. Regular Inspection and Maintenance
Perform regular visual inspections to identify and address any issues promptly. Routine maintenance, such as clearing debris and checking for dents, can extend the lifespan of your corrugated metal roofing.
2. Professional Installation
Opt for professional installation to ensure that the corrugated metal roofing is properly secured and sealed, minimizing the risk of leaks and premature damage.
3. Consider Coatings for Enhanced Protection
Explore the possibility of coatings that can enhance the durability and resistance of corrugated metal roofing, providing additional protection against the elements.
Conclusion
Corrugated metal roofing in Hawaii offers a durable and practical solution for homeowners seeking to balance resilience with the beauty of the islands. With advantages like durability, weather resistance, and a cool roof effect, it stands as a reliable choice. While considerations like upfront costs and potential noise exist, the enduring performance and low maintenance requirements make corrugated metal roofing a worthwhile investment. Embrace the Aloha breeze, knowing that your roof is a sturdy shield against the elements in the midst of Hawaii’s natural beauty!
Roofing: Metal; Standing Seam
Shining Under the Sun: The Pros and Cons of Residential Standing Seam Metal Roofing in Warm Climates
Introduction
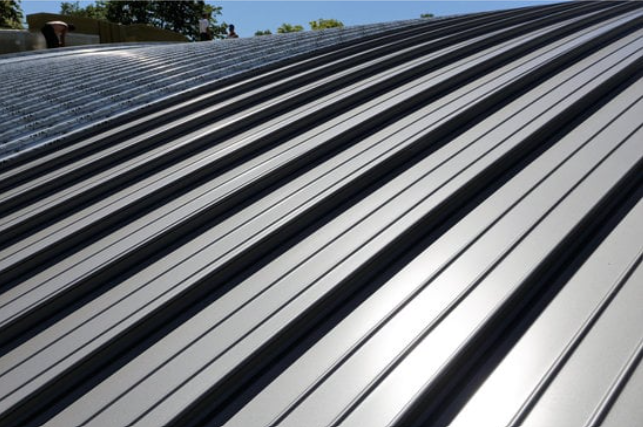
When it comes to roofing materials, homeowners in warm climates seek a balance of durability and heat resistance. Standing seam metal roofing has gained popularity for its sleek appearance and robust performance. Let’s explore the pros and cons of standing seam metal roofing, tailored to thrive under the warmth of sunny locales.
Pros of Residential Standing Seam Metal Roofing
1. Exceptional Durability
Standing seam metal roofing is renowned for its durability. Constructed from tough materials like steel or aluminum, it can withstand the elements, including intense sunlight, without deteriorating or warping over time.
2. Reflectivity and Energy Efficiency
Metal roofing, especially when coated with reflective finishes, can effectively reflect sunlight. This cool roof effect reduces the absorption of heat, contributing to a more energy-efficient home by lowering cooling costs.
3. Long Lifespan
One of the standout advantages is the long lifespan of standing seam metal roofing. When properly installed and maintained, these roofs can last 40 years or more, outlasting many traditional roofing materials.
4. Low Maintenance Requirements
Standing seam metal roofs require minimal maintenance. Their smooth surfaces make it difficult for debris to accumulate, reducing the risk of water pooling and potential damage.
5. Resistant to Weather Extremes
Metal roofing is resistant to various weather extremes, including high winds, heavy rains, and even fire. This resilience makes it an excellent choice for homeowners in warm climates prone to storms.
Cons of Residential Standing Seam Metal Roofing
1. Upfront Cost
One of the primary considerations is the upfront cost. While standing seam metal roofing offers long-term value, the initial investment can be higher than some traditional roofing options. However, many homeowners find the durability and longevity justify the expense.
2. Expansion and Contraction
Metal expands and contracts with temperature fluctuations. While standing seam roofs are designed to accommodate this movement, poor installation or extreme temperature changes can lead to noise, such as popping sounds, especially during the cooling of the evening.
3. Denting and Scratching
While metal roofing is durable, it can be susceptible to dents from heavy impacts like hail or fallen branches. Scratching is also possible, although high-quality coatings can provide some protection.
Maximizing the Lifespan of Standing Seam Metal Roofing in Warm Climates
1. Professional Installation
Opt for professional installation to ensure the standing seam metal roofing is properly secured, minimizing the risk of issues like expansion-related noise.
2. Regular Inspection and Maintenance
Perform regular visual inspections and address any issues promptly. Routine maintenance, such as cleaning debris and checking for scratches or dents, can extend the lifespan of your metal roof.
3. Choose High-Quality Coatings
Invest in standing seam metal roofing with high-quality coatings to enhance its resistance to scratches and dents. This can be particularly important in areas prone to severe weather.
Conclusion
Residential standing seam metal roofing stands as a durable and energy-efficient solution, shining under the warm sun. With benefits like exceptional durability, reflectivity, and a long lifespan, it offers homeowners in warm climates a reliable roofing option. While upfront costs and considerations like expansion noise exist, the enduring performance and low maintenance requirements make standing seam metal roofing a worthwhile investment. Bask in the sun’s warmth, knowing that your metal roof is built to withstand the test of time and the elements!
Roofing: MSR (rolled roofing)
Basking in Radiance: The Pros and Cons of Residential MSR Roofing Materials in Warm Climates
Introduction
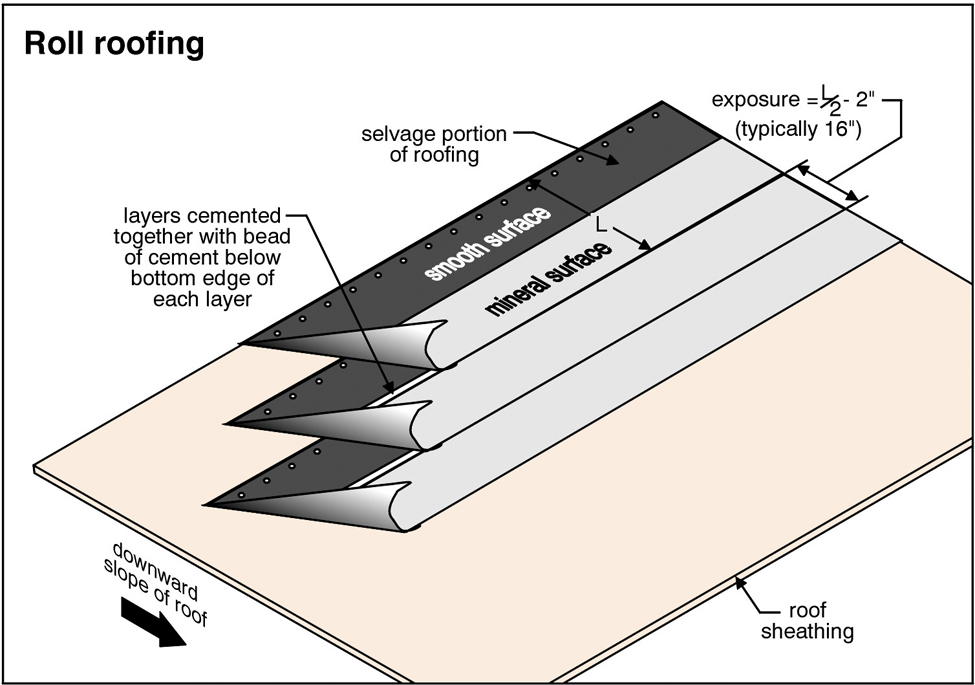
Choosing the right roofing material for your warm-climate home is a decision that blends functionality, durability, and style. Modern Self-Adhering (MSR) roofing materials have gained popularity for their ease of installation and weather-resistant features. Let’s explore the pros and cons of MSR roofing materials, specifically designed to thrive in the radiant warmth of sunny locales.
Pros of Residential MSR Roofing Materials
1. Weather Resistance and Waterproofing
MSR roofing materials are known for their exceptional weather resistance. They are designed to withstand the elements, providing effective waterproofing against rain, hail, and intense sunlight common in warm climates.
2. Ease of Installation
One of the standout advantages is the ease of installation. MSR roofing materials often come with self-adhesive backing, simplifying the installation process. This can save homeowners both time and money on labor costs.
3. Durability in Warm Climates
Warm climates can subject roofs to high temperatures and UV exposure. MSR materials, when designed with UV-resistant components, showcase impressive durability, ensuring a longer lifespan for your roofing system.
4. Flexibility and Expansion Resistance
MSR roofing materials are flexible and can adapt to the natural expansion and contraction of your home’s structure in response to temperature changes. This flexibility minimizes the risk of cracking and extends the life of the roof.
5. Energy Efficiency
Some MSR roofing materials are designed with reflective surfaces that bounce back sunlight. This cool roof effect helps reduce the absorption of heat, contributing to a more energy-efficient home by lowering cooling costs.
Cons of Residential MSR Roofing Materials
1. Lifespan Variability
The lifespan of MSR roofing materials can vary based on factors such as the quality of the materials, installation, and local climate conditions. While they are generally durable, some variations may have a slightly shorter lifespan in extremely hot climates.
2. Environmental Impact
The production of certain MSR materials may have environmental considerations. Homeowners with eco-friendly priorities may want to explore roofing options with a lower environmental footprint.
3. Cost Considerations
While MSR materials can offer cost savings in terms of installation, the initial material cost might be higher than some traditional roofing options. Homeowners should weigh the upfront investment against the long-term benefits.
Maximizing the Lifespan of MSR Roofing Materials in Warm Climates
1. Professional Installation
Opt for professional installation to ensure the MSR roofing materials are applied correctly, maximizing their effectiveness and lifespan.
2. Regular Maintenance Checks
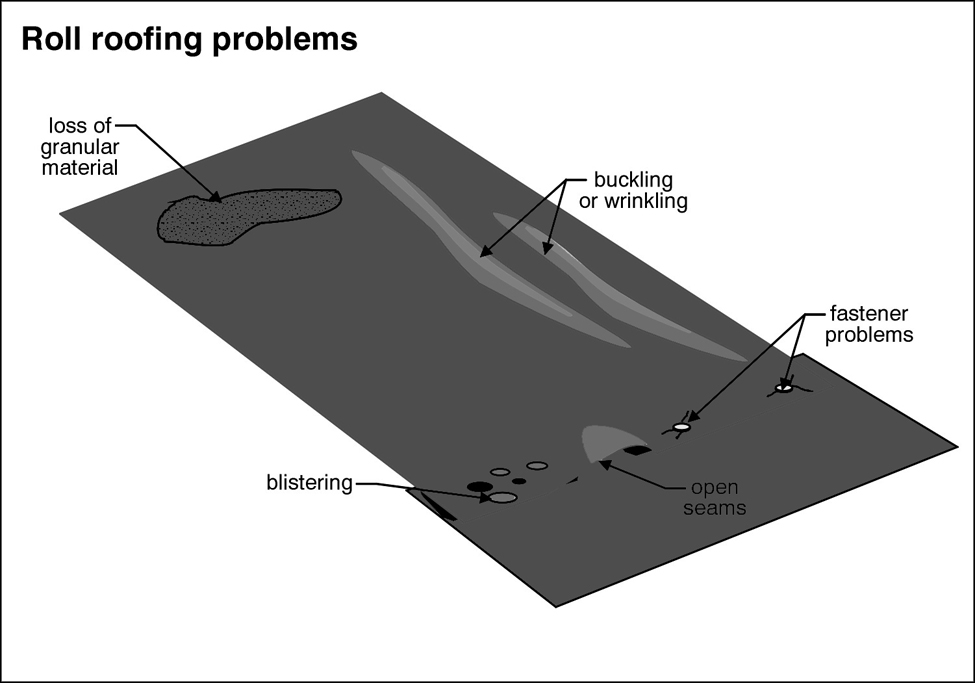
Perform regular visual inspections to identify and address any issues promptly. This proactive approach can extend the lifespan of your MSR roofing.
3. Choose Quality Materials
Invest in high-quality MSR roofing materials designed for durability and weather resistance. Quality products often come with longer warranties, providing added peace of mind.
Conclusion
Residential MSR roofing materials offer a blend of functionality and convenience, making them a compelling choice for warm-climate homeowners. With advantages like ease of installation, weather resistance, and energy efficiency, MSR materials contribute to a reliable and enduring roofing system. While considerations like lifespan variability and environmental impact exist, proactive maintenance and careful material selection can address these concerns. Bask in the radiance of your MSR roof, knowing that it’s designed to shine under the warm sun for years to come!
Roofing: Pitch & Gravel
A Pebble-Perfect Shelter: Pros and Cons of Pitch and Gravel Roofing Materials in Hawaii
Introduction

In the sun-drenched haven of Hawaii, where each day unfolds under a radiant sky, homeowners seek roofing materials that not only provide shelter but also resonate with the island’s natural charm. Pitch and gravel roofing materials, characterized by their unique composition, have become a noteworthy option. Let’s explore the pros and cons of this roofing choice, specially tuned for the Hawaiian environment.
Pros of Pitch and Gravel Roofing in Hawaii
1. Durable and Weather-Resistant
Pitch and gravel roofing materials boast durability and resilience against the diverse Hawaiian weather. From intense sun to occasional rain, these roofs stand strong, providing reliable protection against the elements.
2. Cooling Properties
The gravel on the roof’s surface contributes to a cool roof effect. By reflecting sunlight and preventing excessive heat absorption, pitch and gravel roofs help keep homes cooler, potentially reducing cooling costs in the warm Hawaiian climate.
3. Aesthetic Versatility
The gravel layer on pitch and gravel roofs comes in various colors and sizes, offering homeowners a degree of customization. This versatility allows for a roof that complements the aesthetic preferences of individual homeowners and blends harmoniously with the surroundings.
4. Long Lifespan
Pitch and gravel roofing materials exhibit a long lifespan, often ranging from 20 to 30 years or more with proper maintenance. This longevity makes them a cost-effective investment for homeowners looking for a durable roofing solution.
Cons of Pitch and Gravel Roofing in Hawaii
1. Weight Considerations
Pitch and gravel roofs can be heavy due to the gravel layer atop the roofing material. It’s crucial to ensure that the structure of the home can support this weight, especially in regions with seismic activity.
2. Maintenance Challenges
While gravel provides excellent protection, it can also pose challenges during maintenance. Walking on the gravel surface for repairs or inspections can be cumbersome and may lead to displacement of the gravel.
3. Potential for Ponding Water
The flat nature of pitch and gravel roofs can lead to ponding water in certain areas, especially if the roof isn’t properly sloped. Ponding water can accelerate wear and affect the overall lifespan of the roof.
Statistical Lifespan and Influencing Factors
The lifespan of pitch and gravel roofing materials is influenced by factors such as proper installation, regular maintenance, and the local climate. With appropriate care, these roofs can last 20 years or more.
Maximizing the Lifespan of Pitch and Gravel Roofing in Hawaii
1. Structural Evaluation
Before installation, ensure that the structure of your home can support the weight of a pitch and gravel roof. Consulting with a structural engineer can provide valuable insights.
2. Regular Inspections and Maintenance
Perform regular inspections to identify and address any issues promptly. Regular maintenance, including clearing debris and ensuring proper drainage, is essential for extending the lifespan of pitch and gravel roofing.
3. Professional Installation
Opt for professional installation to ensure that the roof is correctly constructed, preventing issues like ponding water and ensuring even weight distribution.
Conclusion
Pitch and gravel roofing materials in Hawaii offer homeowners a durable and aesthetically versatile solution that aligns with the island’s natural beauty. With advantages like durability, cooling properties, and a long lifespan, these roofs stand as a reliable choice. While considerations like weight and maintenance challenges exist, the enduring performance and unique charm of pitch and gravel roofing make them a valuable investment. Embrace the pebble-perfect shelter, knowing that your roof is a sturdy guardian under Hawaii’s endless blue skies!
Roofing: Silicone
Embracing Innovation: The Pros and Cons of Silicone Roofing Materials in Hawaii
Introduction

In the paradise of Hawaii, where the sun’s rays and occasional rain showers define the climate, homeowners seek roofing materials that provide reliable protection with a touch of innovation. Silicone roofing materials have emerged as a modern solution offering durability and flexibility. Let’s explore the pros and cons of silicone roofing, customized for the Hawaiian environment.
Pros of Silicone Roofing in Hawaii
1. Exceptional Waterproofing
Silicone roofing materials excel in waterproofing capabilities. In Hawaii’s tropical climate, where heavy rains are not uncommon, the water-resistant nature of silicone helps prevent leaks and water damage.
2. UV Resistance
The intense Hawaiian sun can be harsh on roofs, but silicone materials are highly resistant to UV rays. This UV resistance ensures that the roof maintains its integrity and appearance over time without succumbing to sun damage.
3. Flexibility and Expansion Resistance
Silicone roofing is flexible, allowing it to expand and contract with temperature changes. This flexibility minimizes the risk of cracking or splitting, common issues in climates with temperature variations like Hawaii.
4. Ease of Application
Silicone roofing is often applied as a liquid, making the installation process relatively simple. This ease of application can lead to faster installation times and potentially lower labor costs.
5. Energy Efficiency
Certain silicone coatings are formulated with reflective properties. This cool roof effect helps to reflect sunlight, reducing heat absorption and contributing to energy efficiency by keeping the interior of the home cooler.
Cons of Silicone Roofing in Hawaii
1. Initial Cost
The upfront cost of silicone roofing materials can be higher compared to some traditional roofing options. However, many homeowners view this as an investment in the long-term durability and benefits that silicone provides.
2. Foot Traffic Sensitivity
Silicone roofs can be sensitive to foot traffic, especially shortly after application. While they are durable once fully cured, care must be taken during installation and maintenance to avoid unnecessary damage.
3. Limited Aesthetic Options
Silicone roofing materials may have limited color and aesthetic options compared to other roofing materials like tiles or shingles. Homeowners who prioritize a specific aesthetic may need to consider this limitation.
4. Application Requirements
The successful application of silicone roofing requires specific conditions, including the right temperature and dry weather. Weather-related delays can impact the installation schedule.
Effects on Lifespan
The lifespan of silicone roofing can be influenced by factors such as proper installation, adherence to maintenance guidelines, and prompt repairs. With routine care, silicone roofs can have a lifespan of 20 years or more.
Maximizing the Lifespan of Silicone Roofing in Hawaii
1. Professional Installation and Regular Inspections
Opt for professional installation to ensure proper application. Regular inspections can catch issues early, preventing potential damage and maximizing the lifespan of the silicone roof.
2. Adherence to Application Guidelines
Follow the manufacturer’s guidelines for application and maintenance. Adhering to these guidelines ensures that the silicone roofing performs optimally throughout its lifespan.
3. Prompt Repairs and Recoating
Address any issues promptly. Silicone roofs may benefit from periodic recoating to maintain their protective properties and extend their lifespan.
Conclusion
Silicone roofing materials in Hawaii represent a modern and innovative choice for homeowners seeking durability and weather resistance. With advantages like exceptional waterproofing, UV resistance, and energy efficiency, silicone roofing stands as a reliable option. While considerations like upfront cost and limited aesthetics exist, the enduring performance and flexibility of silicone roofing make it a forward-thinking investment. Embrace the innovation, knowing that your roof is a resilient shield against the elements in the midst of Hawaii’s natural splendor!
Roofing: Tile
Elevating Elegance: The Pros and Cons of Tile Roofing Materials in Hawaii
Introduction

In the scenic landscapes of Hawaii, where nature’s beauty reigns supreme, homeowners often seek roofing materials that complement the island’s aesthetic while providing durability. Tile roofing materials offer a blend of timeless elegance and resilience. Let’s explore the pros and cons of tile roofing, specially tailored for the Hawaiian climate.
Pros of Tile Roofing in Hawaii
1. Aesthetic Appeal and Versatility
Tile roofing exudes a classic and elegant appearance that complements the natural beauty of Hawaii. It comes in various styles, colors, and finishes, allowing homeowners to choose a look that enhances the overall aesthetic of their homes.
2. Durability and Weather Resistance
Tiles are known for their durability and resilience against the elements. In Hawaii’s tropical climate, where intense sun, rain, and occasional storms are common, tile roofing stands strong. It resists rot, mold, and insects, providing long-lasting protection.
3. Cooling Properties
Tile roofing has inherent cooling properties. The air space between the tiles and the roof deck allows for ventilation, helping to regulate temperatures. This natural ventilation can contribute to energy efficiency by reducing the need for excessive cooling.
4. Long Lifespan
One of the standout advantages is the long lifespan of tile roofing. With proper installation and maintenance, tile roofs can last 50 years or more. This longevity makes them a sustainable and cost-effective investment for homeowners.
Cons of Tile Roofing in Hawaii
1. Weight Considerations
Tile roofing is heavier compared to some other materials. While modern homes are typically designed to support the weight of tile, it’s essential to ensure that the structure is adequately engineered to handle the load.
2. Installation Complexity
Tile roofing requires professional installation due to its complexity. Each tile must be individually secured, and proper underlayment and flashing are crucial. While this ensures a durable roof, it can contribute to higher installation costs.
3. Fragility and Breakage

While durable, individual tiles can be fragile and may break if subjected to significant impacts, such as fallen branches or severe hail. Replacement tiles may be needed in such cases, and homeowners should consider the availability of replacement tiles.
4. Initial Cost
The upfront cost of tile roofing is higher compared to some other materials. However, many homeowners view this as an investment in both durability and the elevated aesthetic appeal that tile provides.
Maximizing the Lifespan of Tile Roofing in Hawaii
1. Professional Installation and Inspection

2. Prompt Repairs and Replacements
Opt for professional installation to ensure that each tile is correctly secured, and the roof is properly constructed. Regular inspections can catch issues early, preventing potential damage.
Address any broken or damaged tiles promptly. Timely repairs or replacements prevent further issues and contribute to the overall longevity of the tile roof.
3. Regular Maintenance
Perform regular maintenance, including cleaning and checking for debris in valleys and gutters. This helps prevent water pooling and potential damage to the underlayment.
Conclusion
Tile roofing materials in Hawaii offer a timeless and durable solution for homeowners seeking an elevated aesthetic that withstands the test of time. With advantages like aesthetic appeal, weather resistance, and a long lifespan, tile roofing stands as a premium choice. While considerations like weight and upfront cost exist, the enduring elegance and resilience of tile roofing make it a cherished investment. Embrace the sophistication, knowing that your roof adds to the allure of Hawaii’s breathtaking landscapes!
Roofing: Wood Shake/Shingle
Embracing Nature: The Pros and Cons of Wood Shake and Shingle Roofing Materials in Hawaii
Introduction
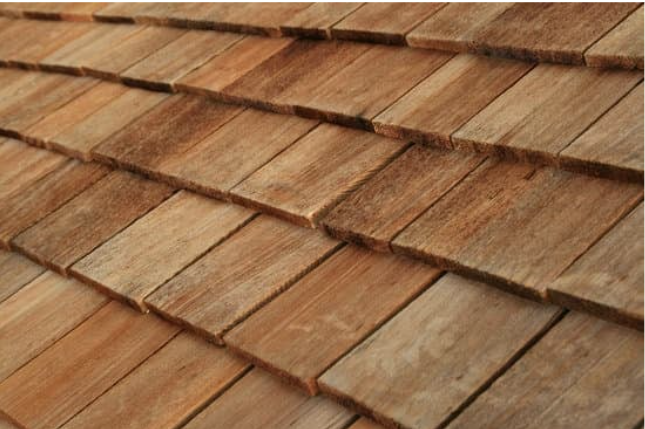
In the lush and tropical landscape of Hawaii, homeowners often seek roofing materials that complement the natural beauty of the islands. Wood shake and shingle roofing materials provide a rustic and charming aesthetic that can harmonize with the surrounding environment. Let’s explore the pros and cons of these materials, tailored for the Hawaiian climate.
Pros of Wood Shake and Shingle Roofing in Hawaii
1. Natural Aesthetic Appeal
Wood shake and shingle roofing materials exude a warm and natural charm. They blend seamlessly with Hawaii’s tropical surroundings, providing a timeless and inviting appearance.
2. Insulation and Energy Efficiency
Wooden roofing materials offer natural insulation properties. They help regulate indoor temperatures, keeping homes cooler in Hawaii’s warm climate. This can contribute to energy efficiency by reducing the need for excessive air conditioning.
3. Biodegradability and Sustainability
Wood shakes and shingles are biodegradable and renewable resources. They are often sourced from sustainable forestry practices, making them an environmentally friendly roofing option for homeowners with sustainability in mind.
4. Customization Options
Wood shakes and shingles come in a variety of styles, sizes, and finishes. This versatility allows homeowners in Hawaii to choose a roofing material that complements the architecture of their homes and reflects their personal style.
Cons of Wood Shake and Shingle Roofing in Hawaii
1. Susceptibility to Weather and Pests
Wood is naturally susceptible to the effects of weathering, including sun, rain, and humidity. In Hawaii’s humid climate, wood shakes and shingles may be prone to mold, rot, and insect infestations if not properly treated and maintained.
2. Maintenance Requirements
Wooden roofing materials require regular maintenance to preserve their longevity. This includes inspections for signs of damage, applying protective coatings or treatments, and promptly addressing any issues to prevent deterioration.
3. Fire Hazard Concerns
Wood shakes and shingles are inherently flammable, posing a fire hazard. While certain treatments can enhance fire resistance, homeowners in fire-prone areas should carefully consider this aspect and ensure compliance with local fire codes.
4. Limited Lifespan
Compared to some other roofing materials, wood shakes and shingles have a more limited lifespan. With proper care and maintenance, they can last around 20 to 30 years, but this is shorter than the lifespan of materials like metal or tile.
Maximizing the Lifespan of Wood Shake and Shingle Roofing in Hawaii
1. Regular Inspections and Treatments
Perform regular inspections of your wood shake and shingle roof. Look for signs of damage, mold, or insect activity. Applying preservatives or treatments can enhance durability and protect against pests and decay.
2. Prompt Repairs
Address any issues promptly. Repair or replace damaged shakes or shingles to prevent further deterioration and extend the lifespan of your wooden roof.
3. Fire-Retardant Treatments
Consider fire-retardant treatments to enhance the fire resistance of your wood shakes and shingles, especially in fire-prone areas.
Conclusion
Wood shake and shingle roofing materials in Hawaii offer a picturesque and environmentally conscious choice for homeowners seeking a connection to nature. With advantages like aesthetic appeal, insulation, and sustainability, they create a distinctive roofing solution. While considerations like maintenance and susceptibility to weather exist, the enduring charm and customizability of wood shake and shingle roofing make them a cherished investment. Embrace the natural elegance, knowing that your roof harmonizes with the beauty of Hawaii’s landscapes!
Water Heaters
Water Heater Capacity or Sizing
A properly sized water heater will meet your household’s hot water needs while operating more efficiently. Therefore, before purchasing a water heater, make sure it’s the correct size.
Here you’ll find information about how to size these systems:
- Tankless or demand-type water heaters
- Solar water heating system
- Storage and heat pump (with tank) water heaters.
For sizing combination water and space heating systems — including some heat pump systems, and tankless coil and indirect water heaters — consult a qualified contractor.
If you haven’t yet considered what type of water heater might be best for your home, learn more about selecting a new water heater.
Sizing Tankless or Demand-Type Water Heaters
Tankless or demand-type water heaters are rated by the maximum temperature rise possible at a given flow rate. Therefore, to size a demand water heater, you need to determine the flow rate and the temperature rise you’ll need for its application (whole house or a remote application, such as just a bathroom) in your home.
First, list the number of hot water devices you expect to use at any one time. Then, add up their flow rates (gallons per minute). This is the desired flow rate you’ll want for the demand water heater. For example, let’s say you expect to simultaneously run a hot water faucet with a flow rate of 0.75 gallons (2.84 liters) per minute and a shower head with a flow rate of 2.5 gallons (9.46 liters) per minute.
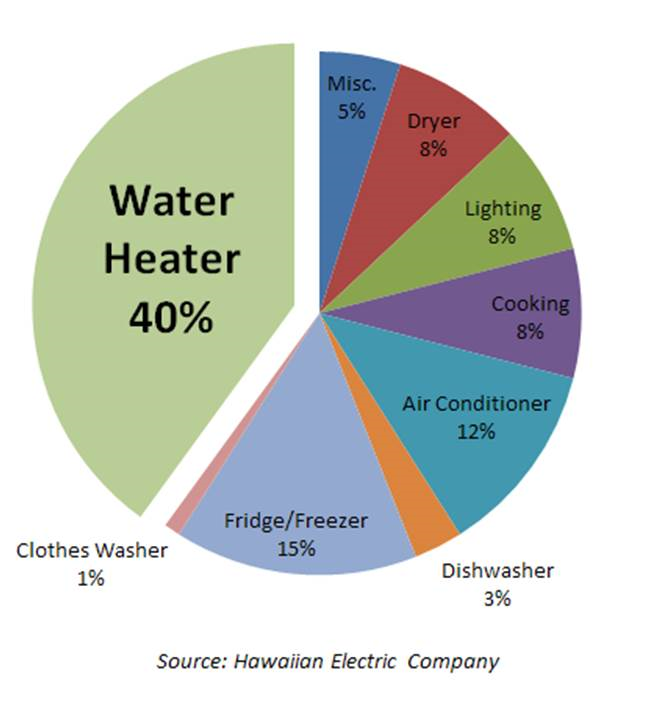
If you don’t know the flow rate, estimate it by holding a pan or bucket under the faucet or shower head and measure the flow for a minute. Measure the amount of water and multiply by 60 to get the gallons per minute (or liters per minute).The flow rate through the demand water heater should be at least 3.25 gallons (12.3 liters) per minute. To reduce flow rates, install low-flow water fixtures.
To determine temperature rise, subtract the incoming water temperature from the desired output temperature. Unless you know otherwise, assume that the incoming water temperature is 50ºF (10ºC). You can also estimate the temperature by holding a thermometer under a cold-water faucet. For most uses, you’ll want your water heated to 120ºF (49ºC). In this example, you’d need a demand water heater that produces a temperature rise of 70ºF (39ºC) for most uses. For dishwashers without internal heaters and other such applications, you might want your water heated at 140ºF (60ºC). In that case, you’ll need a temperature rise of 90ºF (50ºC). Be cautious of a water temperature of 140ºF because it increases the possibility of scalding.
Most demand water heaters are rated for a variety of inlet temperatures. Typically, a 70ºF (39ºC) water temperature rise is possible at a flow rate of 5 gallons per minute through gas-fired demand water heaters and 2 gallons per minute through electric ones. Faster flow rates or cooler inlet temperatures can sometimes reduce the water temperature at the most distant faucet. Some types of tankless water heaters are thermostatically controlled; they can vary their output temperature according to the water flow rate and inlet temperature.
Sizing a Solar Water Heating System
Sizing your solar water heating system basically involves determining the total collector area and the storage volume you’ll need to meet 90%–100% of your household’s hot water needs during the summer. Solar system contractors use worksheets and computer programs to help determine system requirements and collector sizing.
Collector Area
Contractors usually follow a guideline of around 20 square feet (2 square meters) of collector area for each of the first two family members. For every additional person, add 8 square feet (0.7 square meters) if you live in the U.S. Sun Belt area or 12–14 square feet if you live in the northern United States.
Storage Volume
A small (50- to 60-gallon) storage tank is usually sufficient for one to two three people. A medium (80-gallon) storage tank works well for three to four people. A large tank is appropriate for four to six people.
For active systems, the size of the solar storage tank increases with the size of the collector — typically 1.5 gallons per square foot of collector. This helps prevent the system from overheating when the demand for hot water is low. In very warm, sunny climates, some experts suggest that the ratio should be increased to as much as 2 gallons of storage to 1 square foot of collector area.
Other Calculations
Additional calculations involved in sizing your solar water heating system include evaluating your building site’s solar resource and determining the proper orientation and tilt of the solar collector. Visit the solar water heaters page for more on these calculations.
Sizing Storage and Heat Pump (with Tank) Water Heaters
To properly size a storage water heater for your home — including a heat pump water heater with a tank — use the water heater’s first hour rating. The first hour rating is the number of gallons of hot water the heater can supply per hour (starting with a tank full of hot water). It depends on the tank capacity, source of heat (burner or element), and the size of the burner or element.
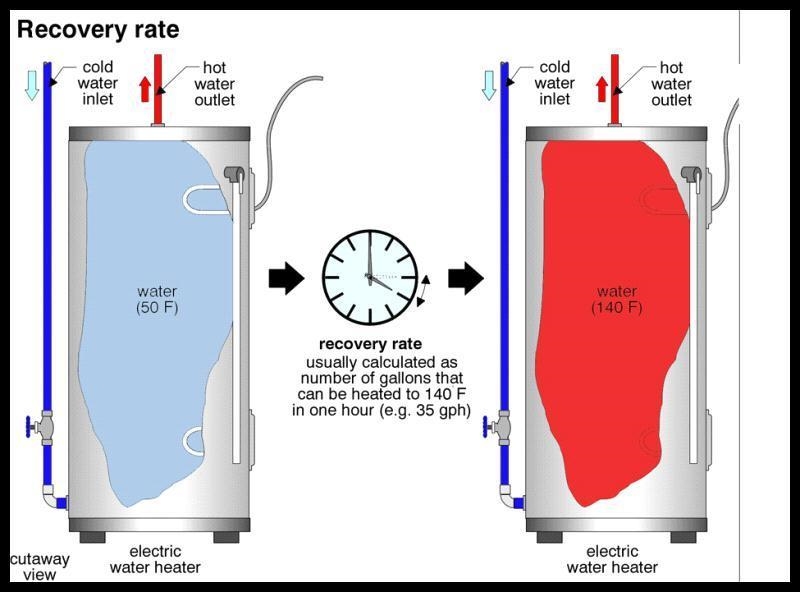
The EnergyGuide label lists the first hour rating in the top left corner as “Capacity (first hour rating).” The Federal Trade Commission requires an EnergyGuide label on all new conventional storage water heaters but not on heat pump water heaters. Product literature from a manufacturer may also provide the first hour rating. Look for water heater models with a first hour rating that at least matches within your peak hour demand (the highest energy use during a single 1-hour period for your home).
To estimate your peak hour demand:
- Determine what time of day (morning, noon, evening) you use the highest amount of hot water in your home. Keep in mind the number of people living in your home.
- Use the worksheet below to estimate your maximum usage of hot water during this one-hour period of the day—this is your peak hour demand. Note: the worksheet does not estimate total daily hot water usage.
The worksheet example shows a total peak hour demand of 66 gallons. Therefore, this household would need a water heater model with a first hour rating of 66 gallons or more.
| USE | AVERAGE GALLONS OF HOT WATER PER USAGE | TIMES USED DURING 1 HOUR | GALLONS USED IN 1 HOUR | ||
| Shower | 20 | × | = | ||
| Shaving (.05 gallon per minute) | 2 | × | = | ||
| Hand dishwashing or food prep (2 gallons per minute) | 3 | × | = | ||
| Automatic dishwasher | 7 | × | = | ||
| Clothes washer | × | = | |||
| – Top-loader | 25 | ||||
| – H-Axis | 15 | ||||
| Total Peak Hour Demand | = |
| 3 showers | 20 | × | 3 | = | 60 |
| 1 shave | 2 | × | 1 | = | 2 |
| 1 hand dishwashing | 3 | × | 1 | = | 3 |
| Peak Hour Demand | = | 66 |
*Estimates are based on averages from a variety of information published on websites. Some water heater manufacturer websites also provide calculators based on the duration for the use case and other factors.
Water Heaters; Conventional (tanked)
Conventional storage water heaters remain the most popular type of water heating system for the home. Here you’ll find basic information about how storage water heaters work; what criteria to use when selecting the right model; and some installation, maintenance, and safety tips.
How They Work
A single-family storage water heater offers a ready reservoir — from 20 to 80 gallons — of hot water. It operates by releasing hot water from the top of the tank when you turn on the hot water tap. To replace that hot water, cold water enters the bottom of the tank through the dip tube where it is heated, ensuring that the tank is always full.
Conventional storage water heater fuel sources include natural gas, propane, fuel oil, and electricity. Learn more about fuel types available when selecting a new water heater.
Since water is heated in the tank until the thermostat setpoint temperature is reached, energy can be wasted even when a hot water tap isn’t running due to standby heat losses, which result from the tank losing heat to the surrounding environment. Only tankless water heaters — such as demand-type water heaters and tankless coil water heaters — avoid standby heat losses. Some storage water heater models have heavily insulated tank, which significantly reduce standby heat losses and lower annual operating costs. Look for models with tanks that have a thermal resistance (R-Value) of R-24 and above to avoid adding an insulation blanket (electric water heaters only).

Gas and oil water heaters also have venting-related energy losses. Two types of water heaters — a fan-assisted gas water heater and an atmospheric sealed-combustion water heater — reduce these losses. Visit the Energy Basics site to learn more about how conventional storage water heaters work.
For low energy bills the best choice to consider are heat pump water heaters and solar water heaters. These water heaters are usually more expensive but they have significantly lower annual operating costs that result in short payback periods.
Selecting a Storage Water Heater
The lowest-priced storage water heater may be the most expensive to operate and maintain over its lifetime. While an oversized unit may be alluring, it carries a higher purchase price and increased energy costs due to higher standby energy losses.
Before buying a new storage water heater, consider the following:
Installation and Maintenance
Proper installation and maintenance of your water heater can optimize its energy efficiency.
Proper installation depends on many factors. These factors include fuel type, climate, local building code requirements, and safety issues, especially concerning the combustion of gas- and oil-fired water heaters. Therefore, it’s best to have a qualified plumbing and heating contractor install your storage water heater. Be sure to do the following when selecting a contractor:
- Request cost estimates in writing
- Ask for references
- Check the company with your local Better Business Bureau
- See if the company will obtain a local permit if necessary and understands local building codes, etc.
If you’re determined to install it yourself, first consult the water heater’s manufacturer. Manufacturers usually have the necessary installation and instruction manuals. Also, contact your city or town for information about obtaining a permit, if necessary, and about local water heater building codes.
Periodic water heater maintenance can significantly extend your water heater’s life and minimize loss of efficiency. Read your owner’s manual for specific maintenance recommendations.
Routine maintenance for storage water heaters, depending on what type/model you have, may include:
- Flushing a quart of water from the storage tank every three months
- Checking the temperature and pressure valve every six months
- Inspecting the anode rod every three to four years.
Improving Energy Efficiency
After your water heater is properly installed and maintained, try some additional energy-saving steps to help lower your water heating bills. Some energy-saving devices and systems are more cost-effective to install with the water heater.
Water Heaters; Solar System
Solar water heaters — sometimes called solar domestic hot water systems — can be a cost-effective way to generate hot water for your home. They can be used in any climate, and the fuel they use — sunshine — is free.
How They Work
Solar water heating systems include storage tanks and solar collectors. There are two types of solar water heating systems: active, which have circulating pumps and controls, and passive, which don’t.
Active Solar Water Heating Systems
There are two types of active solar water heating systems:
- Direct circulation systems
Pumps circulate household water through the collectors and into the home. They work well in climates where it rarely freezes.
Passive Solar Water Heating Systems
Passive solar water heating systems are typically less expensive than active systems, but they’re usually not as efficient. However, passive systems can be more reliable and may last longer. There are two basic types of passive systems:
Storage Tanks and Solar Collectors
Most solar water heaters require a well-insulated storage tank. Solar storage tanks have an additional outlet and inlet connected to and from the collector. In two-tank systems, the solar water heater preheats water before it enters the conventional water heater. In one-tank systems, the back-up heater is combined with the solar storage in one tank.
Two types of common solar collectors are used for residential applications:
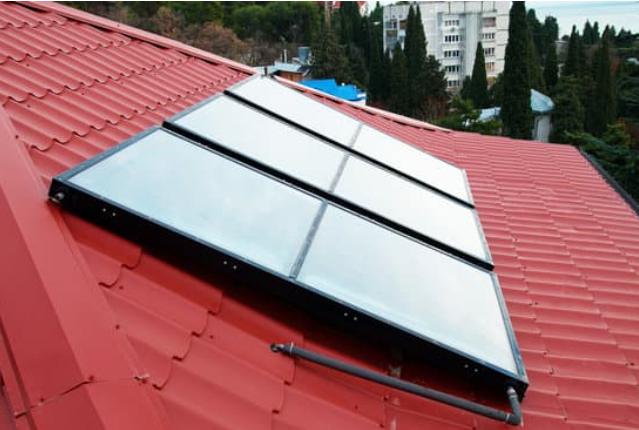
- Flat-plate collector
Glazed flat-plate collectors are insulated, weatherproofed boxes that contain a dark absorber plate under one or more glass or plastic (polymer) covers. Unglazed flat-plate collectors — typically used for solar pool heating — have a dark absorber plate, made of metal or polymer, without a cover or enclosure. - Evacuated-tube solar collectors
They feature parallel rows of transparent glass tubes. Each tube contains a glass outer tube and metal absorber tube attached to a fin. The fin’s coating absorbs solar energy but inhibits radiative heat loss. These collectors are used more frequently for U.S. commercial applications.
Solar water heating systems almost always require a backup system for cloudy days and times of increased demand. Conventional storage water heaters usually provide backup and may already be part of the solar system package. A backup system may also be part of the solar collector, such as rooftop tanks with thermosyphon systems. Since an integral-collector storage system already stores hot water in addition to collecting solar heat, it may be packaged with a tankless or demand-type water heater for backup.
Installing and Maintaining the System
The proper installation of solar water heaters depends on many factors. These factors include solar resource, climate, local building code requirements, and safety issues; therefore, it’s best to have a qualified solar thermal systems contractor install your system.
After installation, properly maintaining your system will keep it running smoothly. Passive systems don’t require much maintenance. For active systems, discuss the maintenance requirements with your system provider, and consult the system’s owner’s manual. Plumbing and other conventional water heating components require the same maintenance as conventional systems. Glazing may need to be cleaned in dry climates where rainwater doesn’t provide a natural rinse.
Regular maintenance on simple systems can be as infrequent as every 3–5 years, preferably by a solar contractor. Systems with electrical components usually require a replacement part or two after 10 years. Learn more about solar water heating system maintenance and repair.
When screening potential contractors for installation and/or maintenance, ask the following questions:
- Does your company have experience installing and maintaining solar water heating systems?
Choose a company that has experience installing the type of system you want and servicing the applications you select. - How many years of experience does your company have with solar heating installation and maintenance?
The more experience the better. Request a list of past customers who can provide references. - Is your company licensed or certified?
Having a valid plumber’s and/or solar contractor’s license is required in some states. Contact your city and county for more information. Confirm licensing with your state’s contractor licensing board. The licensing board can also tell you about any complaints against state-licensed contractors.
Improving Energy Efficiency
After your water heater is properly installed and maintained, try some additional energy-saving strategies to help lower your water heating bills, especially if you require a back-up system. Some energy-saving devices and systems are more cost-effective to install with the water heater.
Water Heaters; Tankless (electric)
The Pros and Cons of Electric Tankless Water Heaters in Warm Climates
Introduction
In warm climates, the choice of a water heater plays a crucial role in maintaining comfort and energy efficiency. Electric tankless water heaters have become a popular option, offering both benefits and drawbacks. Let’s explore the pros and cons of these systems, specifically in warm climates where hot water needs are often consistent.
Pros
1. Energy Efficiency in Moderate Climates
In warmer regions, the demand for heating water is generally lower than in colder areas. Electric tankless water heaters shine in such climates because they only heat water when needed, avoiding the constant energy use associated with traditional tank heaters. This can result in substantial energy savings over time.
2. Space-Saving Design in Compact Homes
Warm climates often mean smaller living spaces. Electric tankless water heaters are compact and can be mounted on walls, saving valuable space. This is especially beneficial for homes where square footage is at a premium.
3. Long Lifespan and Low Maintenance
These water heaters typically have a longer lifespan than traditional tanks. With fewer components prone to corrosion, they often require less maintenance, providing homeowners in warm climates with peace of mind and long-term value.
4. No Standby Heat Loss
Unlike traditional water heaters that keep a large tank of water constantly hot, electric tankless systems eliminate standby heat loss. This is particularly advantageous in warm climates where there’s no need to maintain high water temperatures continuously.
Cons
1. Upfront Cost
While electric tankless water heaters can lead to long-term savings, the initial investment can be higher than that of traditional tank models. However, many users find the energy efficiency benefits offset this upfront cost over time.
2. Limited Flow Rate
In warm climates where the water temperature is already relatively high, electric tankless water heaters can struggle with lower flow rates. It’s essential to consider the unit’s capacity to ensure it meets the simultaneous hot water needs of your household.
3. Electricity Requirements
Electric tankless water heaters demand a significant amount of electricity. In warm climates, where air conditioning systems are often in use, additional electrical upgrades may be necessary. This can add to the overall installation cost.
4. Cold Water Sandwich Effect
The “cold water sandwich” effect may still occur in warm climates. This brief burst of cold water between hot water usage can be a minor inconvenience, but it’s worth considering.
Conclusion
In warm climates, electric tankless water heaters offer a compelling solution for energy-conscious homeowners. With benefits such as energy efficiency, space-saving design, and a longer lifespan, they cater well to the needs of households in moderate temperature regions. While there are upfront costs and considerations, many find that the advantages make electric tankless water heaters a worthwhile investment. As technology continues to evolve, these systems are likely to become an increasingly popular choice for homes in warm climates, providing reliable hot water and sustainability. Here’s to a future of energy-efficient and comfortable living!
Water Heaters; Tankless (gas)
The Pros and Cons of Gas Tankless Water Heaters in Warm Climates
Introduction
In warm climates, where hot water is a year-round necessity, choosing the right water heater is crucial. Gas tankless water heaters have become a popular option due to their on-demand hot water capabilities. Let’s explore the pros and cons of these systems, specifically in warm climates where efficient and reliable hot water is a priority.
Pros
1. High Efficiency in Warm Weather
Gas tankless water heaters excel in warm climates because they can quickly and efficiently heat water as it flows through the system. With no need for a storage tank, these units are especially well-suited for delivering hot water on demand, even when temperatures are already moderate.
2. Endless Hot Water Supply
One of the standout advantages is the ability to provide a continuous supply of hot water. As long as there’s a gas supply, you won’t run out of hot water, making gas tankless water heaters ideal for homes with high hot water demand.
3. Lower Operating Costs
Gas tends to be more cost-effective than electricity in many areas, making gas tankless water heaters more economical to operate in the long run. This can result in significant savings on energy bills, especially in warm climates where cooling costs are already a consideration.
4. Compact Design and Easy Installation
Gas tankless water heaters are typically more compact than their traditional tank counterparts. Their smaller size and wall-mountable design make them a space-saving option, which is beneficial in homes with limited square footage.
Cons
1. Higher Upfront Cost
While gas tankless water heaters can lead to savings over time, the initial cost of purchase and installation tends to be higher than that of traditional tank models. However, many users find the long-term benefits outweigh the upfront investment.
2. Need for Proper Ventilation
Gas-powered appliances require proper ventilation to ensure the safe release of combustion byproducts. This may necessitate additional installation steps and considerations, adding to the overall complexity of the setup.
3. Cold Water Sandwich Effect
Similar to electric tankless water heaters, gas models may experience the “cold water sandwich” effect, where a brief burst of cold water occurs between hot water usage. While not a major drawback, it’s a factor to consider.
4. Environmental Impact
Gas tankless water heaters burn natural gas, a fossil fuel, which contributes to carbon emissions. While they are more energy-efficient than traditional tank heaters, their environmental impact should be considered in the context of sustainability goals.
Conclusion
Gas tankless water heaters offer a fantastic solution for homes in warm climates seeking efficient and on-demand hot water. With advantages such as high efficiency, endless hot water supply, and lower operating costs, they cater well to the needs of households with consistent hot water demands. While there are upfront costs and considerations, the long-term benefits make gas tankless water heaters a valuable investment. As technology progresses, these systems are likely to become an increasingly popular and eco-friendly choice for homes in warm climates, ensuring comfort and sustainability. Here’s to a future of efficient and reliable hot water for all!
Water Heater; Temperature Settings
Embracing Warmth Safely: Navigating Residential Water Temperature Settings in Hawaii
Introduction
In the tropical haven of Hawaii, where the gentle breezes and abundant sunshine define daily life, ensuring your residential water temperature settings strike the perfect balance between comfort and safety is paramount. Let’s explore the key considerations and safety measures to keep in mind when setting the temperature of your water heater in Hawaii.
1. Setting the Right Temperature
Overview
Choosing the appropriate water temperature ensures a comfortable and safe experience. In Hawaii’s warm climate, finding the sweet spot is essential for both energy efficiency and preventing scalding.
Recommendations
- Standard Setting: Aim for a water heater temperature setting of 120°F (49°C). This is generally considered safe for daily activities while minimizing the risk of scalding.
- Adjusting for Efficiency: In Hawaii’s warm climate, consider lowering the temperature setting to optimize energy efficiency. Every degree reduction contributes to energy savings.
2. Solar Water Heaters: A Tropical Blessing
Overview
Given Hawaii’s abundant sunshine, many homes utilize solar water heaters. Understanding how these systems work and their safety features enhances your experience.
Recommendations
- Solar Preheating: Leverage the sun’s warmth by setting your solar water heater to preheat water before it enters the main heater. This maximizes the use of free solar energy.
- Temperature Mixing Valve: Consider installing a temperature mixing valve to automatically adjust the water temperature based on the incoming solar-heated water, ensuring a consistent and safe output.
3. Safety Measures for Tankless Water Heaters
Overview
Tankless water heaters provide on-demand hot water, and ensuring their safety settings align with your household’s needs is crucial.
Recommendations
- Temperature Control: Utilize the digital control panel to set the desired temperature. Regularly check and adjust as needed, keeping in mind the warm Hawaiian climate.
- Flow Rate Adjustment: Adjust the flow rate to match your household’s hot water demands. This not only ensures comfort but also prevents energy waste.
4. Regular Maintenance for Safety
Overview
Regular maintenance plays a vital role in the safety of your water heater, particularly in Hawaii’s climate, which can introduce unique factors like humidity and salt air.
Recommendations
- Flushing the Tank: Periodically flush the water heater tank to remove sediment buildup, preventing efficiency issues and ensuring safe operation.
- Inspecting for Corrosion: Regularly inspect the water heater for signs of corrosion, especially if you’re in a coastal area where salt air can accelerate wear.
5. Safety Considerations for Electric and Gas Heaters
Overview
Choosing between electric and gas water heaters comes with specific safety considerations, and understanding these factors ensures safe and efficient operation.
Recommendations
- Gas Heater Ventilation: If using a gas water heater, ensure proper ventilation to prevent the buildup of potentially harmful gases. Safety should always be a priority.
- Electric Heater Safety Features: Electric water heaters often come with safety features like automatic shutoffs. Familiarize yourself with these features to ensure a safe home environment.
Conclusion
Navigating residential water temperature settings in Hawaii is a delightful journey of warmth and safety. By setting the right temperature, embracing the benefits of solar heaters, optimizing tankless systems, and prioritizing regular maintenance, you create a haven of comfort and security in your home. As you enjoy the gentle embrace of warm water in the midst of Hawaii’s tropical charm, know that your safety measures contribute to a delightful and secure living experience. Cheers to warmth, safety, and the joy of Hawaiian living!

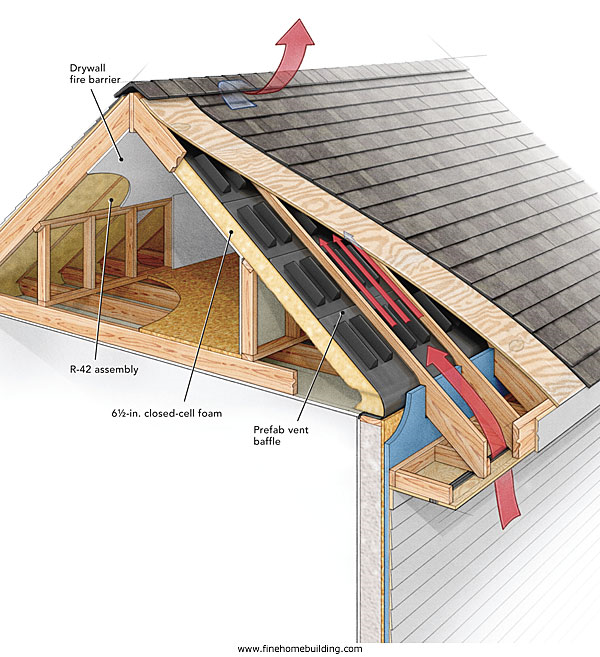




:max_bytes(150000):strip_icc():format(webp)/types-of-pipe-used-for-water-2718736-03-d4fc008f7ea346169480a21d3a164b42.jpg)

